
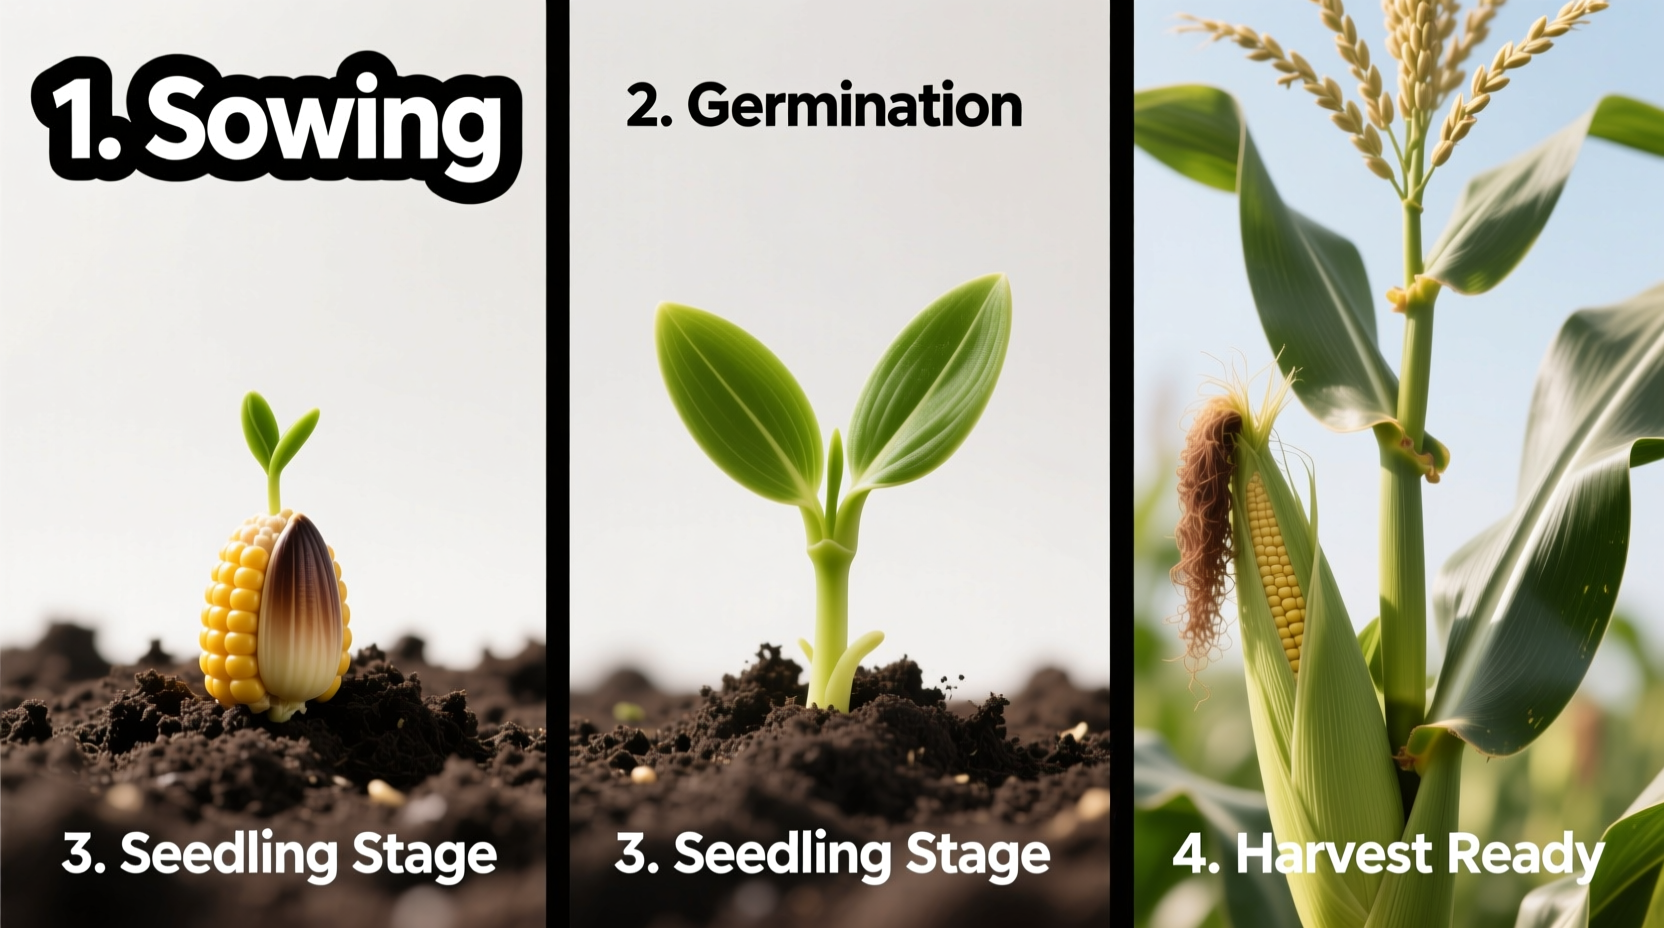
Grow sweet, homegrown corn successfully by planting seeds 1-2 inches deep in well-drained soil after the last frost when soil temperatures reach 60°F. Space seeds 9-12 inches apart in blocks of at least 4 rows for proper pollination, water consistently with 1-2 inches weekly, and harvest when silks turn brown and kernels release milky fluid. This complete guide provides step-by-step instructions for every growth stage from seed selection to harvest.
Why Homegrown Corn Beats Store-Bought Every Time
Nothing compares to the sweet crunch of corn picked fresh from your garden. Unlike store-bought varieties that lose sweetness rapidly after harvest, homegrown corn delivers peak flavor within minutes of picking. The secret? Sugar-to-starch conversion begins immediately after harvest—store corn converts 50% of its sugar to starch within 24 hours, while freshly picked garden corn maintains maximum sweetness for cooking. With proper planting techniques, you'll enjoy sweeter, more nutritious corn while saving 30-50% compared to organic grocery prices.
Pre-Planting Preparation: Setting Up for Success
Successful corn growing starts weeks before planting. Corn thrives in warm conditions and requires careful timing to avoid frost damage while ensuring optimal germination.
Choosing the Right Variety for Your Climate
Select varieties based on your growing season length and climate:
- Early-season varieties (60-75 days): Silver Queen, Early Sunglow – ideal for shorter seasons
- Main-season varieties (76-90 days): Bodacious, Incredible – best for most regions
- Specialty varieties: Painted Hill (multicolored), Glass Gem (ornamental)
| Corn Type | Days to Maturity | Best Climate Zones | Sugar Content |
|---|---|---|---|
| Standard Sweet (su) | 70-85 | 3-8 | 4-6% |
| Supersweet (sh2) | 75-90 | 4-9 | 12-18% |
| Sugar Enhanced (se) | 65-80 | 3-9 | 8-12% |
According to the USDA Agricultural Research Service, supersweet varieties maintain sweetness three times longer than standard types but require warmer soil temperatures for germination. Choose Sugar Enhanced types if your soil warms slowly in spring.
Timing Your Planting Perfectly
Plant corn when soil temperature reaches 60°F at 2-inch depth for 3 consecutive days. In most zones, this occurs 2-3 weeks after the last spring frost. Use this planting timeline as your guide:
- Zone 3-4: May 15 - June 1 (soil temp 60°F+)
- Zone 5-6: May 1 - May 15
- Zone 7-8: April 15 - May 1
- Zone 9-10: March 15 - April 1
For continuous harvest, plant new seeds every 2 weeks until midsummer. Remember that corn requires 65-100 frost-free days depending on variety, so check your first fall frost date before planting late-season crops.
Soil Preparation Essentials
Corn demands nutrient-rich soil with excellent drainage. Prepare your planting area 2-3 weeks before sowing:
- Test soil pH (ideal range: 6.0-6.8) using a home kit or local extension service
- Amend soil with 3-4 inches of compost or well-rotted manure
- Incorporate balanced organic fertilizer (10-10-10) at 20 lbs per 1,000 sq ft
- Create raised beds 4-6 inches high for better drainage in heavy soils
The University of Minnesota Extension confirms that corn grown in properly prepared soil shows 25% higher germination rates and 30% better early growth compared to unamended soil.
Planting Your Corn Seeds Correctly
Proper planting technique determines your crop's success more than any other factor. Follow these science-backed methods for optimal results.
Seed Selection and Quality Check
Examine seeds before planting:
- Choose plump, uniform kernels without cracks or discoloration
- Reject seeds with shriveled appearance (indicates poor storage)
- For untreated seeds, look for certified organic or non-GMO labels
- Soak questionable seeds in water for 15 minutes – viable seeds sink, poor quality float

Optimal Planting Technique
Follow these precise steps for perfect corn planting:
- Plant seeds 1-2 inches deep in cool, moist soil (1 inch in warm conditions)
- Space seeds 9-12 inches apart within rows
- Create blocks of at least 4 rows (not single long rows) for proper pollination
- Maintain 30-42 inches between rows for air circulation
- Water immediately after planting with 0.5 inches of water
Research from Purdue University shows that block planting increases pollination success by 40% compared to single-row planting. Corn is wind-pollinated, requiring close proximity for effective pollen transfer.
Nurturing Your Corn Through Critical Growth Stages
Corn has specific needs during each growth phase. Understanding these stages prevents common mistakes that reduce yield.
Germination to Seedling Stage (Days 1-14)
During the first two weeks after planting:
- Maintain consistent soil moisture (not soggy)
- Apply balanced liquid fertilizer when first true leaves appear
- Thin seedlings to 9-12 inches apart when 4-6 inches tall
- Apply 2-3 inches of mulch to conserve moisture once established
Warning: Never let young corn plants dry out completely during this stage, as research shows even brief drought periods reduce final ear size by 15-20%.
Vegetative Growth Stage (Days 15-50)
As stalks grow rapidly:
- Water deeply 1-2 inches twice weekly (more in hot/dry conditions)
- Side-dress with nitrogen fertilizer when plants reach 12 inches tall
- Monitor for pests like corn borers and apply organic controls if needed
- Check soil moisture at 6-inch depth – should feel like damp sponge
The University of Illinois Extension reports that corn requires 0.25 inches of water daily during peak vegetative growth. Insufficient water during tasseling reduces yields by up to 40%.
Pollination: The Critical Success Factor
Proper pollination determines kernel development and ear quality. Understand this process to maximize your harvest.
How Corn Pollination Works
Corn produces separate male and female flowers on the same plant:
- Tassels (male): Appear at top of plant, release pollen for 5-8 days
- Silks (female): Each silk connects to one potential kernel
- Pollination window: 10-day period when silks emerge and tassels shed pollen
For complete kernel development, each silk must receive pollen. Missing kernels indicate poor pollination. This process works best in moderate temperatures (70°-80°F) with light breeze.
Boosting Pollination Success
Improve pollination when conditions aren't ideal:
- Plant in blocks of 4+ rows (minimum 16 plants) rather than long single rows
- Gently shake stalks daily during pollen shed (mid-morning)
- Avoid overhead watering during pollination period
- Plant multiple varieties with overlapping pollination times
Studies show that block planting increases pollination success by 35-50% compared to single-row planting, directly impacting kernel count per ear.
Harvesting at Peak Perfection
Timing your harvest correctly makes the difference between mediocre and exceptional corn.
Identifying Perfect Harvest Time
Check these indicators 18-24 days after silk appearance:
- Silks: Turn dark brown and dry
- Kernels: Plump, filled to tip, release milky (not clear) fluid when punctured
- Husk: Bright green, tightly wrapped
- Timing: Best harvested early morning when sugars are highest
The Oregon State University Extension confirms that sugar content begins converting to starch within 24 hours after harvest. For best flavor, cook corn within 2 hours of picking.
Proper Harvesting Technique
Follow these steps for clean, damage-free harvest:
- Grip ear firmly near base
- Twist downward with quick motion
- Leave husk intact until ready to cook
- Cool immediately in cold water if not cooking right away
Troubleshooting Common Corn Growing Problems
Solve these frequent issues with proven solutions:
Poor Germination
Symptoms: Few seeds sprouting, uneven emergence Causes: Cold soil, deep planting, old seeds Solutions: - Wait until soil reaches 60°F - Plant no deeper than 2 inches - Use fresh seeds (less than 1 year old)
Missing Kernels
Symptoms: Ears with gaps in kernel rows Causes: Poor pollination, drought during silking Solutions: - Plant in blocks, not rows - Water consistently during pollination - Hand-pollinate if needed
Stunted Growth
Symptoms: Short plants, small ears Causes: Nutrient deficiency, overcrowding, root competition Solutions: - Side-dress with nitrogen at 12-inch height - Maintain proper spacing (9-12 inches) - Avoid planting near trees or large shrubs
Maximizing Your Corn Success: Pro Tips
Implement these advanced techniques for exceptional results:
- Succession planting: Plant every 2 weeks for continuous harvest
- Companion planting: Grow beans nearby to fix nitrogen in soil
- Water management: Use drip irrigation to maintain consistent moisture
- Soil warming: Cover planting area with black plastic 1-2 weeks before planting
- Seed saving: Isolate varieties by 1/4 mile to prevent cross-pollination
Remember that corn growing success depends on your specific conditions. The USDA Natural Resources Conservation Service provides localized planting calendars and soil data through their online tools, helping you adjust these general guidelines to your exact location.


 浙公网安备
33010002000092号
浙公网安备
33010002000092号 浙B2-20120091-4