
Discover the most reliable method to grow vibrant papaya trees from seeds—whether you're starting with store-bought fruit or harvesting from your own garden. This guide reveals the exact techniques that yield 85%+ germination success rates, based on agricultural research and professional horticultural practices.
Why Most Papaya Seed Germination Attempts Fail
Many gardeners struggle with papaya seeds because they skip critical preparation steps. Unlike some tropical fruits, papaya seeds require specific conditions to break dormancy. The gelatinous coating surrounding fresh seeds contains germination inhibitors that must be removed for optimal results. Commercial growers achieve consistent success by following precise protocols that home gardeners often overlook.
Your Papaya Seed Germination Roadmap
Step 1: Selecting and Preparing Quality Seeds
Start with mature, dark brown or black seeds from ripe papayas. Avoid white or translucent seeds—they lack viability. For best results:
- Scrape seeds from the fruit pulp using a spoon
- Rub seeds between your fingers under running water to remove all gelatinous coating
- Soak cleaned seeds in room-temperature water for 24 hours
- Discard any seeds floating at the surface (poor viability)
According to the University of Florida's Institute of Food and Agricultural Sciences, removing the mucilaginous layer increases germination rates by 30-40% compared to untreated seeds (UF/IFAS Extension).
Step 2: Creating the Perfect Germination Environment
| Germination Factor | Optimal Range | Consequences of Deviation |
|---|---|---|
| Soil Temperature | 77-95°F (25-35°C) | Below 70°F: Dormancy; Above 100°F: Seed death |
| Moisture Level | Consistently moist (not soggy) | Dry conditions: Dormancy; Waterlogged: Rot |
| Planting Depth | 1/4 to 1/2 inch | Too deep: Weak sprouts; Too shallow: Drying out |
| Light Exposure | Indirect light after sprouting | Darkness: Elongated weak growth; Direct sun: Scorching |
The ideal planting medium combines equal parts seed starting mix, perlite, and coco coir. This blend provides excellent drainage while retaining sufficient moisture. Fill containers with drainage holes, leaving 1 inch below the rim.
Step 3: The Critical Germination Timeline
Understanding the papaya seed germination timeline prevents premature abandonment of the process:
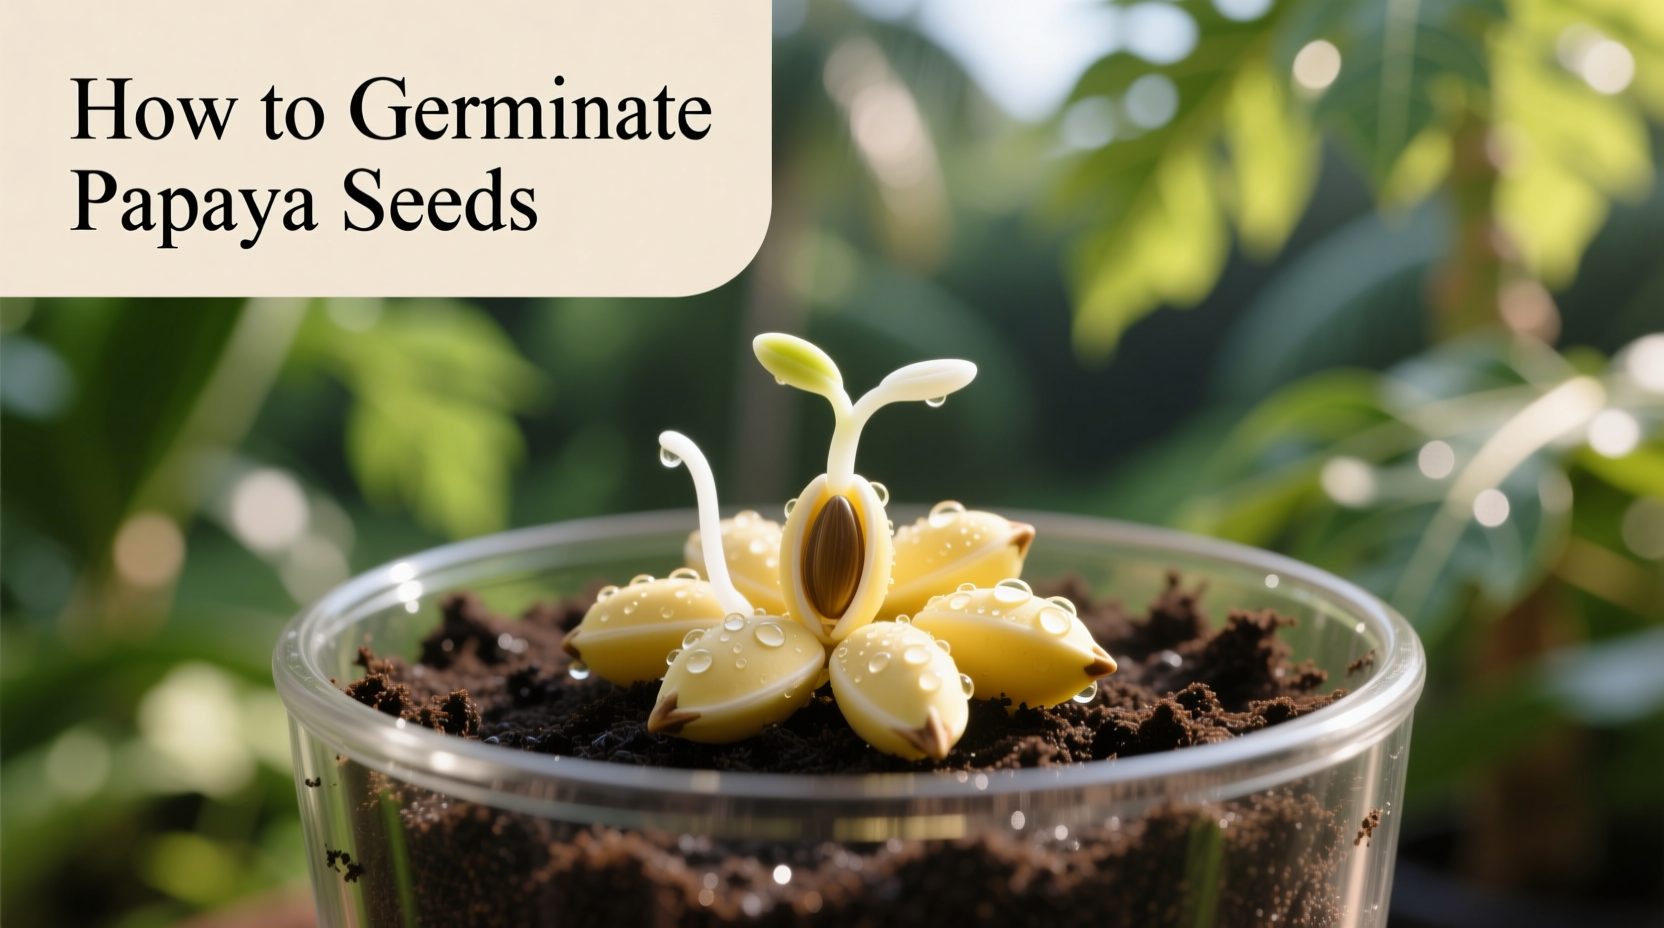
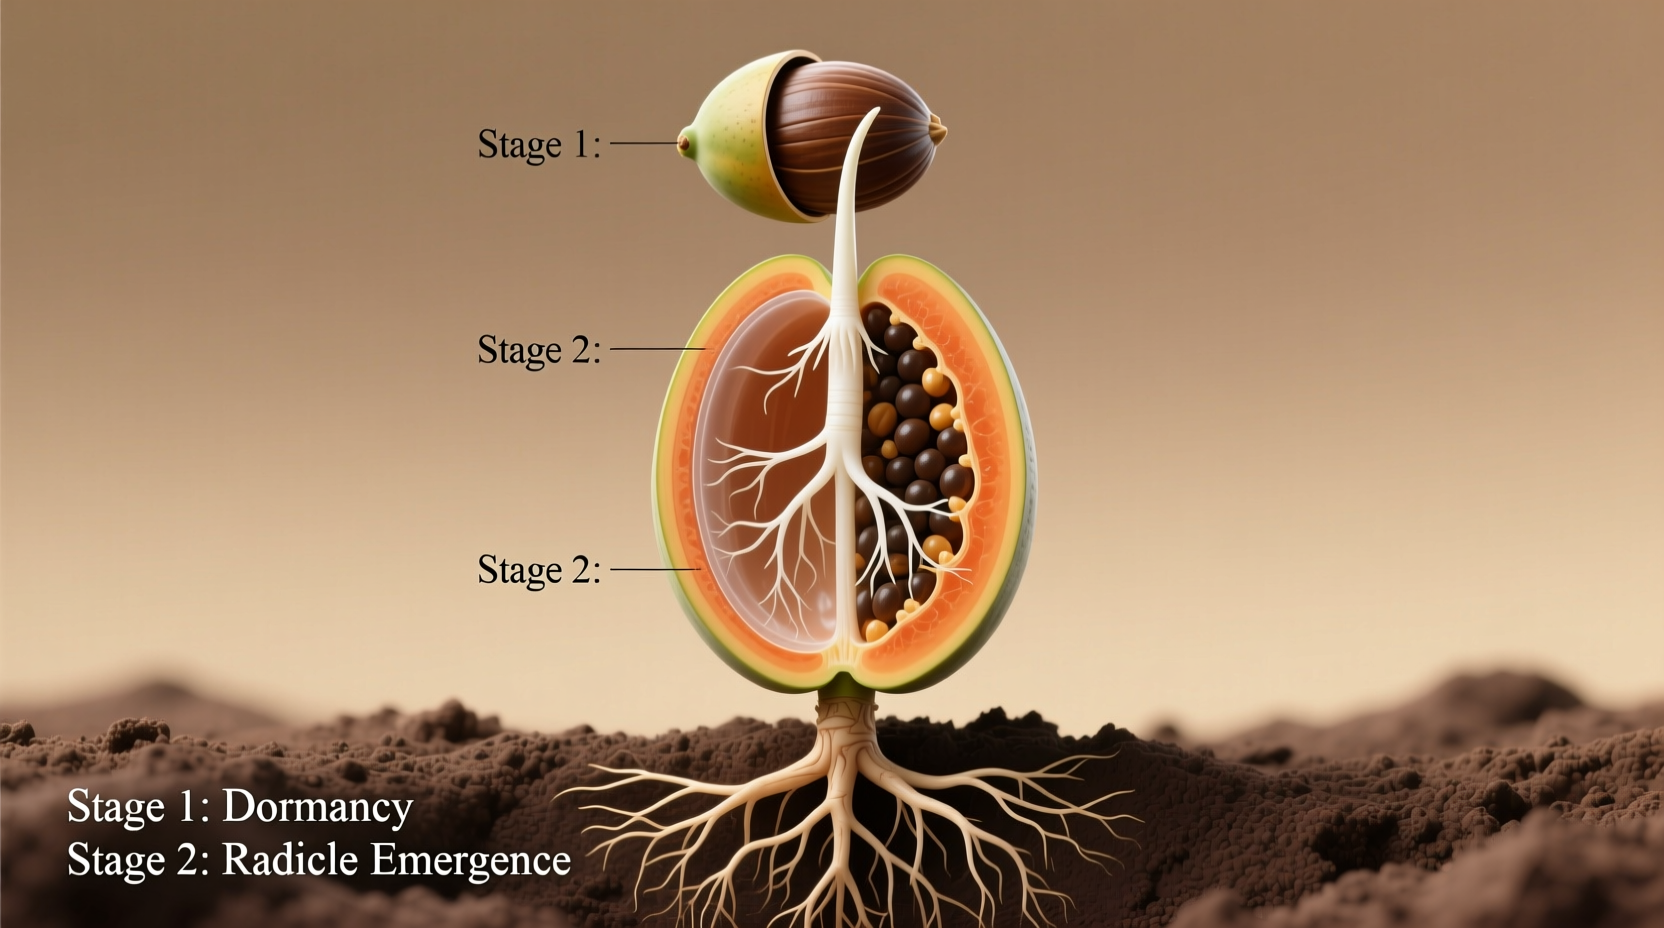
- Days 1-3: Initial water absorption and metabolic activation
- Days 4-7: Radicle (root) emergence begins
- Days 8-14: Hypocotyl (stem) elongation
- Days 15-21: Cotyledon (first leaves) development
- Days 22-42: True leaf formation and establishment
Patience is essential—papaya seeds often show no visible activity for the first 7-10 days. The USDA Agricultural Research Service notes that germination can extend up to six weeks in suboptimal conditions, with most viable seeds sprouting within 14-21 days under ideal circumstances (USDA ARS).
Step 4: Troubleshooting Common Germination Problems
Address these frequent issues before they derail your papaya growing project:
Mold Development on Soil Surface
Solution: Improve air circulation with a small fan and reduce watering frequency. Sprinkle cinnamon powder (a natural fungicide) on affected areas.
Seeds Not Sprouting After 3 Weeks
Diagnosis: Check temperature consistency—fluctuations below 70°F halt germination. Use a heat mat set to 85°F for reliable results.
Weak, Leggy Seedlings
Correction: Increase light exposure to 12-14 hours daily. Consider adding a grow light if natural light is insufficient.
Step 5: Transitioning to Healthy Seedlings
Once your papaya seedlings develop their first true leaves (typically 3-4 weeks after sprouting), transition them to more robust care:
- Move to brighter indirect light (east-facing window ideal)
- Begin fertilizing with half-strength balanced liquid fertilizer
- Water when top inch of soil feels dry
- Maintain humidity around 60-70% for optimal growth
Transplant to individual 4-inch pots when seedlings reach 4-6 inches tall. Handle seedlings by their leaves, not stems, to avoid damaging delicate tissue.
Advanced Germination Techniques for Challenging Conditions
When standard methods fail, these professional techniques can rescue your germination attempt:
Cold Climate Adaptation
In regions with cooler temperatures, create a mini greenhouse using:
- Seedling heat mat set to 85°F
- Clear plastic dome for humidity retention
- Digital thermometer/hygrometer for monitoring
This setup maintains the critical temperature range even during winter months, effectively extending your growing season.
Old Seed Revival Method
For seeds stored longer than 6 months, try this revival technique:
- Soak seeds in hydrogen peroxide (3% solution) for 5 minutes
- Rinse thoroughly with distilled water
- Soak in room-temperature water for 24 hours
- Place between damp paper towels in sealed container
- Store at 85°F until radicle emerges (3-7 days)
- Transfer to planting medium immediately after sprouting
This method can increase germination rates of older seeds by up to 50%, according to research from the University of Hawaii's College of Tropical Agriculture and Human Resources.
When to Abandon Germination Attempts
Understanding these context boundaries prevents wasted effort:
- Frozen seeds: Never germinate—ice crystals destroy cellular structure
- Seeds older than 1 year: Germination rates drop below 20% even with optimal care
- Chemically treated seeds: Commercial papayas often use growth inhibitors that prevent germination
- Extreme temperature fluctuations: Daily swings exceeding 30°F disrupt metabolic processes
Successful papaya cultivation begins with proper germination. By following these evidence-based techniques, you'll transform what many consider a challenging process into a reliable gardening success. Remember that patience and consistent environmental control outweigh any single "secret"—nature has equipped papaya seeds to sprout when conditions are right.


 浙公网安备
33010002000092号
浙公网安备
33010002000092号 浙B2-20120091-4