
Drying dill properly preserves its distinctive flavor for year-round culinary use. Whether you've harvested an abundant crop from your garden or purchased fresh dill in bulk, learning how to dry dill correctly ensures you maintain its essential oils and aromatic qualities. This comprehensive guide covers multiple drying methods with precise timing and temperature recommendations based on practical herb preservation experience.
Why Preserve Dill Through Drying
Dill's delicate flavor compounds begin deteriorating within days of harvest. Properly dried dill retains up to 80% of its original flavor profile compared to frozen or canned alternatives. Drying concentrates the herb's essential oils while removing moisture that causes spoilage. Understanding how to dry fresh dill at home transforms seasonal abundance into a pantry staple that enhances pickling, fish dishes, salad dressings, and bread recipes throughout the year.
Optimal Timing for Harvesting Dill
Harvest dill in the morning after dew evaporates but before midday heat when essential oil concentration peaks. For leaf drying (dill weed), cut stems when flower buds first appear but haven't opened. For seed harvesting, wait until seed heads turn brown. Use sharp scissors to cut 6-8 inch stems, avoiding bruising the delicate foliage. The best way to dry dill weed starts with proper harvesting technique that preserves cellular integrity.
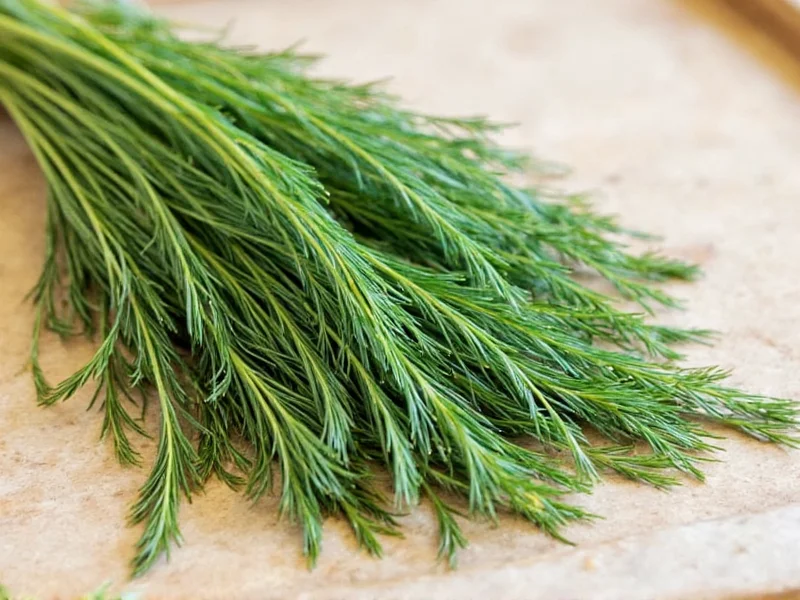
Preparation Before Drying
Gently rinse dill stems in cool water to remove dirt and insects, then shake off excess moisture. Never soak dill as prolonged water exposure damages fragile leaves. Lay stems in a single layer on clean towels and pat dry with additional towels—moisture remaining in the drying process causes mold. Remove any yellowed or damaged leaves. Proper preparation for drying dill ensures cleaner final product with better shelf stability.
Air Drying Method: Traditional Approach
Air drying preserves dill's flavor most effectively through slow moisture removal. Bundle 5-6 stems together with twine and hang upside down in a dark, well-ventilated space with 40-60% humidity. Ideal locations include closets, pantry shelves, or unused corners of bedrooms. Complete darkness prevents chlorophyll breakdown that diminishes color. The entire drying process for dill using this method typically requires 7-14 days depending on ambient conditions.
Check progress after one week by rubbing a leaf between fingers—it should crumble easily when fully dry. If stems feel leathery or leaves remain pliable, continue drying. This method for drying dill weed requires patience but yields superior flavor retention compared to faster techniques.
Oven Drying: Controlled Temperature Approach
Oven drying provides faster results while maintaining reasonable flavor quality. Preheat oven to its lowest setting (150°F/65°C). Arrange dill stems in single layer on parchment-lined baking sheets. Place sheets in oven with door slightly ajar using a wooden spoon to maintain 2-3 inch gap. Check every 30 minutes, rotating trays for even drying.
| Drying Method | Temperature | Time Required | Flavor Retention |
|---|---|---|---|
| Air Drying | Room Temperature | 7-14 days | Excellent (80-90%) |
| Dehydrator | 95°F (35°C) | 4-8 hours | Very Good (70-80%) |
| Oven Drying | 150°F (65°C) | 2-4 hours | Good (60-70%) |
| Micro-drying | N/A | 2-3 minutes | Fair (40-50%) |
Drying time ranges from 2-4 hours depending on oven accuracy and dill quantity. Remove when leaves crumble easily but stems still retain some flexibility. Oven drying dill requires constant monitoring to prevent scorching delicate leaves. This approach works well when learning how to dry dill quickly for immediate use.
Dehydrator Method: Precision Drying
Food dehydrators offer the most controlled environment for drying dill. Set temperature to 95°F (35°C) and arrange stems in single layer on trays without overlapping. Higher temperatures degrade volatile oils responsible for dill's characteristic flavor. Process for 4-8 hours, checking periodically after the 4-hour mark.
The best way to dry dill using a dehydrator maintains consistent low heat that removes moisture without cooking the herb. This method preserves more essential oils than oven drying while completing faster than air drying. Commercial dehydrators with digital controls provide optimal results for drying dill for long term storage.
Microwave Drying: Emergency Method
Microwave drying works only for small quantities when immediate use is required. Place dill between two paper towels and microwave on 30% power for 45-second intervals. Check and rearrange after each interval. Total time rarely exceeds 3 minutes.
This method significantly degrades flavor compounds and should only serve as a last resort. The rapid moisture removal alters chemical composition, resulting in diminished taste. Avoid this approach when learning how to dry dill properly for culinary applications requiring authentic flavor.
Testing for Complete Dryness
Properly dried dill should feel brittle and crumble easily when rubbed between fingers. Stems should snap rather than bend. Any remaining moisture leads to mold during storage. Test multiple points on different stems since drying occurs unevenly. The critical stage in the drying process for dill occurs when moisture content drops below 10%—this prevents microbial growth while maintaining flavor integrity.
Processing and Storing Dried Dill
Once fully dry, remove leaves from stems by running fingers downward. Store whole leaves rather than crushing to preserve flavor longer. Place in airtight glass containers away from light and heat sources. Dark glass jars maintain quality better than plastic containers. Properly stored dried dill retains optimal flavor for 6-12 months.
Label containers with harvest date and drying method. The shelf life of dried dill varies significantly based on storage conditions—cool, dark environments extend usability. Understanding how to store dried dill properly completes the preservation process that began with proper drying technique.
Culinary Applications for Dried Dill
Use 1 teaspoon dried dill as equivalent to 1 tablespoon fresh in recipes. Rehydrate in warm water for 10 minutes before use in cold applications like salad dressings. Add during early cooking stages for soups and stews to allow flavor infusion. Dried dill works particularly well in pickling brines, bread recipes, and potato salads where fresh dill would wilt.
Common Drying Mistakes to Avoid
- Drying in direct sunlight which degrades chlorophyll and essential oils
- Overcrowding stems which traps moisture and causes mold
- Using excessive heat that cooks rather than dries the herb
- Storing before completely dry which leads to spoilage
- Crushing immediately after drying which releases volatile compounds
Frequently Asked Questions
How long does dried dill last when stored properly?
Properly dried and stored dill maintains optimal flavor for 6-12 months in airtight containers away from light and heat. After one year, flavor gradually diminishes but remains safe for consumption if no moisture or mold appears.
Can I dry dill in the oven without a dehydrator setting?
Yes, you can dry dill in a conventional oven by setting it to the lowest temperature (150°F/65°C) with the door slightly ajar. Monitor closely every 30 minutes to prevent scorching, as oven thermostats often fluctuate. Total drying time typically ranges from 2-4 hours depending on dill quantity and oven accuracy.
Why does my dried dill taste different from fresh?
Drying concentrates certain flavor compounds while diminishing others, particularly the more volatile oils. Proper drying at low temperatures preserves up to 80% of fresh flavor. Use 1 teaspoon dried dill to replace 1 tablespoon fresh in recipes, and add earlier in cooking to allow flavor development.
What's the best way to check if dill is completely dry?
Test dryness by rubbing a leaf between your fingers—it should crumble easily without leaving moisture. Stems should snap cleanly rather than bend. Check multiple points on different stems since drying occurs unevenly. Any remaining flexibility indicates insufficient drying that could lead to mold during storage.
Can I dry dill flowers and seeds using the same methods?
Dill flowers dry similarly to leaves but require slightly less time. Harvest when flowers first open. Dill seeds need different treatment—they should remain on the plant until seed heads turn brown, then cut whole umbels and dry in paper bags. Seeds require 1-2 weeks air drying before threshing.


 浙公网安备
33010002000092号
浙公网安备
33010002000092号 浙B2-20120091-4