
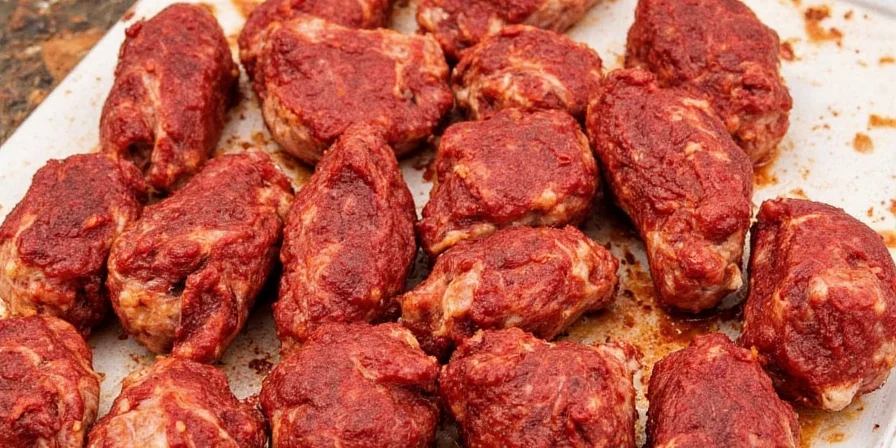
Dry brining is the simple process of rubbing salt directly onto meat and letting it rest in the refrigerator before cooking. Unlike wet brining, it creates a perfect crust while keeping meat incredibly tender and flavorful without waterlogged texture. This complete guide shows exactly how to dry brine any cut of meat for restaurant-quality results at home.
Whether you're a beginner trying dry brining for the first time or an experienced cook looking to perfect your technique, you'll discover the right timing, salt ratios, and professional secrets that work for your specific cut of meat. Skip to our quick-reference guide below or read through for the complete science-backed method.
Quick Dry Brining Reference Guide
| Meat Type | Salt Amount | Time Required | Cooking Tip |
|---|---|---|---|
| Steak (1-1.5") | 1 tsp kosher salt per lb | 1-24 hours | Sear at 450°F for perfect crust |
| Chicken Breast | 3/4 tsp kosher salt per lb | 12-24 hours | Cook to 165°F internal temperature |
| Pork Chop | 1 tsp kosher salt per lb | 12-48 hours | Rest 5 minutes before slicing |
| Whole Chicken | 1.5 tbsp kosher salt total | 24-48 hours | Roast at 375°F until 165°F internal |
What Is Dry Brining? (Simple Explanation)
Dry brining means applying salt directly to meat and letting it rest uncovered in the refrigerator. The salt draws out moisture, dissolves, then gets reabsorbed along with the meat's natural juices. This process seasons the meat throughout while helping it retain moisture during cooking.
Unlike wet brining (soaking meat in saltwater), dry brining:
- Makes meat more flavorful without dilution
- Creates a better sear and crust
- Requires no special equipment
- Works in your regular refrigerator
- Takes less space than wet brining
Why Dry Brining Works Better Than Wet Brining
Most home cooks see better results with dry brining because:
- Better texture: No waterlogging means meat stays firm and develops a superior crust when seared
- More flavor: Natural meat flavors concentrate rather than get diluted in water
- Simpler process: No need to make brine solutions or find large containers
- Faster cooking: Dry surface sears immediately instead of steaming first
- More forgiving timing: Works well whether you brine for 1 hour or 48 hours

Basic Dry Brining Method (For Beginners)
What You Need:
- Fresh meat (steak, chicken, pork)
- Kosher salt (1 tsp per pound of meat)
- Refrigerator space
- Wire rack (optional but helpful)
Step-by-Step Instructions:
- Pat meat dry with paper towels (moisture prevents good seasoning adhesion)
- Rub salt evenly over all surfaces (use 1 tsp kosher salt per pound of meat)
- Place on wire rack in refrigerator (or directly on plate if no rack)
- Rest uncovered: Minimum 1 hour, ideally 12-24 hours for best results
- Cook as usual (no need to rinse off salt)
The Science Behind Dry Brining (For Advanced Cooks)
Understanding the food science helps you perfect your technique:
- Initial moisture extraction: Salt creates a hypertonic environment, drawing out surface moisture within 15-30 minutes
- Natural brine formation: Extracted moisture dissolves salt, creating a concentrated solution that's gradually reabsorbed
- Protein denaturation: Salt disrupts myosin proteins, forming a gel that traps moisture during cooking
- Enzymatic tenderization: Extended resting activates natural enzymes that break down tough fibers
Key insight: Different meats need different timing. Red meats benefit from longer brining (24-48 hours), while poultry achieves optimal results in 12-24 hours before texture degradation begins.
Simple Flavor Enhancements (Beyond Basic Salt)
Once you've mastered basic dry brining, try these easy flavor boosts:
| Meat Type | Simple Flavor Boost | Why It Works |
|---|---|---|
| Steak | Add 1/4 tsp garlic powder + black pepper | Enhances umami without overwhelming beef flavor |
| Chicken | Add 1/2 tsp paprika + dried thyme | Creates beautiful color and subtle herbal notes |
| Pork | Add 1/2 tsp brown sugar + smoked paprika | Sugar enhances caramelization, paprika adds smokiness |
Most Common Dry Brining Mistakes (And How to Fix Them)
- Mistake: Not enough time
Fix: Minimum 1 hour for thin cuts, 12+ hours for best results with thicker cuts - Mistake: Using table salt instead of kosher
Fix: Table salt is denser - use half as much if substituting - Mistake: Washing meat after brining
Fix: Don't rinse - you'll remove the seasoning that creates perfect crust - Mistake: Brining already seasoned meat
Fix: Check labels - many store meats already contain salt solutions - Mistake: Using too much salt
Fix: Stick to 1 tsp kosher salt per pound for most meats
Professional Tips for Perfect Results
- For best sear: Let meat sit at room temperature 30 minutes before cooking after brining
- For thicker cuts: Apply slightly more salt to thicker portions for even seasoning
- To enhance flavor: Add dry herbs during last 24 hours of brining to preserve their potency
- For quick results: If short on time, minimum 1 hour still provides noticeable improvement
- For poultry skin: Gently loosen skin and apply some salt directly to the meat underneath
Final Thoughts
Dry brining is the easiest technique to dramatically improve your meat cooking with minimal effort. By simply applying salt ahead of time, you'll notice better flavor, juicier results, and restaurant-quality sears on everything from weeknight chicken breasts to special occasion steaks.
Start with the basic method (1 tsp kosher salt per pound, 12-24 hours in fridge), then experiment with timing and additional seasonings as you gain confidence. The beauty of dry brining is its flexibility - even imperfect attempts yield better results than no brining at all. Try it once and you'll never go back to cooking meat without this simple step.
Frequently Asked Questions
How long should I dry brine a steak?
For best results, dry brine steak for 12-24 hours. Minimum 1 hour still provides noticeable improvement. Thicker cuts (1.5"+) benefit from longer times up to 48 hours. Always refrigerate during the brining process.
Do I need to rinse after dry brining?
No, never rinse after dry brining. The salt has been absorbed and rinsing would remove the surface moisture needed for perfect searing. Simply pat dry with paper towels if needed before cooking.
Can I dry brine frozen meat?
Yes, but apply the salt as the meat begins to thaw in the refrigerator. The total time should include both thawing duration and standard brining time. Plan for about 50% longer than normal brining time when starting with frozen meat.
What's the difference between dry brining and seasoning ahead of time?
Dry brining specifically refers to the process where salt has time to be absorbed into the meat, not just sitting on the surface. True dry brining requires at least 45 minutes to an hour for the salt to begin the absorption process, with optimal results after 12+ hours.
Does dry brining work for all types of meat?
Yes, dry brining works for all meats but timing varies. Red meats (steak, roast): 24-48 hours. Poultry: 12-24 hours. Pork: 12-48 hours. Delicate fish: 30-60 minutes only. Game meats often need specialized timing based on leanness.


 浙公网安备
33010002000092号
浙公网安备
33010002000092号 浙B2-20120091-4