

Why Proper Potato Wedge Cutting Technique Matters
Getting your potato wedges right isn't just about appearance—it directly impacts cooking results and safety. Professional chefs know that inconsistent sizing leads to uneven cooking, with some pieces burning while others remain undercooked. The USDA Food Safety and Inspection Service emphasizes proper vegetable preparation techniques to minimize food waste and ensure even cooking.
When you cut uniform wedges, you achieve:
- Consistent cooking time across all pieces
- Maximum crispiness on all surfaces
- Better seasoning distribution
- Professional presentation
- Reduced kitchen accidents from improper knife handling
Essential Tools for Cutting Perfect Potato Wedges
While you don't need specialized equipment, having the right tools makes the process safer and more efficient:
| Tool | Recommended Type | Why It Matters |
|---|---|---|
| Knife | 8-inch chef's knife | Provides control and stability for clean cuts through dense potato flesh |
| Cutting Board | Wood or thick plastic | Prevents slipping and protects knife edge; damp cloth underneath adds stability |
| Vegetable Peeler | Y-shaped peeler | Optional for removing skin; creates less waste than traditional peelers |
| Bowl of Water | Medium mixing bowl | Prevents cut potatoes from browning while you work |
Step-by-Step Guide to Cutting Perfect Potato Wedges
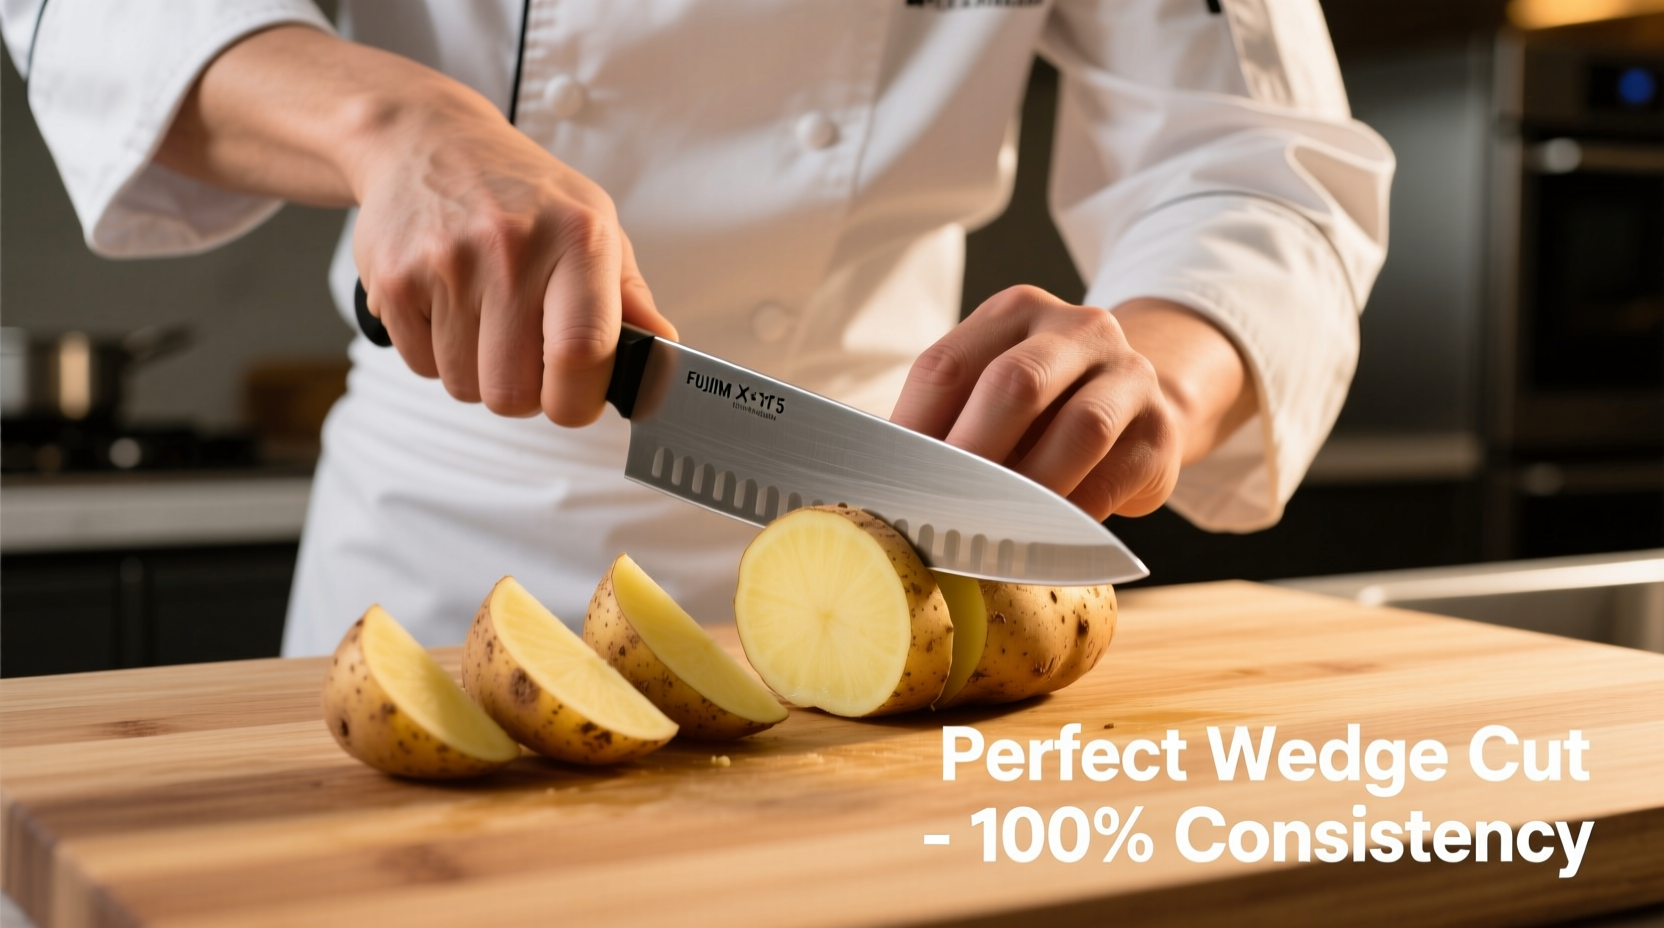
Step 1: Select and Prepare Your Potatoes
Choose firm, blemish-free potatoes of similar size for consistent cooking. Russet potatoes work best for classic crispy wedges, while Yukon Golds offer a buttery texture. Scrub thoroughly under cold water to remove dirt—no need to peel unless preferred. Trim about 1/8 inch from both ends to create stable flat surfaces.
Step 2: Position for the First Cut
Place the potato vertically on one of the trimmed ends. This stable base prevents rolling. Hold firmly with non-dominant hand, fingers curled inward (the "claw grip") to protect fingertips. Position your knife at the center of the potato, ready to cut lengthwise.
Step 3: Create the Foundation Slices
Cut the potato in half lengthwise. Then, place each half cut-side down and slice each into two wedges, creating quarters total. For larger potatoes, you may need to cut each quarter in half again to maintain that ideal 1-inch thickness.
Step 4: Maintain Consistent Thickness
This is where most home cooks go wrong. Measure your wedges with your index finger—aim for approximately 1 inch thick. Thicker wedges won't crisp properly, while thinner ones burn before cooking through. Consistent sizing ensures all wedges finish cooking simultaneously.
Avoid These Common Potato Wedge Cutting Mistakes
Based on culinary school observations, these errors happen frequently:
- Inconsistent sizing: Mixing thick and thin wedges in the same batch
- Improper knife angle: Cutting at an angle creates uneven surfaces that don't crisp well
- Wet potatoes: Washing potatoes right before cutting makes them slippery and dangerous
- Using a dull knife: Requires more pressure, increasing accident risk
- Ignoring potato orientation: Not aligning cuts with natural starch patterns affects texture
Special Considerations for Different Cooking Methods
Your cutting technique should adapt based on how you'll cook the wedges:
- For oven baking: Cut slightly thicker (1-1.5 inches) as they'll shrink during cooking
- For air frying: Make thinner wedges (3/4 inch) since air circulation cooks faster
- For grilling: Cut with skin on for structural integrity and slightly larger to prevent falling through grates
- For potato skins: Cut wider wedges with extra-thick skin portions for scooping fillings
Pro Tips for Perfect Potato Wedges Every Time
Professional chefs use these techniques to elevate their potato wedges:
- Soak cut wedges in cold water for 30 minutes to remove excess starch for crispier results
- Pat wedges completely dry before seasoning—wet potatoes won't crisp properly
- For restaurant-quality presentation, trim any irregular edges after the initial cuts
- When working with multiple potatoes, keep cut pieces in water with lemon juice to prevent browning
- Always cut potatoes just before cooking for best texture and flavor
When Potato Wedges Aren't the Best Choice
Understanding context boundaries helps you choose the right cut for the job. Potato wedges work best for:
- Baking or roasting as a side dish
- Creating loaded potato skins
- When you want maximum crispy surface area
Consider alternative cuts when:
- You need uniform pieces for soups or stews (use cubes instead)
- Preparing scalloped potatoes (thin rounds work better)
- Short on cooking time (smaller dice cooks faster)
- Creating hash browns (shredded works best)
Storing Cut Potatoes Properly
If you must prepare wedges ahead of time:
- Submerge completely in cold water with 1 tablespoon lemon juice or vinegar per quart
- Refrigerate for no more than 24 hours
- Change water if storing longer than 12 hours
- Always dry thoroughly before cooking
According to food safety research from University of Maryland's National Center for Home Food Preservation, properly stored cut potatoes maintain quality for one day but lose texture and nutritional value beyond that timeframe.


 浙公网安备
33010002000092号
浙公网安备
33010002000092号 浙B2-20120091-4