
Cultivating turmeric (Curcuma longa) successfully combines traditional knowledge with precise agricultural practices. This vibrant golden spice, prized for both culinary and medicinal applications, thrives in tropical and subtropical climates but can be grown in temperate regions with proper care. Understanding the complete growth cycle from rhizome selection to harvest ensures optimal yield and quality of this valuable crop.
Climate Requirements for Turmeric Cultivation
Turmeric is a tropical perennial that demands specific environmental conditions. The ideal temperature range for growing turmeric in home gardens spans 20-35°C (68-95°F), with consistent humidity levels between 70-80%. While turmeric tolerates partial shade, it performs best with 6-8 hours of filtered sunlight daily. In regions with distinct seasons, plant turmeric after the last frost when soil temperatures reach at least 18°C (65°F). The crop requires 7-10 months of frost-free growing conditions to reach maturity—any exposure to freezing temperatures will kill the plants.
Soil Preparation Essentials
Proper soil preparation represents one of the most critical factors in successful turmeric cultivation techniques. Turmeric prefers deep, loamy soil with excellent drainage and a slightly acidic to neutral pH between 5.5 and 7.5. Before planting, amend heavy clay soils with generous amounts of organic matter like compost or well-rotted manure to improve structure and drainage.
| Soil Parameter | Optimal Range | Adjustment Method |
|---|---|---|
| pH Level | 5.5-7.5 | Add lime to raise pH; sulfur to lower |
| Organic Matter | 3-5% | Incorporate compost or aged manure |
| Drainage | Excellent | Add sand or perlite to heavy soils |
For container growing, use a high-quality potting mix amended with 30% perlite for optimal drainage. Raised beds work exceptionally well for best soil for turmeric cultivation in areas with heavy rainfall or poor natural drainage.
Planting Process: Step-by-Step Guide
Select healthy, disease-free rhizomes from a reputable source or save from your previous harvest. Choose plump rhizomes with multiple buds ("eyes") for the highest success rate. Before planting, soak rhizomes in a solution of 2g of carbendazim per liter of water for 30 minutes to prevent fungal diseases.
The optimal time for when to plant turmeric rhizomes depends on your climate zone. In tropical regions, plant at the beginning of the rainy season. In temperate climates, plant in spring after soil warms to 18°C (65°F), typically April or May. Plant rhizomes 5-7 cm (2-3 inches) deep with buds facing upward, spacing them 25-30 cm (10-12 inches) apart in rows 45-60 cm (18-24 inches) apart. Cover with soil and water gently.
Watering and Nutrient Management
Consistent moisture represents a cornerstone of turmeric plant care guide practices. Water regularly to maintain evenly moist (but never waterlogged) soil, especially during the first 2-3 months of growth. Reduce watering as harvest approaches to allow rhizomes to mature properly. During dry periods, provide 2.5-5 cm (1-2 inches) of water weekly.
Fertilize turmeric every 4-6 weeks with balanced organic fertilizer. A 10-10-10 NPK ratio works well, supplemented with potassium-rich amendments like wood ash. Avoid excessive nitrogen, which promotes leafy growth at the expense of rhizome development. Mulching with straw or dried leaves helps retain moisture, suppress weeds, and regulate soil temperature.
Pest and Disease Management
While turmeric naturally resists many pests due to its curcumin content, several issues can affect organic turmeric growing methods. Common problems include:
- Leaf spot diseases: Control with neem oil sprays every 10-14 days
- Rhizome rot: Prevent through proper drainage and avoiding overwatering
- Shoot borers: Hand-pick insects or use biological controls like Bacillus thuringiensis
- Nematodes: Rotate crops and incorporate marigolds as companion plants
For common turmeric plant pests, implement integrated pest management strategies focusing on prevention through proper spacing, crop rotation, and maintaining plant health. Remove and destroy infected plant material immediately to prevent disease spread.
Harvesting and Post-Harvest Handling
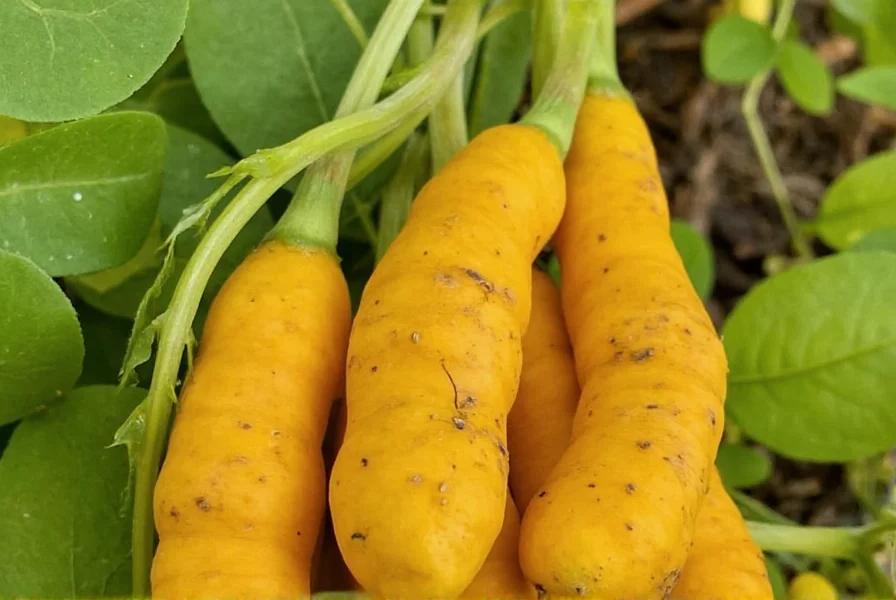
Determining how to harvest turmeric roots requires careful observation of plant maturity signs. Turmeric typically reaches harvest readiness 8-10 months after planting, when the leaves turn yellow and begin to dry. Stop watering 2-3 weeks before harvest to allow rhizomes to mature properly.
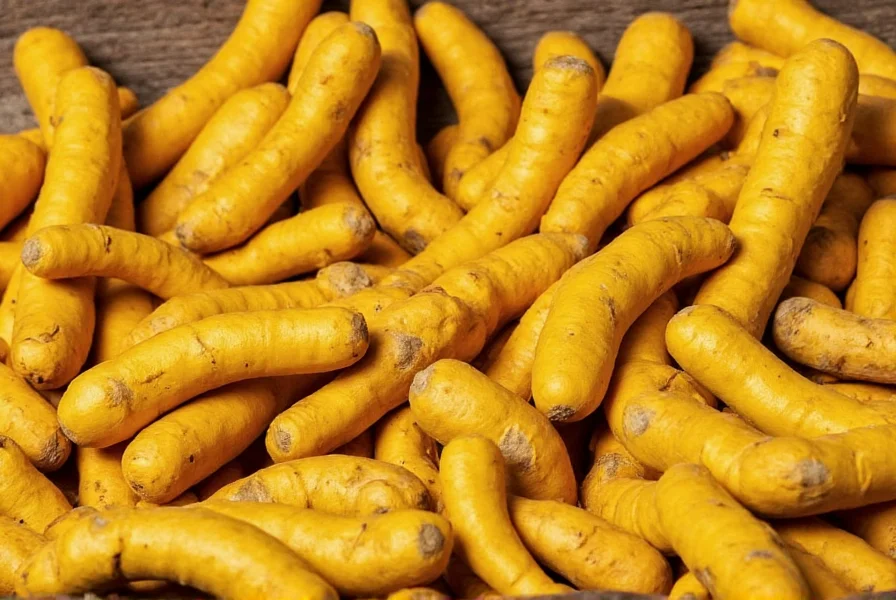
To harvest, carefully dig around the plant base with a garden fork, taking care not to damage the rhizomes. Gently lift the entire plant from the soil. Separate the main rhizomes from the smaller finger rhizomes. Clean soil from the rhizomes by rinsing with water—avoid scrubbing which can damage the skin.
Storage and Preservation Methods
Proper storage determines the longevity of your harvest. For short-term storage (2-3 weeks), keep fresh turmeric in a cool, dark place with high humidity. For longer preservation:
- Refrigeration: Store in perforated plastic bags in the vegetable crisper (up to 1 month)
- Freezing: Peel and slice rhizomes before freezing in airtight containers (up to 6 months)
- Drying: Slice thinly and dehydrate at 50-60°C until brittle, then grind to powder
- Preserving in oil or vinegar: Creates flavorful culinary additions with extended shelf life
Understanding storing fresh turmeric after harvest properly ensures you maintain maximum curcumin content and flavor profile. Avoid storing turmeric near potatoes, which release gases that accelerate spoilage.
Troubleshooting Common Cultivation Problems
Even with careful planning, growers may encounter issues. Here's how to address frequent challenges in turmeric cultivation temperature requirements:
- Yellowing leaves: Often indicates overwatering or nutrient deficiency—check drainage and apply balanced fertilizer
- Stunted growth: May result from poor soil preparation or inadequate spacing—amend soil and ensure proper plant distance
- No rhizome development: Typically caused by excessive nitrogen—switch to potassium-rich fertilizers
- Rhizome rot: Usually from waterlogged conditions—improve drainage immediately
For gardeners wondering how long does turmeric take to grow, note that the full growth cycle typically requires 8-10 months from planting to harvest. Patience proves essential, as premature harvesting yields smaller, less potent rhizomes.
Advanced Cultivation Techniques
Experienced growers can optimize yields through several advanced methods. Implementing proper turmeric planting spacing guide principles significantly impacts harvest quality. Consider intercropping turmeric with shade-providing plants like bananas or coffee in tropical regions to create ideal microclimates.
For commercial production or larger gardens, consider these enhancements:
- Apply mulch consistently to maintain soil moisture and temperature
- Use drip irrigation for precise water delivery during dry periods
- Implement crop rotation with legumes to maintain soil fertility
- Monitor soil pH monthly and adjust as needed
These practices contribute to higher yields and superior quality in your turmeric cultivation efforts, ensuring robust rhizome development and maximum curcumin content.


 浙公网安备
33010002000092号
浙公网安备
33010002000092号 浙B2-20120091-4