
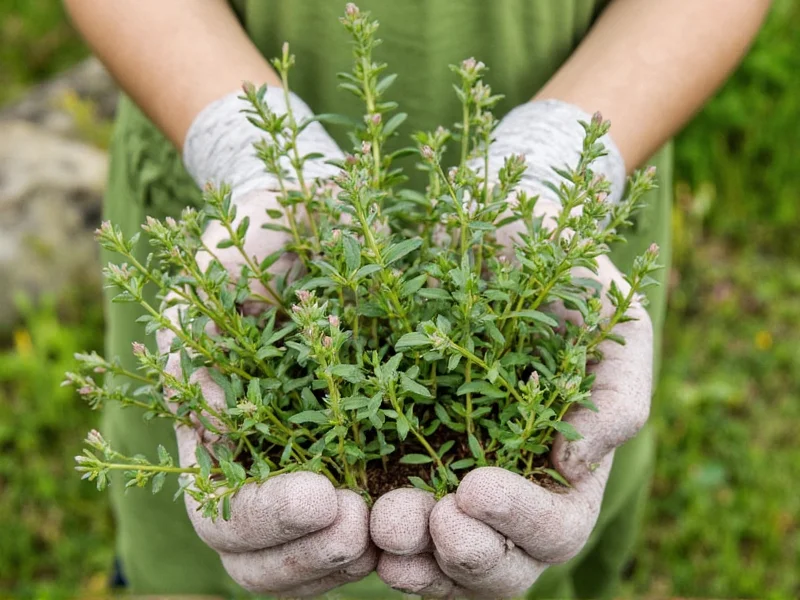
Thyme (Thymus vulgaris) has been cherished by gardeners and chefs for centuries, not just for its culinary versatility but for its remarkable resilience. This Mediterranean native thrives in conditions that would challenge many other herbs, making it an excellent choice for beginner gardeners and experienced horticulturists alike. Understanding how to cultivate thyme properly transforms this humble herb from a simple garden addition to a flourishing, aromatic cornerstone of your herb collection.
Why Grow Thyme in Your Garden
Thyme offers multiple benefits beyond its distinctive flavor. This low-growing perennial serves as an attractive ground cover that suppresses weeds while releasing a pleasant fragrance when brushed against. Its small flowers attract beneficial pollinators like bees and butterflies, enhancing your garden's ecosystem. Medicinally, thyme contains thymol, a compound with antiseptic properties used in many natural remedies. When learning how to grow thyme successfully, you're investing in a plant that gives back season after season with minimal maintenance.
Understanding Thyme Varieties for Successful Cultivation
While common thyme (Thymus vulgaris) is the standard culinary variety, numerous cultivars offer different flavors, growth habits, and ornamental qualities. Selecting the right variety for your climate and purpose significantly impacts your success with thyme cultivation.
| Variety | Height | Flavor Profile | Best Use | Cold Hardiness |
|---|---|---|---|---|
| Common Thyme | 6-12 inches | Strong, earthy | Cooking, medicinal | USDA 5-9 |
| Lemon Thyme | 4-8 inches | Citrusy, bright | Fish, poultry, teas | USDA 6-9 |
| Woolly Thyme | 2-3 inches | Mild, subtle | Ground cover, ornamental | USDA 4-9 |
| Caraway Thyme | 4-6 inches | Nutty, caraway-like | Bread, cheese dishes | USDA 5-9 |
| Creeeping Thyme | 1-3 inches | Mild, floral | Pathways, rock gardens | USDA 4-9 |
Creating the Ideal Environment for Thyme Growth
Mastering how to cultivate thyme starts with replicating its native Mediterranean conditions. Thyme thrives in full sun—aim for 6-8 hours of direct sunlight daily. In extremely hot climates (zones 9+), afternoon shade prevents scorching. The soil must drain exceptionally well; thyme suffers in heavy clay or consistently moist conditions. Amend garden soil with 30-50% sand, perlite, or pumice to improve drainage. Raised beds work exceptionally well for thyme cultivation, particularly in areas with heavy rainfall.
Soil pH between 6.0 and 8.0 accommodates thyme's needs, though slightly alkaline conditions (7.0-8.0) often produce more robust growth. Unlike many herbs, thyme prefers lean soil with minimal organic matter—too much fertility encourages leafy growth at the expense of essential oil concentration. When planning where to plant thyme, consider its mature spread (12-18 inches for most varieties) and position it where it won't be overshadowed by more aggressive growers.
Step-by-Step Thyme Planting Methods
Successful thyme cultivation offers three primary planting approaches, each with specific timing considerations for optimal growth.
Starting Thyme from Seeds
Though slower than other methods, growing thyme from seeds allows access to the widest variety selection. Start seeds indoors 8-10 weeks before your last expected frost date. Surface-sow seeds on a seed starting mix since they require light to germinate. Maintain consistent moisture until germination (14-28 days), then gradually reduce watering. Transplant seedlings outdoors after hardening off and when soil temperatures reach at least 60°F (15°C). Patience is essential when learning how to grow thyme from seeds, as plants take 1-2 years to reach full maturity.
Propagating Thyme from Cuttings
Cuttings provide the fastest route to mature plants with identical characteristics to the parent plant. Take 3-4 inch cuttings from non-flowering stems in spring or early summer. Remove lower leaves and dip the cut end in rooting hormone (optional but recommended). Plant in a 50/50 perlite and peat mix, keeping the medium lightly moist but not wet. Roots typically develop in 3-4 weeks. This method for cultivating thyme yields plants ready for harvest within the same growing season.
Transplanting Established Thyme Plants
For immediate results, transplant nursery-grown thyme after the last frost when soil has warmed. Dig a hole twice as wide as the root ball but no deeper. Gently loosen roots and position the plant so the crown sits at soil level. Water thoroughly after planting, then allow the soil to dry between subsequent waterings. Space plants 12-18 inches apart to ensure adequate air circulation, which prevents fungal diseases—a critical consideration for successful thyme cultivation.
Essential Thyme Care Practices
Proper care transforms basic thyme cultivation into a thriving herb garden centerpiece. Watering practices make or break thyme success—established plants need deep but infrequent watering, typically once every 7-10 days during dry periods. Always check soil moisture 2 inches below the surface before watering; if damp, wait another day. Morning watering reduces fungal risk by allowing foliage to dry during the day.
Fertilizing thyme requires restraint. Excessive nutrients, particularly nitrogen, diminish flavor intensity and encourage leggy growth. Apply a balanced organic fertilizer once in early spring, or use compost tea monthly during the growing season. Alternatively, a light application of bone meal in spring provides phosphorus for root development without overstimulating leaf growth—a professional tip for enhancing how to cultivate thyme with maximum flavor.
Pruning Techniques for Healthy Thyme Plants
Regular pruning maintains thyme's compact shape and prevents woody, unproductive growth. In early spring, cut back one-third of the previous year's growth to encourage bushiness. After flowering, shear plants by half to stimulate new growth and maintain shape. Never cut into old, woody stems with no green growth, as these won't regenerate. The pruned material provides perfect harvest—this dual-purpose technique exemplifies efficient thyme cultivation practices.
Harvesting Thyme for Maximum Flavor and Plant Health
Timing your harvest correctly significantly impacts both flavor intensity and plant longevity. The optimal time to harvest thyme is in the morning after dew evaporates but before the sun reaches its peak intensity. This timing captures the highest concentration of essential oils. For culinary use, harvest just before flowering when oil content peaks. Use sharp scissors or pruning shears to cut 4-6 inch stems, never pulling or tearing which damages the plant.
For drying, bundle small groups of stems and hang them upside down in a dark, well-ventilated space. Once fully dry (1-2 weeks), strip leaves from stems and store in airtight containers away from light. Fresh thyme maintains peak flavor for 1-2 weeks when stored properly in the refrigerator. Understanding proper harvesting techniques completes your knowledge of how to cultivate thyme sustainably.
Troubleshooting Common Thyme Cultivation Challenges
Even with proper care, thyme may encounter issues. Root rot from overwatering or poor drainage manifests as yellowing leaves and wilting despite moist soil. Address this by reducing watering frequency and improving soil drainage immediately. Powdery mildew appears as white coating on leaves, especially in humid conditions—improve air circulation and avoid overhead watering to prevent it.
Pests like spider mites and aphids occasionally attack thyme. A strong spray of water often dislodges them, or use insecticidal soap for persistent infestations. If your thyme becomes woody and sparse, severe pruning in spring may rejuvenate it, though replacement with new plants often yields better results. Recognizing these issues early ensures your thyme cultivation remains successful year after year.
Seasonal Thyme Care Calendar
Adapting care to seasonal changes optimizes thyme cultivation:
- Spring: Prune dead growth, fertilize lightly, divide overcrowded plants
- Summer: Harvest regularly, water during extended dry periods, deadhead flowers
- Fall: Reduce watering as temperatures drop, avoid late-season fertilizing
- Winter: In zones below 5, apply light mulch after ground freezes; avoid wet mulches
In colder climates, container-grown thyme can be brought indoors for winter. Place near a south-facing window and water sparingly—about once a month. This seasonal approach to thyme cultivation ensures year-round success regardless of your climate zone.
Extending Your Thyme Harvest
Preserving your thyme harvest multiplies your cultivation efforts. Beyond traditional drying, freezing thyme in olive oil preserves both flavor and convenience. Chop fresh thyme and pack into ice cube trays, cover with oil, and freeze. Once solid, transfer cubes to freezer bags for easy portioning in cooking. Alternatively, create thyme-infused vinegar by steeping fresh sprigs in white wine vinegar for 2-4 weeks.
For gardeners practicing sustainable thyme cultivation, consider succession planting. Start new thyme plants every 2-3 years to maintain vigorous growth, as older plants become woody and less productive. Dividing established plants in spring provides free new plants while rejuvenating the parent—this simple technique ensures your thyme garden remains vibrant indefinitely.
Final Thoughts on Successful Thyme Cultivation
Mastering how to cultivate thyme rewards gardeners with a resilient, flavorful herb that enhances both garden aesthetics and culinary creations. By understanding thyme's preference for lean soil, abundant sunlight, and restrained watering, you create conditions where this Mediterranean native thrives. Regular harvesting and proper pruning transform basic thyme cultivation into a sustainable practice that yields aromatic bounty year after year. Whether you're a novice gardener or seasoned horticulturist, thyme's adaptability makes it a worthy addition to any herb collection—its fragrance, flavor, and beauty enhancing both garden and kitchen.
Frequently Asked Questions
How often should I water thyme plants?
Water thyme deeply but infrequently—typically once every 7-10 days during dry periods once established. Always check that the top 2 inches of soil are dry before watering. Overwatering causes root rot, the most common cause of thyme failure. Container-grown thyme may need more frequent watering during hot, dry spells but still requires complete drainage between waterings.
Can thyme survive winter in cold climates?
Most thyme varieties survive winters in USDA zones 5-9. In colder zones (below 5), apply a light mulch after the ground freezes to protect roots from freeze-thaw cycles. Avoid heavy, moisture-retaining mulches that could cause rot. Container-grown thyme should either be brought indoors or placed against a south-facing wall with protective mulch. English thyme generally shows better cold tolerance than lemon varieties.
Why is my thyme plant becoming woody and sparse?
Thyme naturally develops woody stems with age, but excessive woodiness indicates insufficient pruning or poor growing conditions. To prevent this, prune thyme by one-third each spring and after flowering. Never cut into completely woody stems with no green growth. If your plant has become too woody, it's often best to start new plants from cuttings, as severely woody thyme rarely recovers fully. Regular harvesting also helps maintain bushy growth.
What's the best way to propagate thyme for continuous harvest?
Stem cuttings provide the most reliable propagation method for consistent thyme cultivation. Take 3-4 inch cuttings from non-flowering stems in spring or early summer, remove lower leaves, and place in a perlite/peat mix. Keep lightly moist until roots develop (3-4 weeks). Alternatively, divide established plants every 2-3 years in spring—this rejuvenates the parent plant while providing new plants. Success with thyme propagation ensures you always have vigorous plants for harvesting.
How do I prevent root rot when cultivating thyme?
Preventing root rot starts with proper soil preparation—thyme requires exceptionally well-draining soil. Amend garden soil with 30-50% sand or perlite. In containers, use a cactus/succulent mix with extra perlite. Water only when the top 2 inches of soil are dry, and always ensure containers have drainage holes. Raised beds improve drainage in heavy soils. If root rot appears (yellowing leaves, wilting despite moist soil), stop watering immediately and consider replanting in fresh, drier soil.


 浙公网安备
33010002000092号
浙公网安备
33010002000092号 浙B2-20120091-4