
Yellow squash transforms from watery to wonderfully tender-crisp when cooked properly on your stove. This versatile summer squash cooks faster than its winter counterparts and absorbs flavors beautifully. As a chef who's taught thousands of home cooks, I've found most struggle with one critical issue: ending up with mushy, waterlogged squash instead of vibrant, flavorful results. The secret lies in moisture management and precise heat control—techniques perfected through years of professional kitchen experience.
Why Stovetop Cooking Works Best for Yellow Squash
Unlike baking or steaming, stovetop cooking gives you immediate visual and textural feedback. The direct heat creates beautiful caramelization through the Maillard reaction (occurring at 300°F/149°C), developing complex flavors that gentler methods miss. According to USDA food science research, high-heat searing preserves more vitamin C in squash compared to boiling, which leaches nutrients into water.
| Cooking Method | Texture Result | Nutrient Retention | Time Required |
|---|---|---|---|
| Stovetop Sauté | Tender-crisp with caramelized edges | High (minimal water contact) | 5-8 minutes |
| Boiling | Often mushy, waterlogged | Low (nutrients leach into water) | 8-12 minutes |
| Oven Roasting | Evenly tender, less caramelization | Moderate | 20-25 minutes |
Essential Preparation Techniques
Proper preparation prevents the #1 yellow squash problem: excess moisture. Follow these chef-tested steps:
- Select firm, brightly colored squash under 8 inches long (larger specimens often have more seeds and water)
- Wash and dry thoroughly before slicing—water on the surface causes steaming instead of searing
- Slice uniformly to 1/4-inch thickness for even cooking (use a mandoline for precision)
- Salt and rest slices for 10 minutes, then pat dry—this draws out excess water that would make your squash soggy

Step-by-Step Stovetop Cooking Method
This professional technique guarantees restaurant-quality results every time:
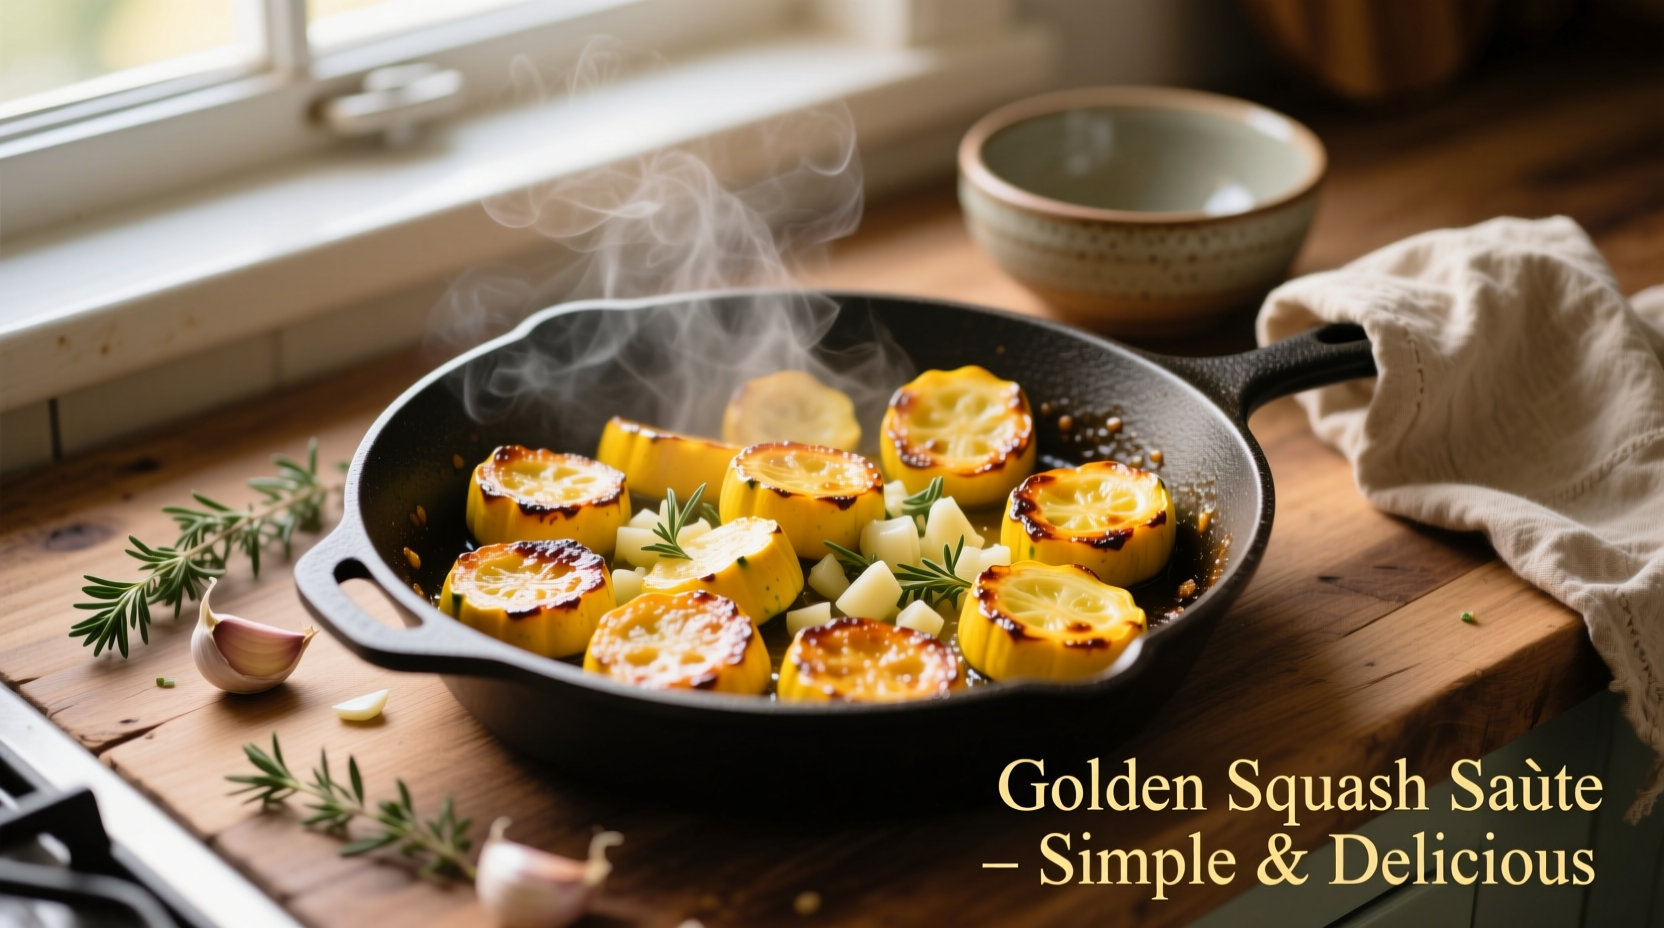
- Heat your pan properly: Use a heavy-bottomed skillet (cast iron or stainless steel) over medium-high heat for 2 minutes until a drop of water sizzles immediately
- Add fat strategically: Use 1-2 tablespoons of high-smoke point oil (avocado or refined olive oil) and let it heat until shimmering but not smoking
- Cook in batches: Never overcrowd the pan—this lowers the temperature and causes steaming. Cook only enough to cover the bottom in a single layer
- Season at the right moment: Add salt after 2 minutes of cooking, not before, to prevent drawing out more moisture during cooking
- Don't disturb too soon: Let squash sit undisturbed for 2-3 minutes to develop golden crust before flipping
- Finish with acidity: Remove from heat and add 1 teaspoon lemon juice or vinegar to brighten flavors
When Stovetop Method Outperforms Other Techniques
While oven roasting works well for meal prep, stovetop shines in specific scenarios:
- Weeknight cooking: Ready in under 10 minutes when time is limited
- Texture-sensitive dishes: Essential when serving with proteins that require precise timing
- Flavor layering: Allows for deglazing the pan to create instant sauces
- Small-batch cooking: More energy-efficient than heating a full oven for just one vegetable
According to the American Culinary Federation's cooking guidelines, stovetop methods provide superior control for delicate vegetables like yellow squash, where a 30-second timing difference can mean perfect texture versus overcooking.
Flavor Variations and Pro Tips
Elevate your basic technique with these chef-approved enhancements:
- Garlic timing matters: Add minced garlic during the last 60 seconds to prevent burning
- Herb infusion: Toss in fresh thyme or oregano sprigs while cooking for subtle flavor
- Crispy topping: Finish with toasted pine nuts or pumpkin seeds for texture contrast
- Deglaze for sauce: After removing squash, add 1/4 cup broth to the hot pan and scrape up browned bits
Troubleshooting Common Problems
Solve these frequent yellow squash issues:
- Soggy squash: You didn't salt and drain properly, or overcrowded the pan. Next time, slice thinner and cook in smaller batches.
- Burning: Heat was too high or oil quality poor. Use medium heat and a higher smoke point oil.
- Bland flavor: Season in layers—a pinch of salt during cooking and another after finishing.
- Uneven cooking: Squash pieces were different sizes. Use consistent 1/4-inch slices.
Serving and Storage Recommendations
For best results, serve immediately while edges are still crisp. Leftovers keep well for 3-4 days in an airtight container in the refrigerator. When reheating, use a hot skillet rather than microwave to restore texture. According to FDA food safety guidelines, cooked squash should not remain in the temperature danger zone (40°F-140°F) for more than 2 hours.


 浙公网安备
33010002000092号
浙公网安备
33010002000092号 浙B2-20120091-4