
Thin pork loin chops present a unique challenge for home cooks—they're prone to drying out if handled incorrectly, yet can deliver incredible flavor when cooked properly. After years of testing methods in professional kitchens and home settings, I've perfected a reliable technique that guarantees juicy, flavorful results without complicated equipment or ingredients.
Why Thin Pork Loin Chops Fail (And How to Prevent It)
The primary reason thin pork chops become dry and tough is overcooking. At just ¼ to ½ inch thick, these cuts cook extremely quickly—often in under 6 minutes total. Unlike thicker cuts, they have minimal buffer against heat penetration. The USDA's Food Safety and Inspection Service confirms that pork reaches safe doneness at 145°F (63°C) with a 3-minute rest period, not the previously recommended 160°F that often resulted in dry meat.
Pre-Cooking Preparation: Setting Up for Success
Proper preparation makes the difference between rubbery and restaurant-quality pork chops:
Selection and Handling
Choose chops with even thickness (¼ to ½ inch) and some marbling for moisture retention. Avoid pre-packaged chops sitting in liquid, which indicates possible water injection that affects cooking. According to the National Pork Board, properly handled fresh pork should have a firm texture and pale pink color.
Temperature Equilibrium
Remove chops from refrigeration 20-30 minutes before cooking. Cooking cold meat creates uneven heat distribution—exterior overcooks while interior reaches temperature. This simple step prevents the common issue of gray, overcooked edges with undercooked centers.
Drying and Seasoning
Pat chops thoroughly dry with paper towels—moisture is the enemy of proper searing. Season generously with salt (¼ teaspoon per chop) at least 15 minutes before cooking. For enhanced flavor, add black pepper, garlic powder, and a pinch of smoked paprika. The salt draws out surface moisture initially, then dissolves and is reabsorbed, improving both texture and taste.
| Cooking Method | Best For Thin Chops? | Key Advantage | Limitation |
|---|---|---|---|
| Searing in cast iron | ✓ Best option | Superior heat retention for perfect crust | Requires proper preheating |
| Non-stick skillet | ✓ Good option | Easier for beginners | Less effective browning |
| Grilling | ✗ Not recommended | Smoky flavor | High risk of overcooking thin cuts |
| Oven baking | ✗ Poor option | Hands-off cooking | Rarely achieves proper sear |
The Foolproof Cooking Process
Pan and Oil Selection
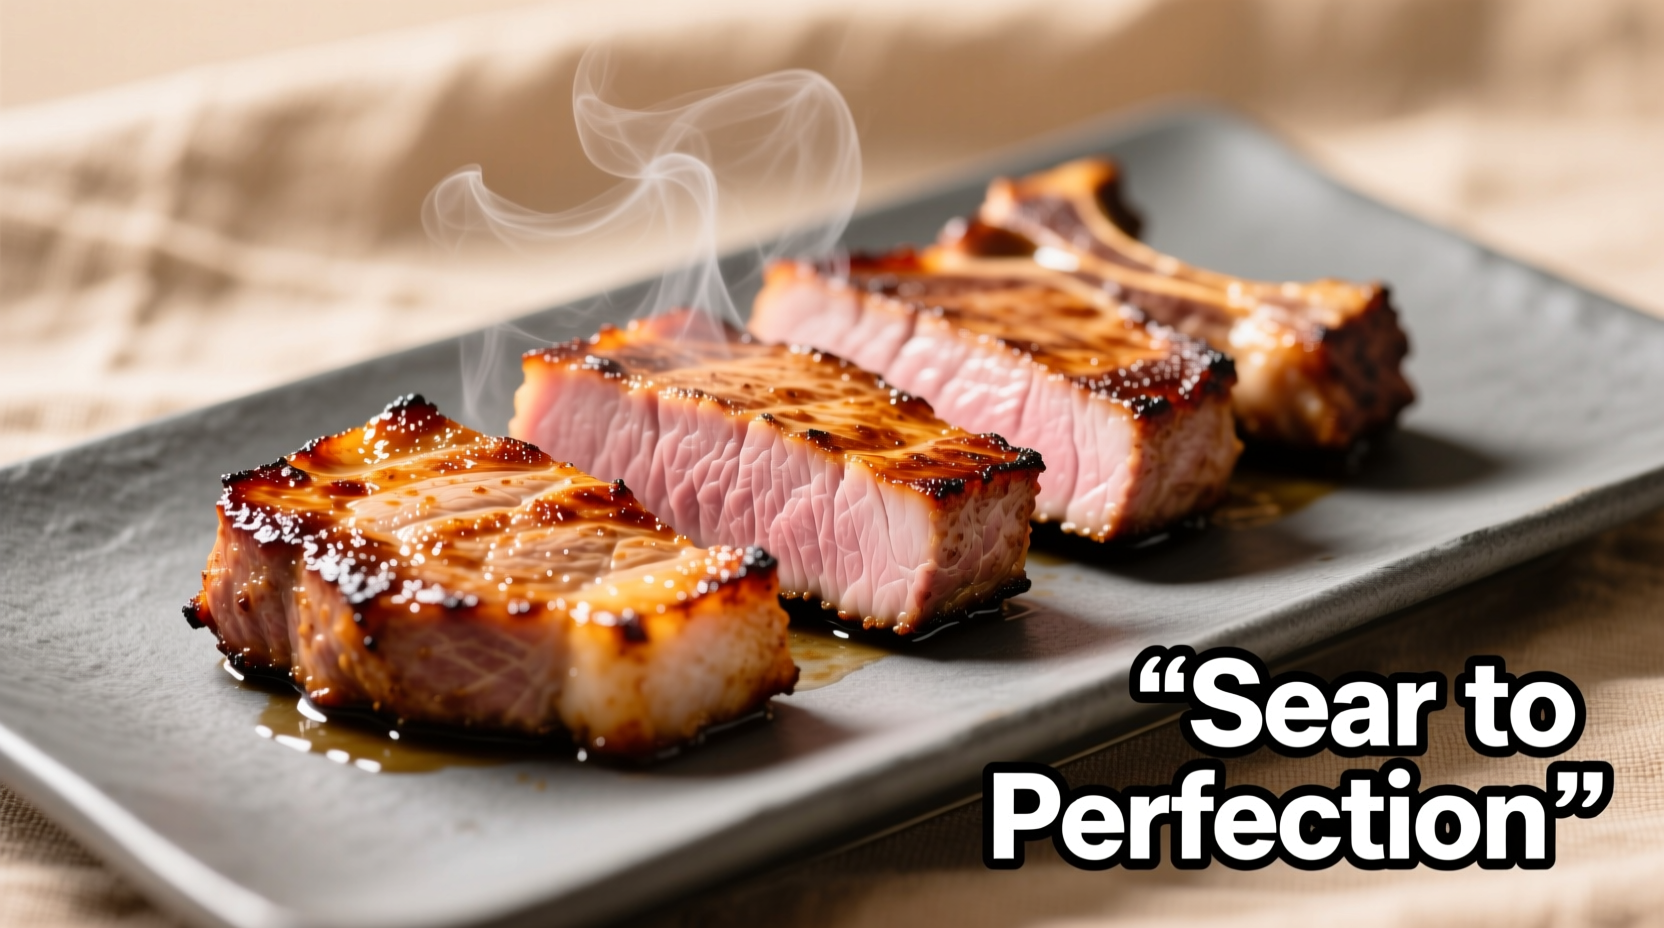
Use a heavy-bottomed skillet (cast iron preferred) preheated to 400°F (204°C). Add enough high-smoke point oil (avocado, canola, or grapeseed) to lightly coat the surface—about 1 tablespoon. The oil should shimmer but not smoke. This temperature balance creates the Maillard reaction for flavor development without burning.
Searing Technique
Place chops in hot skillet without crowding (cook in batches if necessary). Press gently with a spatula for 10 seconds to ensure full contact. Cook undisturbed for 2-3 minutes until a golden-brown crust forms. Flip once using tongs and cook 2-3 minutes more. For extra flavor, add 2 tablespoons butter, 2 smashed garlic cloves, and fresh thyme during the last minute, basting the chops continuously.
Temperature Monitoring
Use an instant-read thermometer to check doneness. Insert horizontally into the thickest part—thin chops require careful placement to avoid hitting the pan. Remove from heat at 140°F (60°C); carryover cooking will raise temperature to the safe 145°F (63°C) during resting. This precision prevents the #1 mistake home cooks make with thin pork chops: overcooking by just 30 seconds.
Resting Protocol
Transfer chops to a wire rack (not a plate) and tent loosely with foil for 5 minutes. This allows juices to redistribute without steaming the crust. Never skip this step—thin cuts lose moisture rapidly when sliced immediately after cooking.
Troubleshooting Common Issues
Preventing Sticking
If chops stick during cooking, they haven't developed sufficient crust. Wait until they release naturally—forcing them will tear the meat. Ensure your pan is properly preheated and the meat is thoroughly dry before cooking.
Handling Uneven Thickness
If your chops have varying thickness, fold thinner sections under or use the "butterfly" technique to create more uniform thickness. Alternatively, position thinner areas away from the hottest part of the pan.
Rescuing Overcooked Chops
If you accidentally overcook chops, slice thinly against the grain and serve with a complementary sauce like apple cider reduction or mushroom cream. The sauce adds moisture while the thin slices remain tender despite slight overcooking.
Serving Recommendations
Slice chops against the grain at a 45-degree angle for maximum tenderness. Pair with acidic sides like lemon-dressed greens or apple-fennel slaw to cut through the richness. For complete meal planning, the USDA's MyPlate guidelines recommend filling half your plate with vegetables when serving protein-rich dishes like pork.
Advanced Technique: Pan Sauce in 5 Minutes
After removing chops, deglaze the skillet with ¼ cup apple cider or chicken broth, scraping up browned bits. Reduce by half, then swirl in 2 tablespoons cold butter and fresh herbs. This simple sauce adds moisture and elevates the dish from basic to restaurant-quality.


 浙公网安备
33010002000092号
浙公网安备
33010002000092号 浙B2-20120091-4