
Why Microwave Sweet Potatoes? The Smart Cook's Shortcut
When you're craving a nutrient-packed sweet potato but don't have 45-60 minutes for oven baking, your microwave becomes the ultimate kitchen ally. This method isn't just about speed - it's scientifically proven to preserve more nutrients than boiling. According to research from the Harvard T.H. Chan School of Public Health, microwaving sweet potatoes retains up to 90% of their valuable beta-carotene compared to only 60% when boiled.

Your Microwave Sweet Potato Toolkit: 3 Essential Items
Forget complicated equipment - you only need these three items for flawless results:
- Fresh sweet potato (any variety works, but orange-fleshed types like Beauregard cook most evenly)
- Sharp fork (for proper venting - this prevents dangerous steam buildup)
- Microwave-safe plate (never use metal or foil in the microwave)
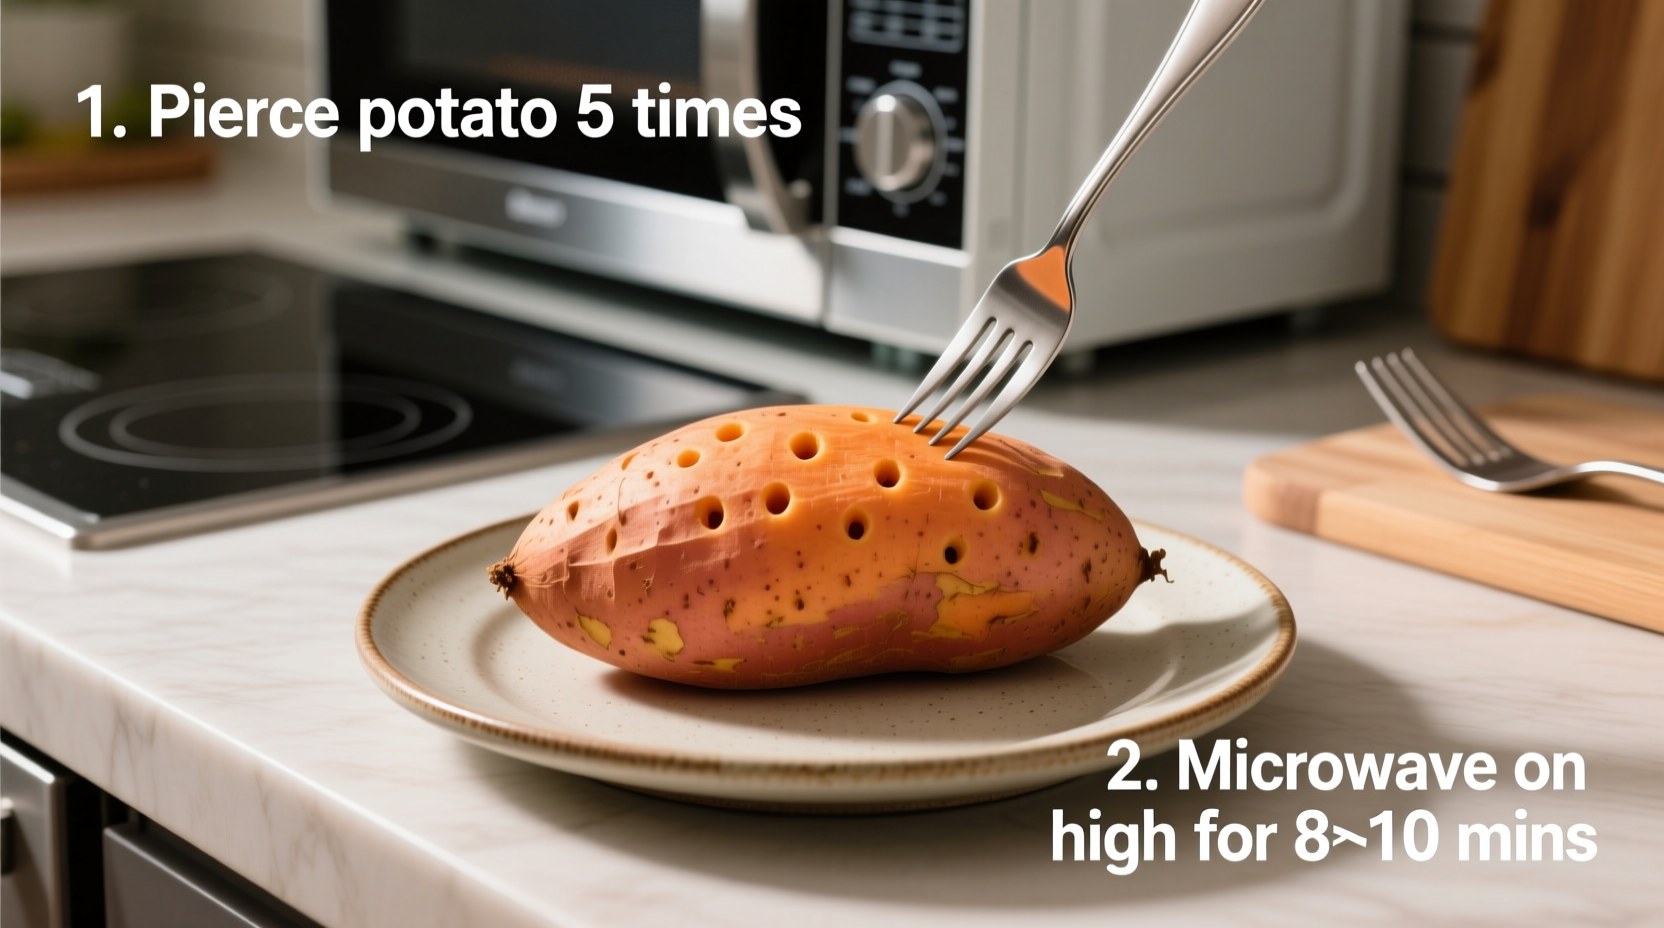
Step-by-Step: Perfect Microwave Sweet Potato in 4 Simple Actions
Step 1: Prep Like a Pro (60 Seconds)
Wash your sweet potato thoroughly under cool running water, scrubbing away any dirt with a vegetable brush. This crucial step removes potential contaminants - the USDA Food Safety and Inspection Service recommends washing all produce even if you plan to peel it, as bacteria can transfer from the outside to the inside during preparation.
Using a sharp fork, pierce the sweet potato 8-12 times around its surface. These vents allow steam to escape safely during cooking. Skip this step and you risk a messy (and potentially dangerous) microwave explosion.
Step 2: Strategic Placement Matters
Place the prepared sweet potato directly on a microwave-safe plate - no water, no wrapping, no foil. Contrary to popular belief, wrapping sweet potatoes in plastic or paper towels creates uneven cooking and can lead to soggy texture. The University of Minnesota Extension confirms that microwaving vegetables without added water preserves more nutrients and maintains better texture.
Step 3: Precision Cooking Times by Size
Microwave cooking time depends entirely on your potato's size and your appliance's wattage. Use this foolproof reference table:
| Sweet Potato Size | 500-700W Microwave | 800-1000W Microwave | 1000W+ Microwave |
|---|---|---|---|
| Small (4-6 oz) | 4-5 minutes | 3-4 minutes | 2.5-3.5 minutes |
| Medium (6-8 oz) | 5-6 minutes | 4-5 minutes | 3.5-4.5 minutes |
| Large (8-10+ oz) | 6-8 minutes | 5-7 minutes | 4.5-6 minutes |
Critical tip: Pause halfway through cooking and flip your sweet potato. This simple action ensures even heating and prevents cold spots. Most home microwaves have uneven energy distribution, so rotation is essential for perfect results.
Step 4: The Foolproof Doneness Test
Don't guess - verify! Insert a skewer or thin knife into the thickest part of your sweet potato. It should slide in with no resistance, like butter. For scientific precision, use an instant-read thermometer - properly cooked sweet potatoes reach 205°F (96°C) internally, according to USDA food safety standards.
If your potato needs more time, continue microwaving in 30-second increments. Overcooking leads to dry, stringy texture - far worse than slightly undercooked (which you can easily fix).
Serving Your Microwave Sweet Potato: 3 Healthy Options
Now that you've mastered the cooking technique, elevate your sweet potato with these nutritionist-approved toppings:
- The Classic: A pinch of sea salt and 1 tsp of grass-fed butter or extra-virgin olive oil (enhances beta-carotene absorption)
- Protein Power: 2 tbsp of black beans and a sprinkle of pumpkin seeds (creates a complete protein profile)
- Sweet & Spicy: A dash of cinnamon and cayenne pepper (studies show this combination helps regulate blood sugar)
Troubleshooting Common Microwave Sweet Potato Issues
Problem: Cold spots in the center
Solution: Always flip your potato halfway through cooking. Higher-wattage microwaves (1000W+) often require an additional quarter-turn for even heating. If problems persist, try reducing total cooking time by 20% and increasing flip frequency.
Problem: Soggy or watery texture
Solution: Never wrap your sweet potato in anything while microwaving. The natural moisture inside the potato creates the perfect steaming environment. If your potato seems too moist after cooking, let it rest uncovered for 3-5 minutes - this allows excess moisture to evaporate.
Problem: Skin separates from flesh
Solution: This indicates overcooking. Reduce total cooking time by 15-20% next time. Remember that sweet potatoes continue cooking from residual heat for several minutes after removal from the microwave.
Storage and Reheating: Maintaining Quality
Store leftover cooked sweet potato in an airtight container in the refrigerator for up to 5 days. When reheating, place leftovers on a microwave-safe plate and cover loosely with a damp paper towel. Heat at 50% power for 60-90 seconds - this gentle approach prevents the common problem of rubbery texture that occurs with high-power reheating.
Why This Method Beats Traditional Baking
While oven-baked sweet potatoes have their place, the microwave method offers distinct advantages that align with modern cooking needs:
- Time efficiency: 80% faster than oven baking (5-8 minutes vs 45-60 minutes)
- Nutrient preservation: Retains more water-soluble vitamins than boiling
- Energy savings: Uses approximately 75% less energy than conventional oven cooking
- Consistent results: Eliminates variables like oven temperature fluctuations


 浙公网安备
33010002000092号
浙公网安备
33010002000092号 浙B2-20120091-4