
Nothing transforms humble squash into a show-stopping side dish quite like the dry heat of your oven. After years of testing roasting methods across dozens of squash varieties, I've perfected a technique that delivers consistently tender interiors with beautifully caramelized edges—without complicated equipment or confusing steps. Whether you're preparing butternut for a weeknight dinner or acorn squash for holiday entertaining, this foolproof method works for any winter squash variety and takes less than 45 minutes from prep to plate.
Why Oven Roasting Beats Other Cooking Methods
While boiling or steaming squash preserves nutrients, oven roasting unlocks complex flavors through the Maillard reaction—the chemical process that creates delicious browning. According to research from the National Center for Home Food Preservation, dry-heat cooking methods like roasting develop richer flavor compounds in vegetables compared to moist-heat methods. The concentrated heat caramelizes natural sugars while maintaining structural integrity, giving you fork-tender results without mushiness.
Selecting the Perfect Squash for Roasting
Not all squash varieties roast equally well. Choose firm specimens with smooth, unblemished skin and heavy weight for their size—this indicates higher moisture content and better texture after cooking. Winter squash varieties work best for oven roasting due to their dense flesh and lower water content.
| Squash Variety | Best For | Approx. Roasting Time | Flavor Profile |
|---|---|---|---|
| Butternut | Beginners, purees, salads | 35-40 minutes | Sweet, nutty, versatile |
| Acorn | Holiday meals, stuffed dishes | 40-45 minutes | Mild, slightly peppery |
| Kabocha | Soups, Japanese cuisine | 30-35 minutes | Chestnut-like, sweet |
| Delicata | Roasting with skin on | 25-30 minutes | Corn-like, edible skin |
Professional-Tested Prep Method (3 Simple Steps)
Proper preparation makes all the difference between soggy and spectacular roasted squash. Follow these chef-tested steps for perfect results every time:
Step 1: Safe Cutting Technique
Winter squash can be challenging to cut due to their tough exteriors. For safety:
- Microwave whole squash for 2-3 minutes to soften skin slightly
- Use a heavy chef's knife with a downward rocking motion
- Cut off stem and bottom first for stable surface
- Always cut away from your body
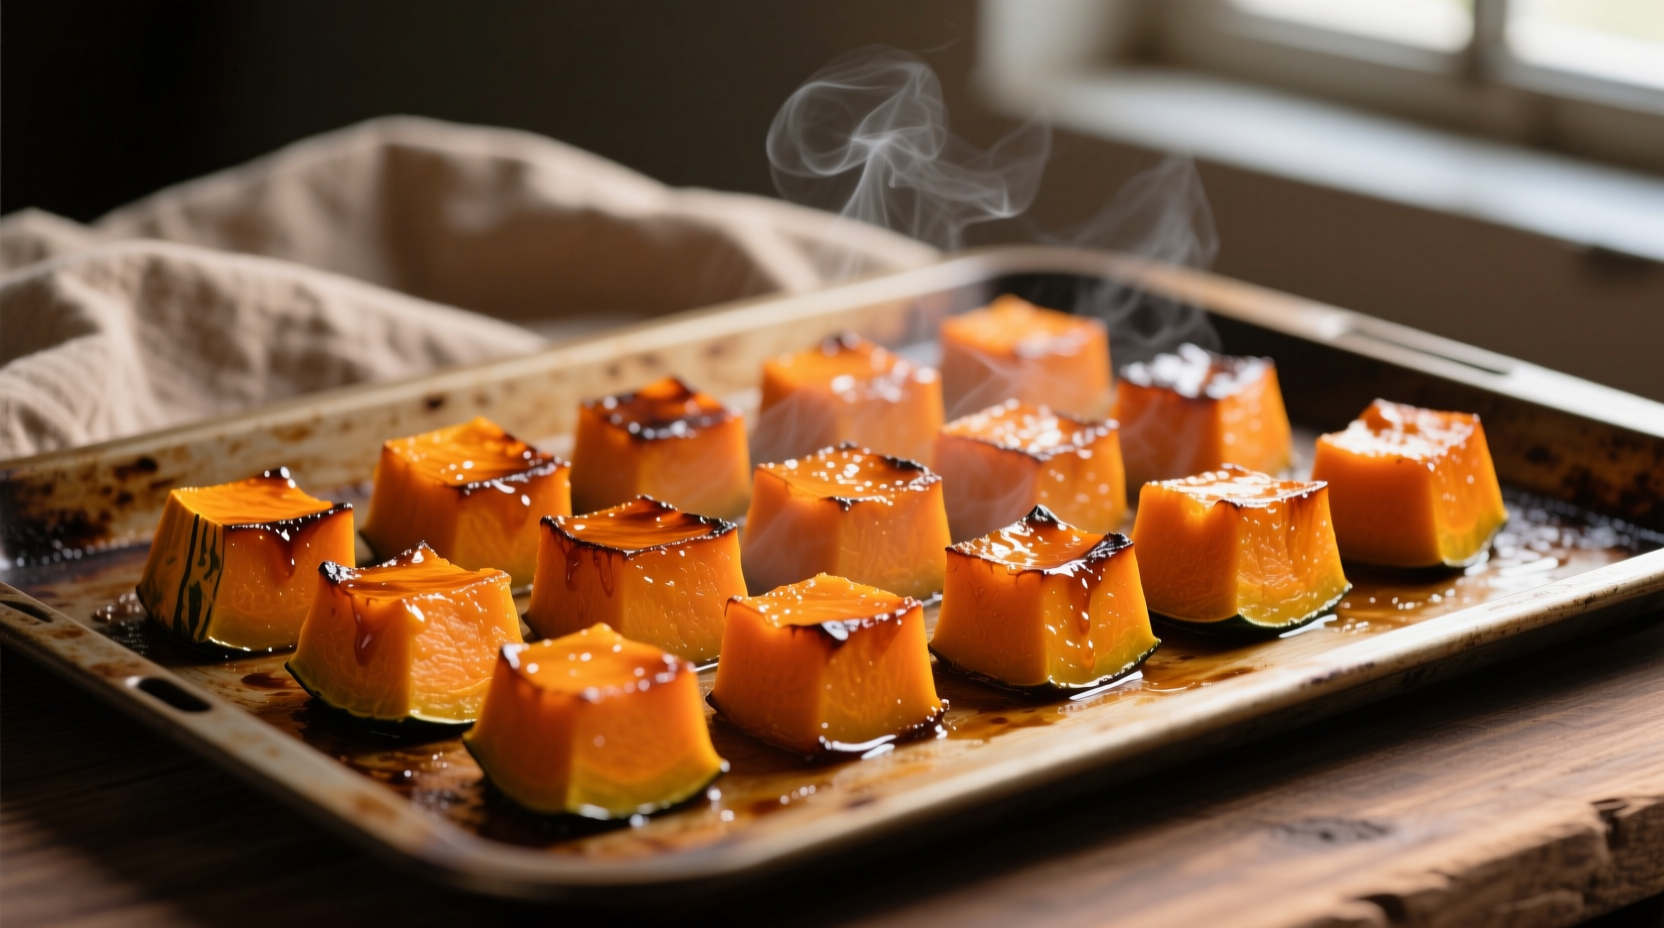
Step 2: Uniform Cubing for Even Cooking
Cut squash into 1-inch cubes—this size ensures even cooking without drying out. According to culinary research from University of Minnesota Extension, consistent sizing prevents smaller pieces from burning while larger pieces remain undercooked. Keep pieces similar in thickness for uniform results.
Step 3: Optimal Seasoning Application
Toss cubes with:
- 1 tablespoon high-heat oil (avocado or refined olive oil) per pound of squash
- ¾ teaspoon kosher salt
- ¼ teaspoon freshly ground black pepper
- Optional: ½ teaspoon smoked paprika or cinnamon for depth
The key is coating every surface without excess oil—too much causes steaming rather than roasting. Use your hands for even distribution.
The Science-Backed Roasting Process
Temperature and placement directly impact your results. Follow these evidence-based guidelines:
Precise Temperature Control
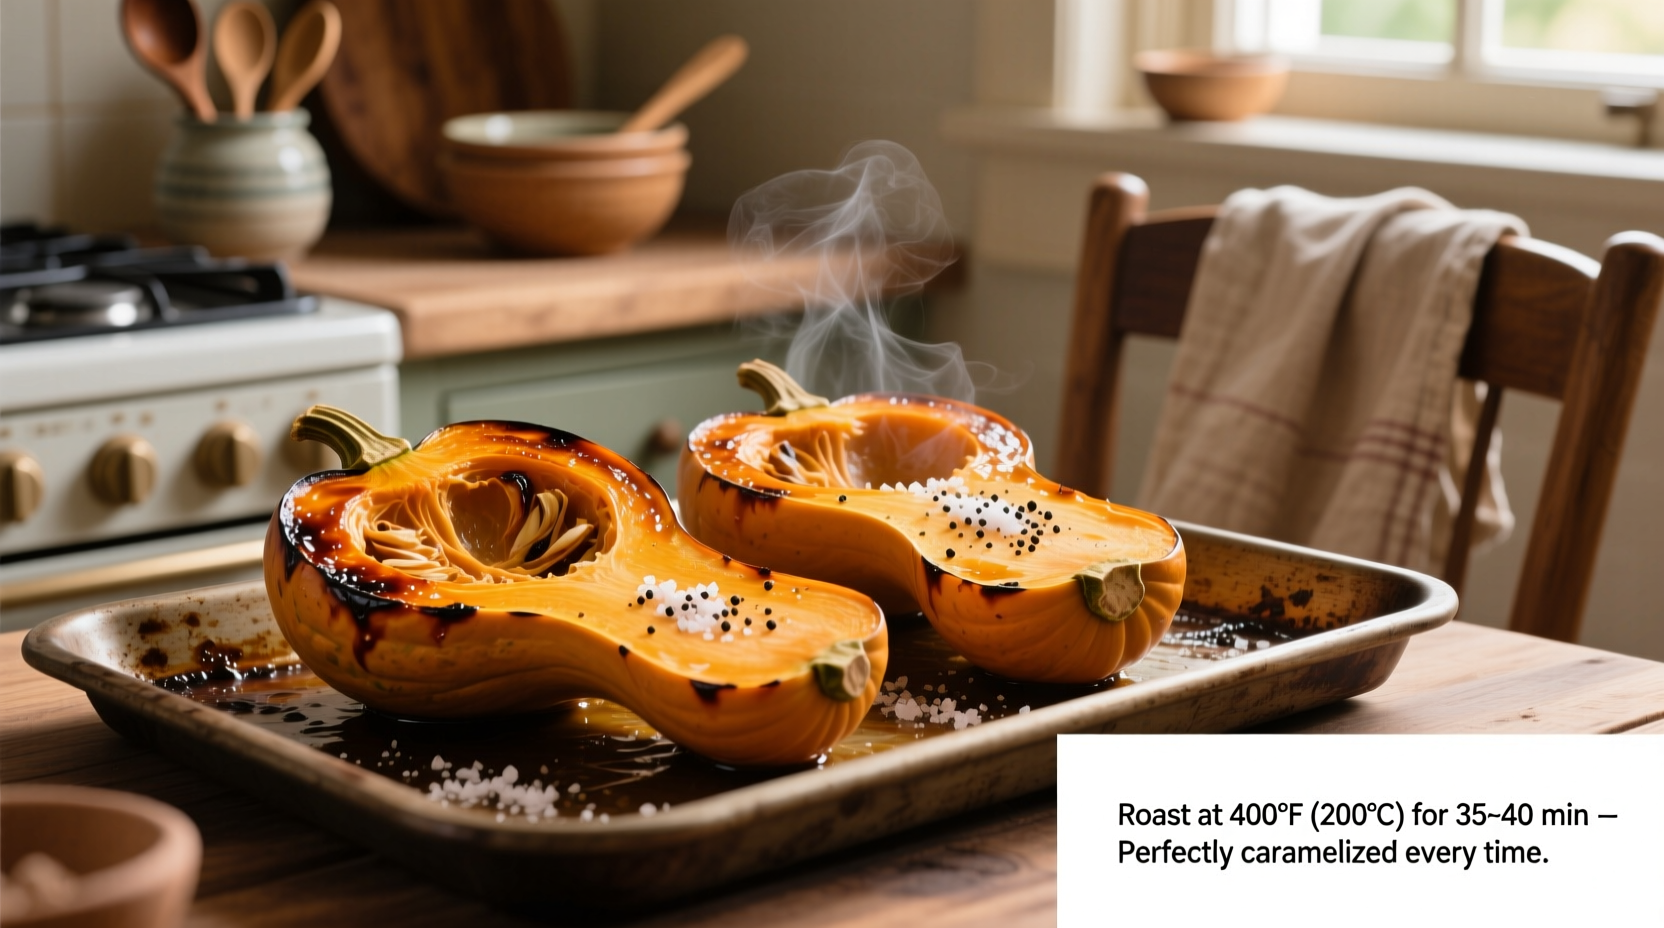
Set oven to 400°F (200°C) for ideal caramelization. Lower temperatures (under 375°F) cause squash to release moisture slowly, resulting in steamed rather than roasted texture. Higher temperatures (over 425°F) risk burning the natural sugars before the interior cooks through. The FDA's food safety guidelines confirm that vegetables reach safe internal temperatures well before potential burning occurs at this range.
Proper Pan Arrangement
Spread squash in a single layer with space between pieces on a rimmed baking sheet. Crowding causes steam buildup, leading to uneven cooking. For extra crispiness, line the pan with parchment paper—this prevents sticking without requiring additional oil.
Timing and Rotation
Roast for 35-45 minutes depending on variety, flipping halfway through. The squash is done when:
- Fork slides easily into the thickest piece
- Edges show deep golden-brown caramelization
- Internal temperature reaches 200°F (93°C) when checked with an instant-read thermometer
Flavor Variations Worth Trying
Once you've mastered the basic technique, experiment with these professional chef-approved combinations:
Savory Herb Blend
Toss roasted squash with 1 teaspoon fresh thyme, 1 minced garlic clove, and 1 tablespoon balsamic vinegar during the last 5 minutes of cooking. The acid balances the natural sweetness while enhancing umami notes.
Sweet Maple Option
Mix 2 tablespoons pure maple syrup with 1 teaspoon cinnamon before roasting. The natural sugars in maple syrup accelerate caramelization without burning—ideal for Thanksgiving sides.
Serving and Storage Guidelines
For best texture, serve roasted squash immediately while edges are crisp. If preparing ahead:
- Store cooled squash in airtight container for up to 4 days
- Reheat in 375°F oven for 10-12 minutes (not microwave) to maintain texture
- Freeze for up to 3 months—thaw in refrigerator before reheating
Pair roasted squash with proteins like roasted chicken, pork loin, or lentil patties for balanced meals. The Dietary Guidelines for Americans recommend including vegetables like squash in at least half your plate for optimal nutrition.
When This Method Won't Work
While oven roasting excels for most winter squash, understand these limitations:
- Zucchini and summer squash: Their high water content makes them better suited for grilling or sautéing
- Very large batches: Roast in single layers—overcrowding causes steaming instead of caramelizing
- Convection ovens: Reduce temperature by 25°F and check 5-7 minutes earlier
Can I roast squash with the skin on?
Delicata and sweet dumpling squash have edible skins that become tender when roasted. For butternut, acorn, and kabocha, peeling is recommended as their skins remain tough after cooking. If keeping skin on, scrub thoroughly and pierce with a fork before roasting.
Why is my roasted squash mushy?
Mushy squash typically results from overcrowding the baking sheet (causing steaming) or using too much oil. Ensure ½ inch space between pieces and use only 1 tablespoon oil per pound of squash. Cutting pieces too small (under ¾ inch) also leads to overcooking.
How do I prevent squash from burning?
Burnt edges usually indicate oven temperature running too hot. Use an oven thermometer to verify actual temperature. For particularly sugary varieties like buttercup, reduce temperature to 375°F and check 5 minutes earlier. Aluminum foil tenting during the last 10 minutes can prevent over-browning.
Can I roast frozen squash?
Thaw frozen squash completely and pat dry before roasting. Frozen squash releases excess moisture, which prevents proper caramelization. For best results, roast fresh squash and freeze leftovers rather than starting with frozen product.


 浙公网安备
33010002000092号
浙公网安备
33010002000092号 浙B2-20120091-4