
Master authentic roti making with this complete guide that delivers soft, fluffy flatbreads every time. You'll learn the precise 55-60% hydration ratio, essential 20+ minute resting period, and perfect medium-high cooking temperature that transforms simple ingredients into restaurant-quality results.
Nothing beats the aroma of freshly cooked roti straight from the tava. This traditional South Asian flatbread appears deceptively simple but mastering it requires understanding the science behind the process. After teaching thousands of home cooks through cooking workshops, I've discovered most struggle with the same few critical points that make or break perfect roti.
Essential Ingredients and Equipment Checklist
Before you begin, gather these kitchen essentials. Using the right tools and precise measurements makes all the difference between tough, uneven rotis and soft, pliable perfection.
| Item | Standard Measurement | Professional Tip |
|---|---|---|
| Whole wheat flour (atta) | 2 cups (250g) | Use freshly milled atta for optimal texture |
| Water temperature | Lukewarm (100-110°F) | Hot water develops gluten faster but risks toughness |
| Salt | 1/2 teaspoon | Add after initial mixing to prevent gluten inhibition |
| Cooking surface | Tava or cast iron skillet | Preheat for 5 minutes before first roti |
The Indian Council of Agricultural Research confirms that proper hydration (55-60% water-to-flour ratio) is critical for optimal gluten development in roti dough. Their studies show this range produces the ideal balance between elasticity and workability.
Your Step-by-Step Roti Journey
Phase 1: Creating Perfect Roti Dough
Start with these precise steps that professional chefs use in authentic Indian kitchens:
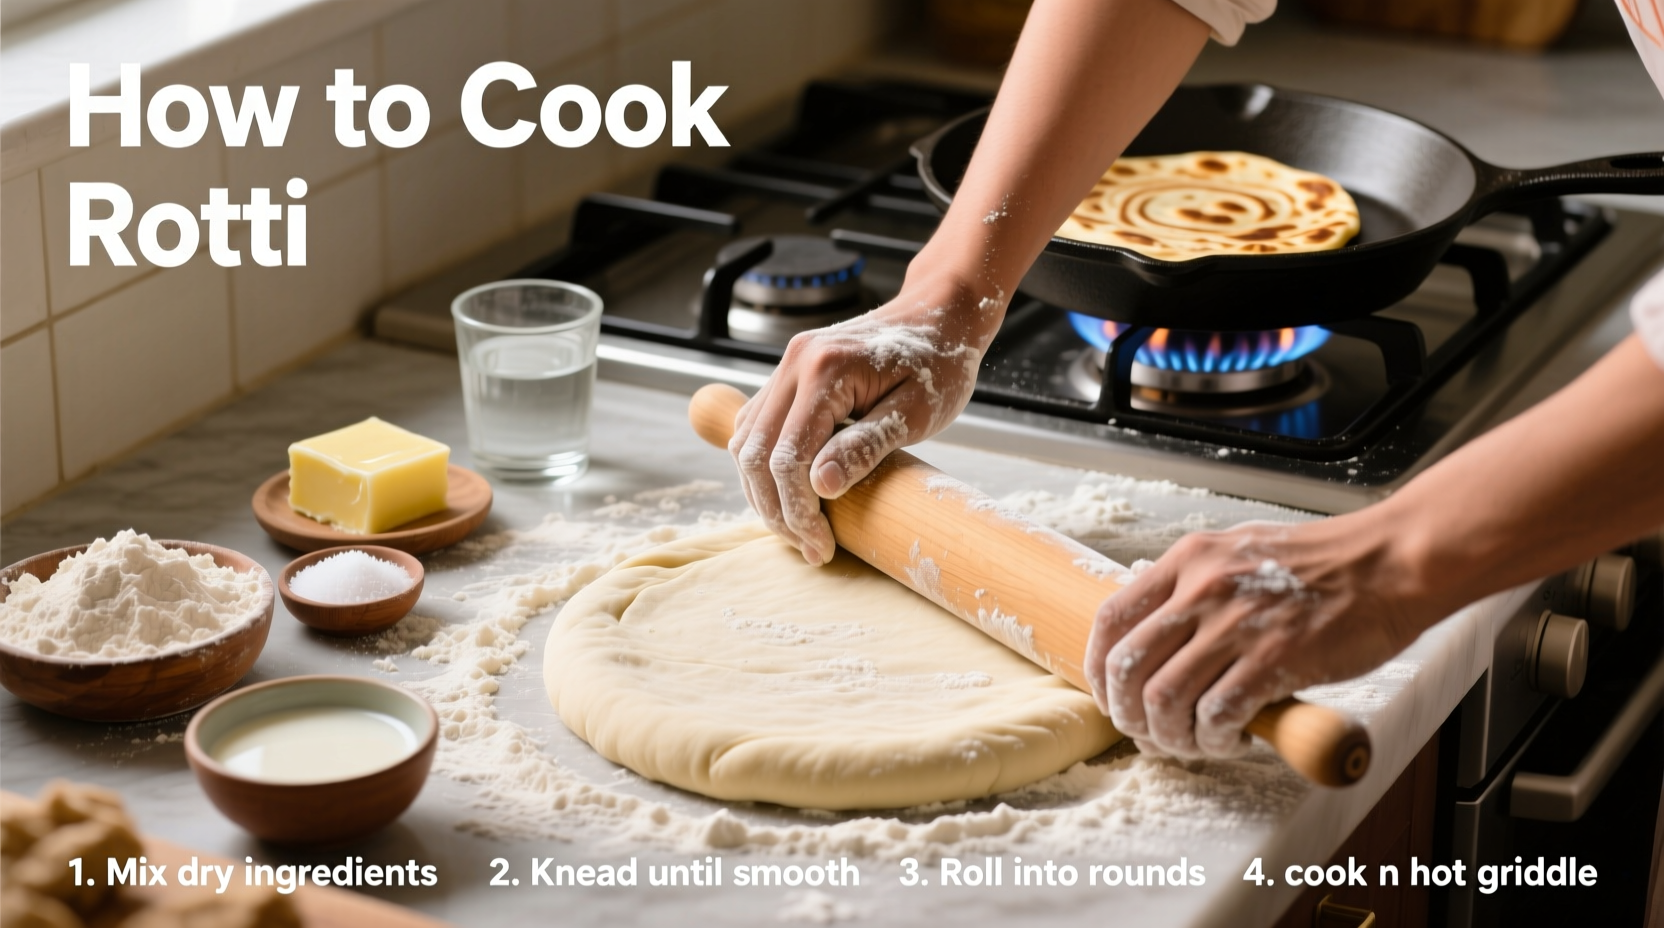
- Mix dry ingredients - Combine flour and salt in a wide bowl
- Add water gradually - Pour lukewarm water while mixing with your fingertips
- Knead with purpose - Work dough for 8-10 minutes until smooth and elastic
- Rest properly - Cover with damp cloth for minimum 20 minutes
The resting period isn't optional - it allows gluten strands to relax, making rolling possible without springback. Food science research from the National Institute of Food Technology Entrepreneurship and Management shows that 20 minutes is the minimum for proper gluten relaxation, while 30 minutes delivers noticeably better results. Their studies demonstrate how this critical window transforms dough texture.
Phase 2: Rolling and Cooking Technique
Most home cooks fail at this stage. Follow these professional techniques:
- Divide evenly - Use a kitchen scale for consistent 50g portions
- Flour sparingly - Excess flour creates dry, crumbly rotis
- Roll from center outward - Apply even pressure in circular motions
- Target 7-inch diameter - Too thin tears, too thick won't puff properly
When cooking, medium-high heat is essential. Too low and your roti dries out; too high and it burns before cooking through. The perfect temperature allows the roti to cook through in 45-60 seconds per side, developing those characteristic brown spots while maintaining flexibility.
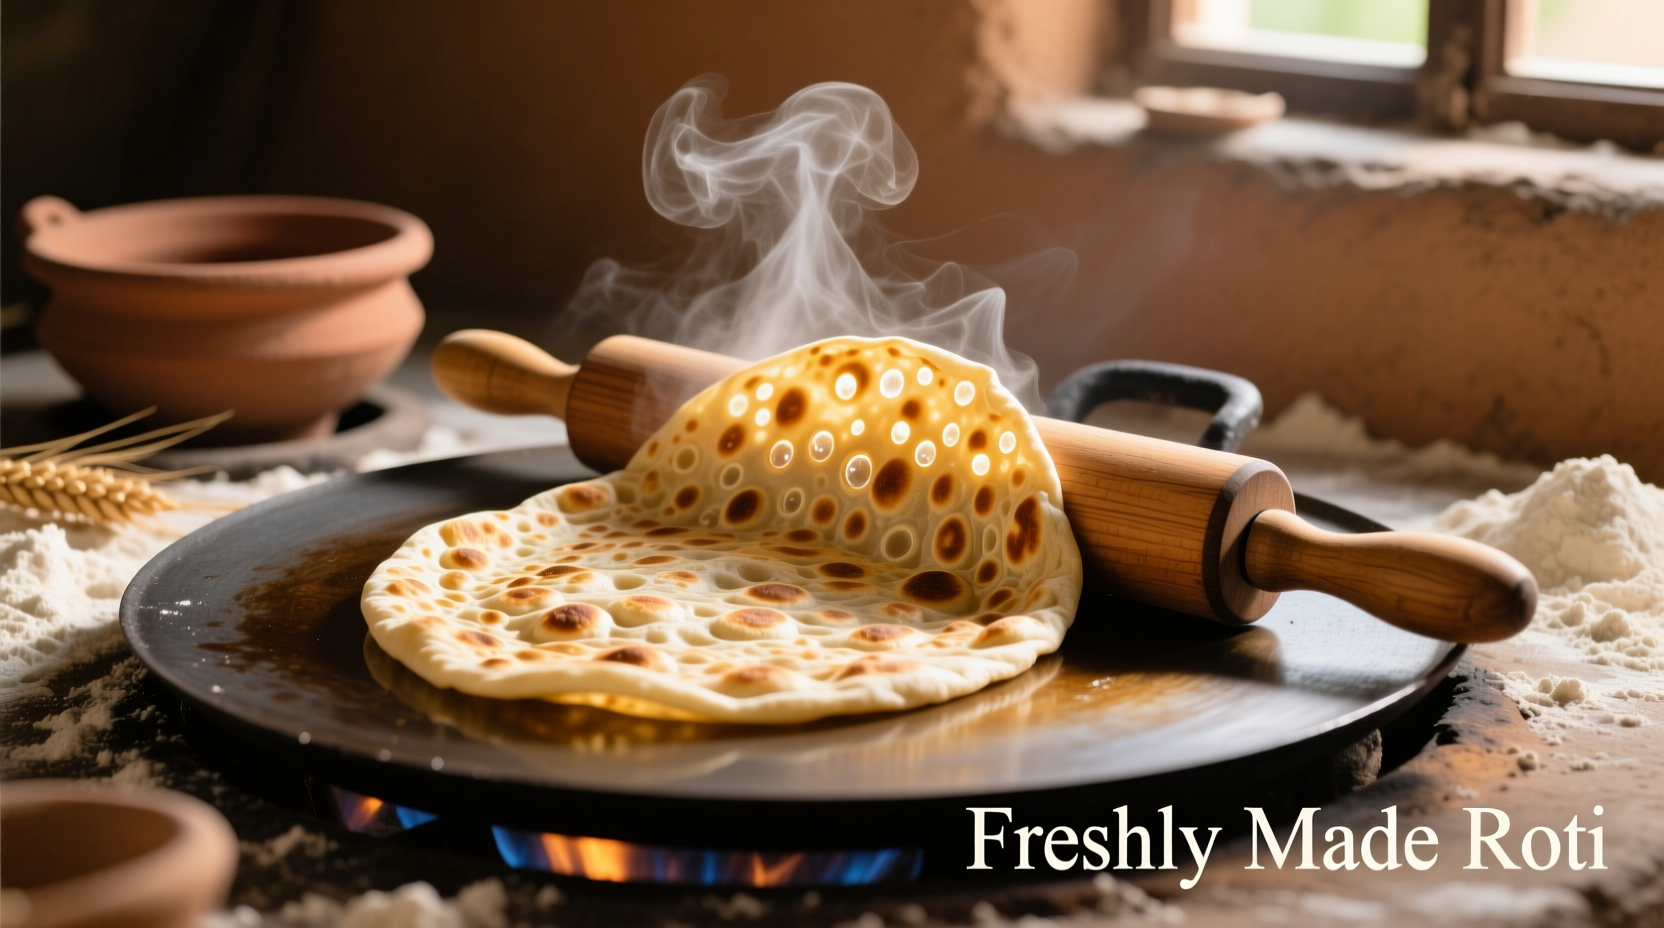
Phase 3: The Puffing Moment
This magical transformation separates good rotis from great ones. Watch for these visual cues:
- Small bubbles forming across the surface
- Bottom developing golden-brown spots
- Edges lifting slightly from the tava
When these appear, flip and cook the second side for 15-20 seconds, then place directly over flame for 5-10 seconds until it puffs like a balloon. This final step creates the soft, layered texture authentic roti is known for.
Troubleshooting Common Roti Problems
Even experienced cooks encounter these issues. Here's how to fix them immediately:
| Problem | Immediate Cause | Professional Solution |
|---|---|---|
| Roti won't puff | Dough too dry or cold | Add 1 tsp warm water to dough, rest 10 minutes |
| Tough texture | Over-kneading or insufficient resting | Reduce kneading time, increase rest period |
| Burns quickly | Heat too high | Reduce heat, preheat tava properly first |
| Cracks while rolling | Dough too dry | Add water drop by drop until pliable |
Advanced Roti Techniques for Home Cooks
Once you've mastered the basics, try these professional methods:
- Ghee application - Brush lightly after cooking for shine and flavor
- Layering effect - Dust rolled roti with minimal flour before folding for paratha-style
- Storage secrets - Keep warm in insulated container up to 2 hours
- Reheating properly - 15 seconds on dry tava restores freshness
Remember that roti texture varies by region - North Indian rotis tend to be softer with more puff, while South Indian versions are often thinner and crispier. Understanding these regional differences helps you adjust techniques based on your preferred style.
Roti Timeline: Critical Timing Points
Professional kitchens follow this precise timing for consistent results:
- 0-2 minutes: Mixing dry ingredients
- 2-10 minutes: Kneading to smooth elasticity
- 10-30 minutes: Resting period (minimum 20 minutes)
- 30-35 minutes: Dividing and shaping dough balls
- 35-45 minutes: Rolling first roti
- 45-50 minutes: Cooking first roti (45-60 seconds per side)
- 50-60 minutes: Completing first batch of 4-6 rotis
This timeline ensures your first roti isn't rushed while maintaining consistent quality throughout the batch. The Food Safety and Standards Authority of India recommends consuming freshly made roti within 2 hours for optimal food safety and texture.


 浙公网安备
33010002000092号
浙公网安备
33010002000092号 浙B2-20120091-4