
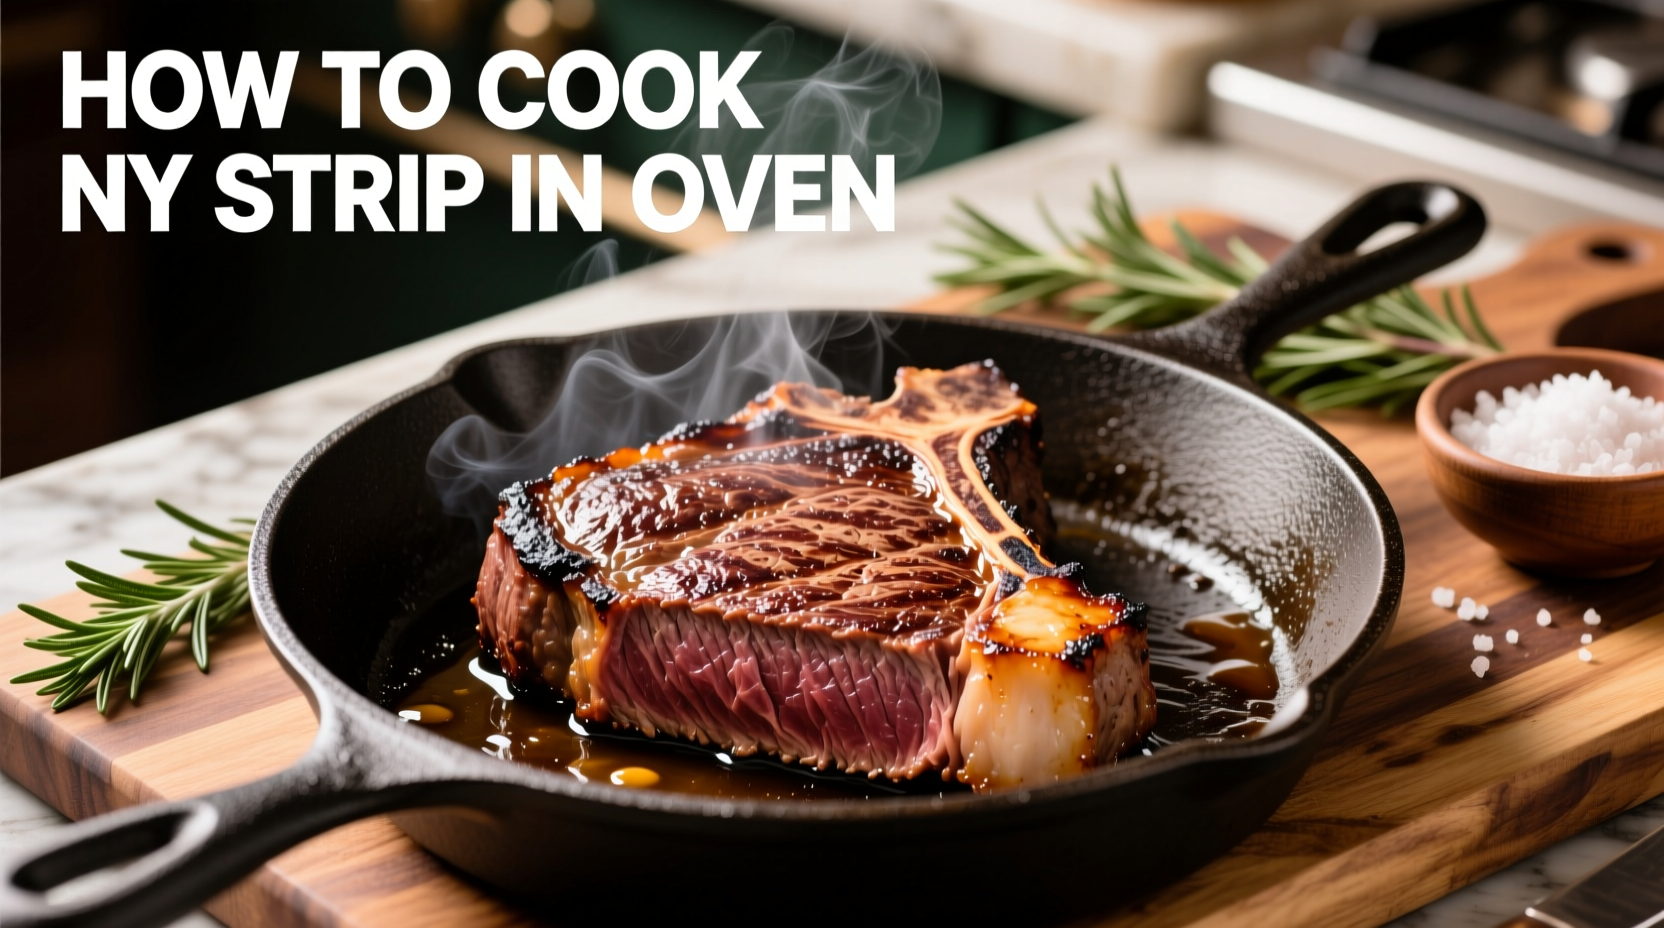
Cooking the perfect NY strip steak in your oven delivers professional results without specialized equipment. This method combines high-heat searing with precise oven finishing to create a beautifully caramelized crust while maintaining an evenly cooked interior. You'll achieve consistent results every time with this straightforward technique that works for steaks 1-1.5 inches thick.
Why Oven Cooking Works Best for NY Strip
The New York strip's generous marbling and firm texture make it ideal for oven cooking. Unlike thicker cuts that benefit from reverse searing, the NY strip's moderate thickness (typically 1-1.5 inches) responds perfectly to the traditional sear-then-oven method. This approach creates the Maillard reaction for flavor development while allowing precise temperature control through the center.
Essential Prep: Setting Up for Success
Proper preparation determines your steak's final quality more than any other factor. Begin with these critical steps:
- Choose the right cut: Select a well-marbled NY strip at least 1 inch thick with bright red color and creamy white fat
- Temperature matters: Remove steak from refrigerator 45-60 minutes before cooking to reach room temperature
- Dry surface is crucial: Pat thoroughly with paper towels to ensure proper searing
- Season simply: Generously coat with kosher salt and freshly ground black pepper 30-45 minutes before cooking
- Gather equipment: Heavy cast-iron or oven-safe skillet, instant-read thermometer, tongs, and aluminum foil
Step-by-Step Cooking Process
Follow this professional technique for flawless results:
1. Preheat and Sear
Preheat your oven to 400°F (204°C) with rack in the middle position. Heat your cast-iron skillet over medium-high heat for 5 minutes until smoking slightly. Add 1-2 tablespoons of high-smoke point oil (avocado or canola). Carefully place steak in skillet and press gently for full contact. Sear undisturbed for 2-3 minutes until a deep brown crust forms.
2. Flip and Add Aromatics
Flip steak using tongs and sear the other side for 2-3 minutes. During the last minute of searing, add 2 tablespoons of butter, 2 garlic cloves, and fresh thyme or rosemary sprigs to the skillet. Tilt pan and spoon melted butter over the steak continuously.
3. Oven Finish
Transfer the entire skillet to your preheated oven. Cook according to your desired doneness using this guide:
| Doneness | Internal Temperature | Oven Time (1" thick) | Visual Characteristics |
|---|---|---|---|
| Rare | 120-125°F (49-52°C) | 4-6 minutes | Bright red center, very soft |
| Medium-rare | 130-135°F (54-57°C) | 6-8 minutes | Warm red center, tender |
| Medium | 140-145°F (60-63°C) | 8-10 minutes | Pink center, slightly firm |
| Medium-well | 150-155°F (66-68°C) | 10-12 minutes | Small amount of pink, firm |
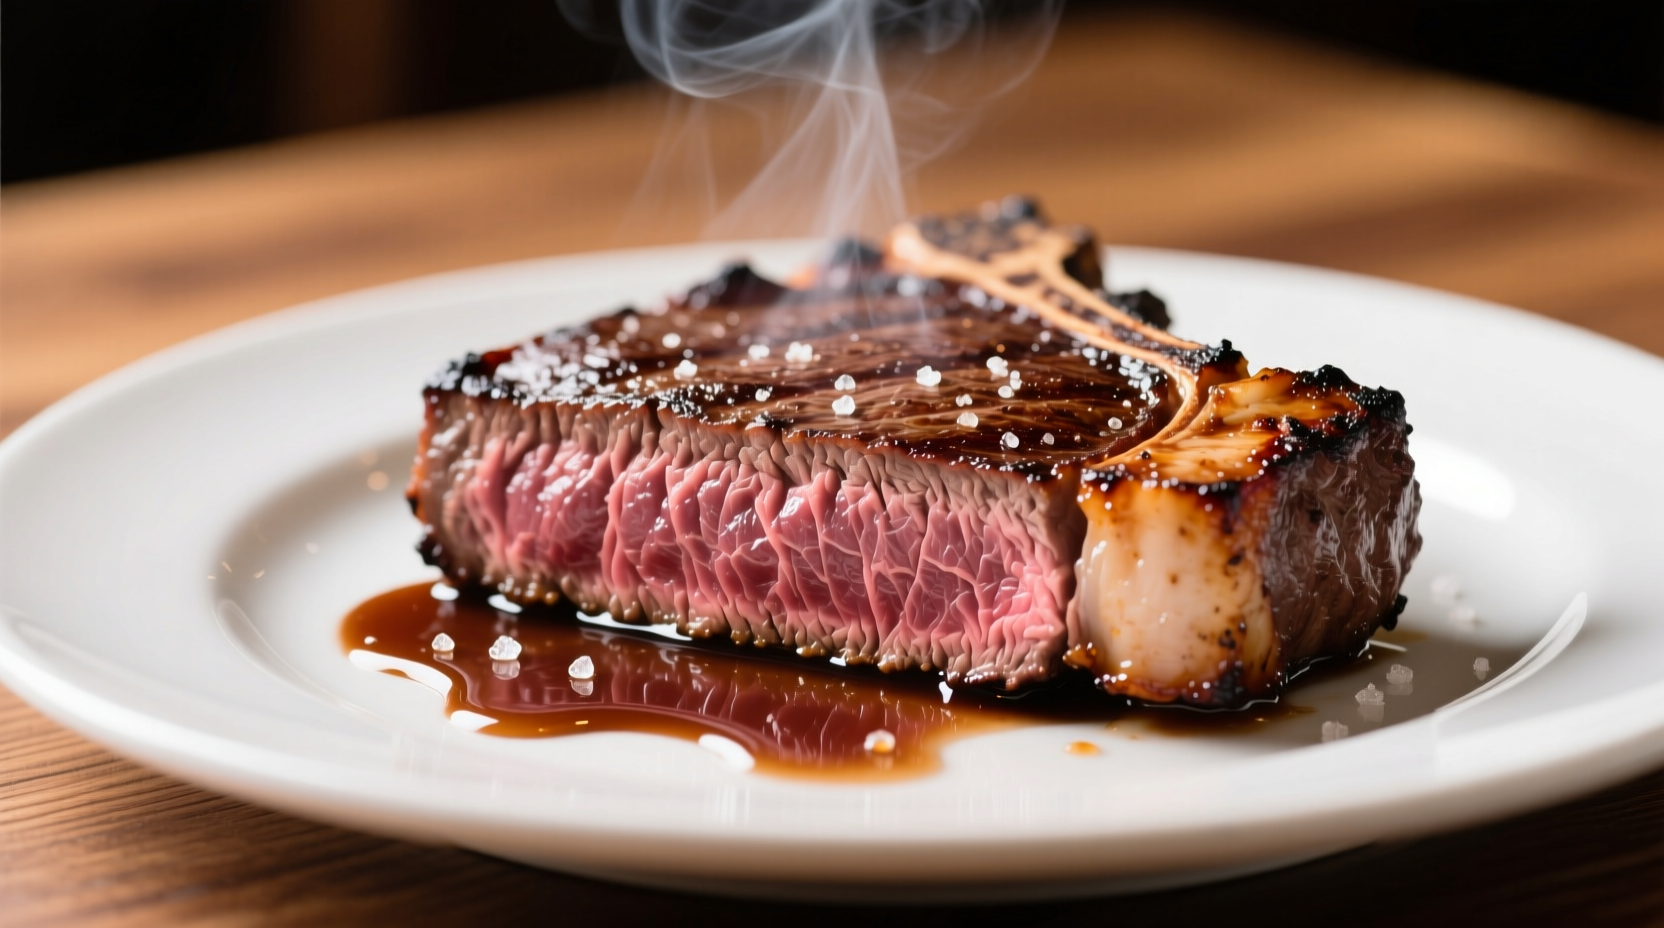
Important note: USDA recommends a minimum internal temperature of 145°F for beef, followed by a 3-minute rest. However, culinary professionals typically pull steak 5-10°F below target temperature due to carryover cooking during resting. Always use an instant-read thermometer for accuracy—this is the single most important tool for perfect steak.
4. The Critical Resting Phase
Transfer steak to a cutting board or warm plate, tent loosely with foil, and rest for 5-10 minutes. This allows juices to redistribute throughout the meat. During this time, the internal temperature will continue to rise 5-10°F (carryover cooking). Cutting too soon releases precious juices onto your plate rather than staying in the steak.
Troubleshooting Common Issues
Even experienced cooks encounter challenges. Here's how to handle frequent problems:
- Excessive smoke: Reduce oven temperature to 375°F and ensure proper ventilation. Trim excess fat that might drip and cause flare-ups.
- Uneven cooking: Rotate steak 180 degrees halfway through oven time. Thicker steaks benefit from flipping once in the oven.
- Overcooked exterior: Lower skillet heat slightly before searing. The goal is a good crust without burning.
- Undercooked center: Return to oven in 2-minute increments, checking temperature each time.
Pro Techniques for Elevated Results
Once you've mastered the basics, try these professional enhancements:
- Compound butter finish: Top rested steak with flavored butter (try blue cheese or herb variations)
- Reverse sear alternative: For thicker cuts (1.5"+), cook at 275°F until 115°F internally, then sear
- Smoking infusion: Add a wood chip pouch to the skillet during oven phase for subtle smokiness
- Temperature precision: Invest in a leave-in probe thermometer for exact monitoring
Why This Method Works: The Science Behind Perfect Steak
Understanding the culinary science improves your technique. The USDA Food Safety and Inspection Service confirms that the Maillard reaction—responsible for that desirable brown crust—occurs most effectively between 285-325°F. This explains why we sear first at high heat, then finish at a controlled oven temperature. Additionally, research from the American Meat Science Association shows that proper resting allows myoglobin (the protein that gives steak its red color and juiciness) to redistribute throughout the muscle fibers, preventing juice loss when sliced.
Storage and Reheating Tips
If you have leftovers (rare with a good steak!), store in an airtight container in the refrigerator for up to 3 days. For best reheating results, place steak in a 250°F oven until internal temperature reaches 110°F, then quickly sear for 60 seconds per side. Avoid microwaving, which creates uneven texture.


 浙公网安备
33010002000092号
浙公网安备
33010002000092号 浙B2-20120091-4