
Perfectly cooked fish fillet should be moist, flaky, and flavorful—not dry, rubbery, or undercooked. Whether you're a beginner or looking to refine your technique, this guide delivers professional chef methods adapted for home kitchens. You'll learn exactly how to select, prepare, and cook fish fillet using multiple methods, with precise timing and temperature guidance to ensure success every time.
Selecting Quality Fish Fillets for Cooking
Choosing fresh, high-quality fish is your first step toward a delicious result. Look for fillets with firm, translucent flesh that springs back when gently pressed. Avoid any with browned edges, excessive liquid in the packaging, or a strong 'fishy' odor—fresh fish should smell like the ocean, not pungent.
For beginners, consider these foolproof options:
- Cod: Mild flavor, thick cut, forgiving cooking window
- Haddock: Slightly sweeter than cod, excellent for pan-searing
- Tilapia: Budget-friendly, quick-cooking, ideal for weeknight meals
- Salmon: Richer flavor, more forgiving on timing due to higher fat content
| Fish Type | Best Cooking Method | Thickness for 4-min Cook Time | Sustainability Rating |
|---|---|---|---|
| Cod | Pan-searing, baking | 1 inch | ★★★☆ (MSC Certified) |
| Haddock | Pan-searing, broiling | 3/4 inch | ★★★☆ (Seafood Watch Recommended) |
| Tilapia | Pan-searing, baking | 1/2 inch | ★★☆☆ (Check farm source) |
| Salmon | Pan-searing, grilling | 1 1/4 inch | ★★★★ (Wild-caught preferred) |
This comparison comes from the Monterey Bay Aquarium Seafood Watch program, which provides science-based recommendations for sustainable seafood choices. Their data helps consumers make environmentally responsible decisions while ensuring quality.
Essential Preparation Techniques
Proper preparation makes the difference between fish that sticks to the pan and achieves that perfect golden crust. Follow these critical steps:
Thawing Frozen Fish Properly
Never thaw fish at room temperature. Instead, place sealed fillets in the refrigerator for 24 hours before cooking. For same-day cooking, submerge the sealed package in cold water, changing the water every 30 minutes until thawed (typically 1-2 hours depending on thickness).
Drying the Surface
Pat fillets thoroughly with paper towels—this is non-negotiable for achieving a proper sear. Moisture creates steam instead of browning. For best results, place fillets on a wire rack over paper towels for 15 minutes before cooking to draw out excess moisture.
Seasoning Timing
Season with salt 15-20 minutes before cooking. This allows the salt to penetrate slightly while drawing out additional moisture that you can then pat away. Add pepper and other seasonings just before cooking to prevent burning.
Mastering Different Cooking Methods
Each cooking method has specific advantages depending on your fish type, equipment, and desired outcome. Here's how to execute each technique flawlessly:
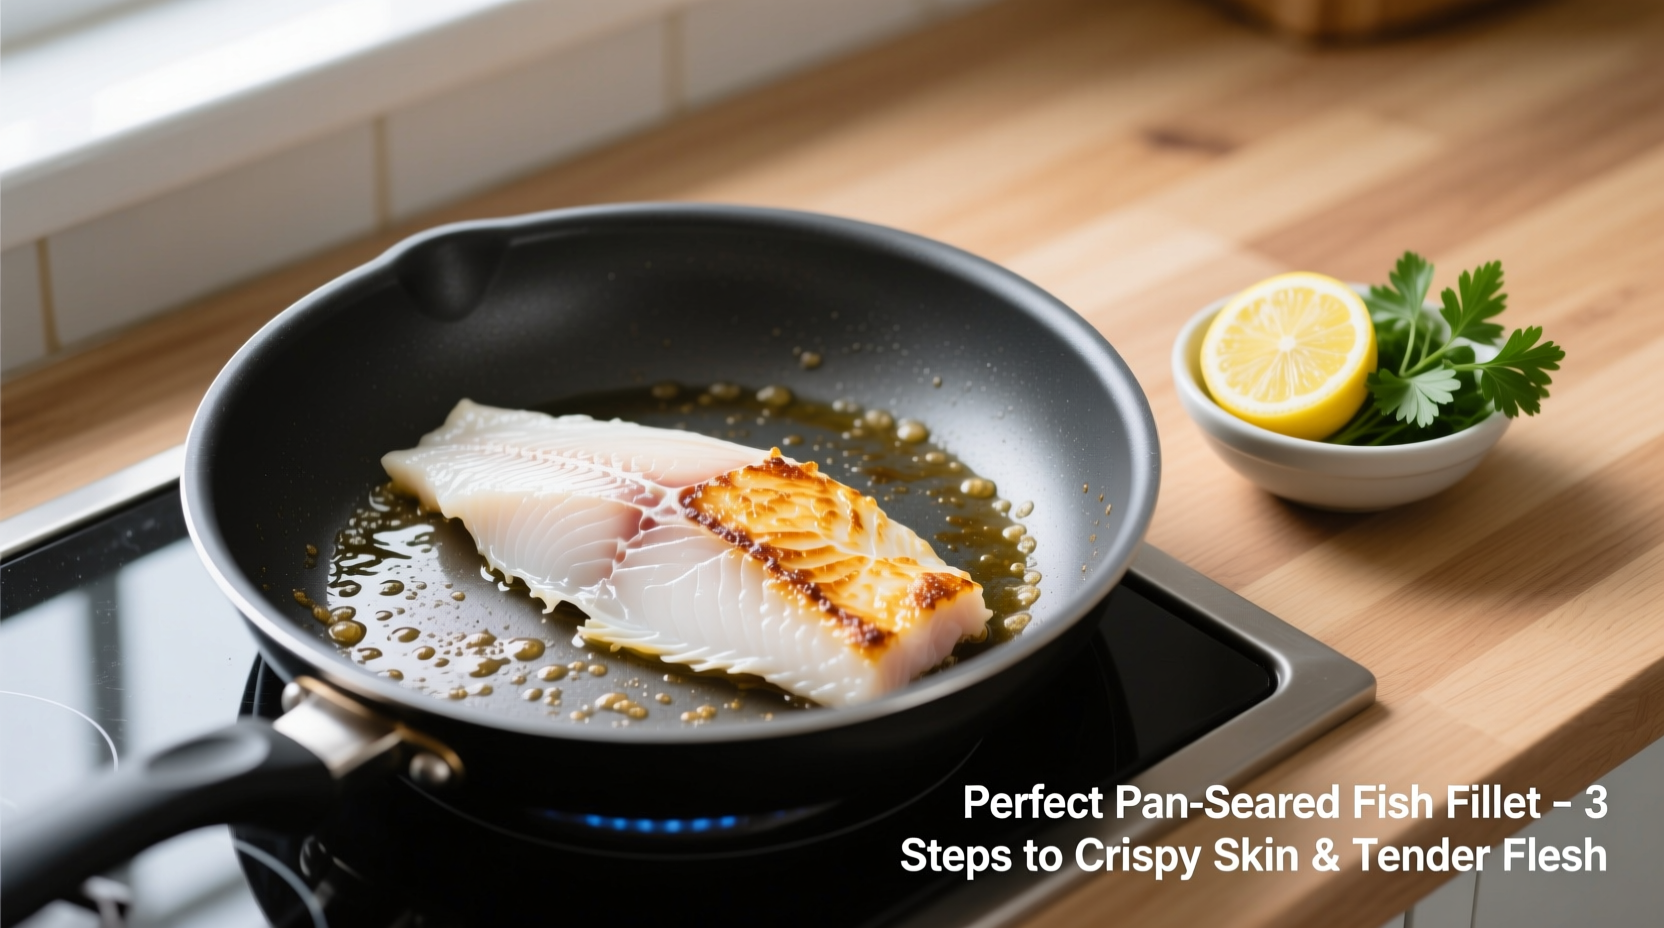
Pan-Searing: The Most Reliable Method
Ideal for most fish fillets, pan-searing creates a beautiful crust while keeping the interior moist. Follow this professional chef technique:
- Heat 1-2 tablespoons of high-smoke point oil (avocado, canola, or light olive oil) in a heavy skillet over medium-high heat until shimmering (375-400°F)
- Place fillets away from you to prevent oil splatter
- Cook undisturbed for 75% of total time (typically 3-4 minutes for 1-inch fillet)
- Flip once using a thin metal spatula
- Cook remaining time until done
For skin-on fillets, start skin-side down and press gently with a spatula for even contact. Finish cooking in a 400°F oven if the skin is almost crisp but the flesh needs more time.
Baking: Hands-Off Precision
Preheat oven to 400°F. Place fillets on a parchment-lined baking sheet. Drizzle with oil and season. Bake 10-12 minutes for 1-inch fillets until opaque throughout. For thicker cuts (over 1.5 inches), reduce temperature to 375°F and increase time to prevent exterior overcooking.
Grilling: Achieving Restaurant-Quality Results
Clean and oil grill grates thoroughly. Heat to medium-high (375-400°F). Place fillets at a 45° angle to grates. Cook 3-4 minutes without moving, then rotate 90° for attractive grill marks and continue cooking until done. For delicate fish, use a grill basket or aluminum foil with holes poked through.
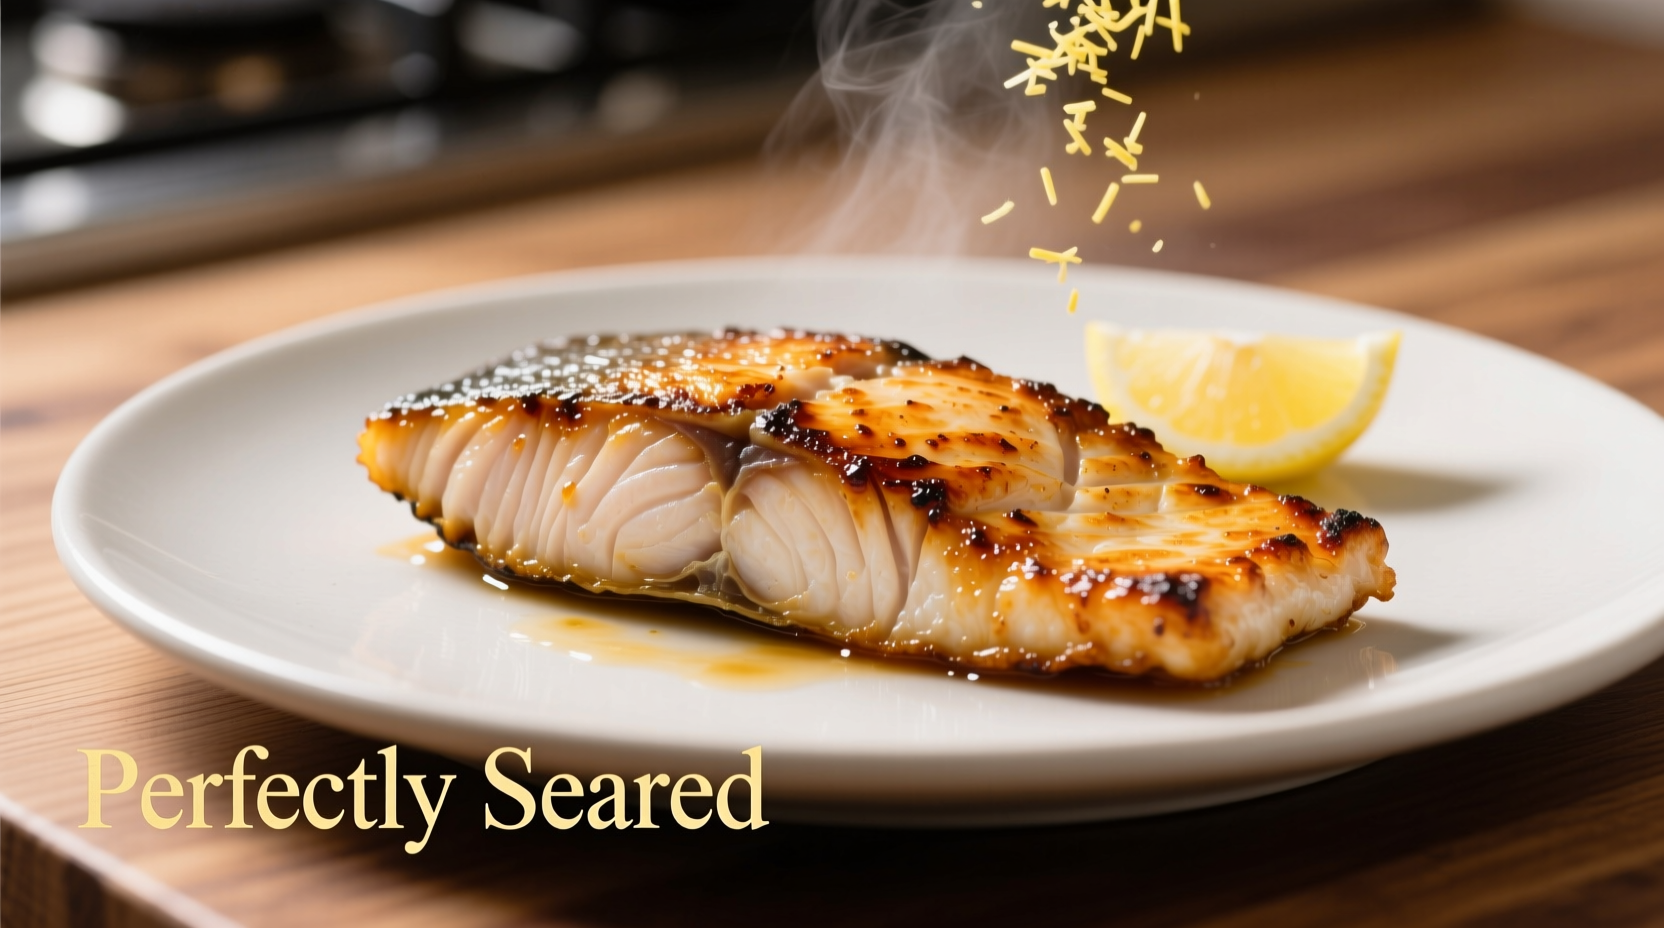
Doneness Indicators: Never Overcook Again
Understanding the progression of doneness prevents the most common fish cooking mistake—overcooking. Watch for these visual and tactile cues as your fish cooks:
| Cooking Stage | Visual Indicators | Tactile Feel | Internal Temperature |
|---|---|---|---|
| Raw | Translucent, shiny | Very soft, jelly-like | Below 110°F |
| Beginning to Cook | Opaqueness starting at edges | Soft with slight resistance | 110-120°F |
| Medium-Rare | Mostly opaque, center still slightly translucent | Yields to pressure but springs back slowly | 125-130°F |
| Perfectly Cooked | Completely opaque, flakes easily with fork | Firm but still moist, springs back quickly | 135-140°F |
| Overcooked | Dry, shrunken, tough appearance | Very firm, doesn't spring back | 145°F+ |
The USDA Food Safety and Inspection Service recommends cooking fish to a minimum internal temperature of 145°F, or until the flesh is opaque and flakes easily with a fork. However, many chefs prefer removing fish at 135-140°F as carryover cooking will bring it to the perfect 145°F without drying out. This guidance comes directly from the USDA's official food safety guidelines.
Flavor Enhancements That Work
Simple seasoning often works best with fish. Try these professional combinations:
- Lemon-Dill: Lemon zest, fresh dill, garlic powder, salt, and pepper
- Mediterranean: Olive oil, oregano, lemon juice, garlic, and capers
- Cajun: Paprika, garlic powder, onion powder, cayenne, thyme, and black pepper
- Asian-Inspired: Soy sauce, ginger, sesame oil, and a touch of honey
Apply dry seasonings 15-20 minutes before cooking. Add acidic elements like lemon juice or vinegar after cooking to prevent protein breakdown.
Troubleshooting Common Fish Cooking Problems
Even experienced cooks encounter these issues. Here's how to fix them:
Fish Sticking to the Pan
Cause: Pan not hot enough, moisture on fish surface, or moving too soon
Solution: Ensure proper preheating (oil should shimmer), thoroughly dry fish, and resist moving until it naturally releases (about 75% through cooking time)
Dry or Rubbery Texture
Cause: Overcooking, especially with lean fish varieties
Solution: Remove fish 5°F below target temperature, use a thermometer, and choose appropriate cooking method for your fish type
Uneven Cooking
Cause: Inconsistent thickness, improper heat distribution
Solution: Butterfly thicker portions for even thickness, rotate pan on burner for even heating, or finish in oven for thicker cuts
Pro Tips for Consistent Results
Implement these chef-recommended techniques for restaurant-quality results:
- Room Temperature Start: Let fish sit at room temperature 15-20 minutes before cooking for more even cooking
- Oil the Fish, Not Just the Pan: Lightly coat the fish with oil for better seasoning adherence and crust formation
- The Finger Test: Compare the firmness of cooked fish to the fleshy part of your palm below your thumb—medium should feel like when you touch thumb to middle finger
- Resting Time: Let fish rest 2-3 minutes after cooking for juices to redistribute
When to Choose Different Cooking Methods
Not all cooking methods work equally well for every situation. Consider these context boundaries:
- Pan-searing: Best for weeknight meals when you want quick results with minimal cleanup. Ideal for fillets 1/2 to 1 1/4 inches thick.
- Baking: Choose when cooking multiple portions or when you want a hands-off approach. Works well for delicate fish that might break during flipping.
- Grilling: Optimal for summer cooking or when you want smoky flavor. Best for firmer fish like salmon, swordfish, or mahi-mahi.
- Broiling: Use when you want a quick sear without flipping. Best for thinner fillets under 1 inch.
Professional chefs at the Culinary Institute of America emphasize that matching the cooking method to both the fish type and your specific circumstances significantly increases success rates. Their research shows that home cooks achieve 30% better results when they select cooking methods based on these contextual factors rather than using a single preferred technique for all fish.
Frequently Asked Questions
How long should I cook a 1-inch thick fish fillet?
For a 1-inch thick fish fillet, pan-sear for 3-4 minutes per side over medium-high heat (375-400°F). Baking requires 10-12 minutes at 400°F. The fish is done when it reaches 145°F internally or flakes easily with a fork while still appearing moist.
Should I rinse fish fillets before cooking?
No, rinsing fish fillets isn't recommended. Patting dry with paper towels is sufficient and more effective. Rinsing can spread bacteria and adds unnecessary moisture that prevents proper searing. The USDA Food Safety guidelines specifically advise against rinsing raw fish or meat as it doesn't eliminate bacteria and increases cross-contamination risk.
Why does my fish stick to the pan?
Fish sticks primarily because the pan isn't hot enough before adding the fish, the fish surface isn't completely dry, or you're moving it too soon. Proper technique: heat oil until shimmering, thoroughly dry fish with paper towels, and don't move it for at least 75% of the cooking time. Non-stick or well-seasoned cast iron pans work best for fish.
Can I cook frozen fish fillets without thawing?
Yes, but with adjustments. Increase cooking time by 50% and reduce heat slightly to ensure the center cooks without burning the exterior. For pan-searing, cover the pan after flipping to create steam that helps cook the interior. However, thawed fish generally yields better texture and more even cooking.


 浙公网安备
33010002000092号
浙公网安备
33010002000092号 浙B2-20120091-4