
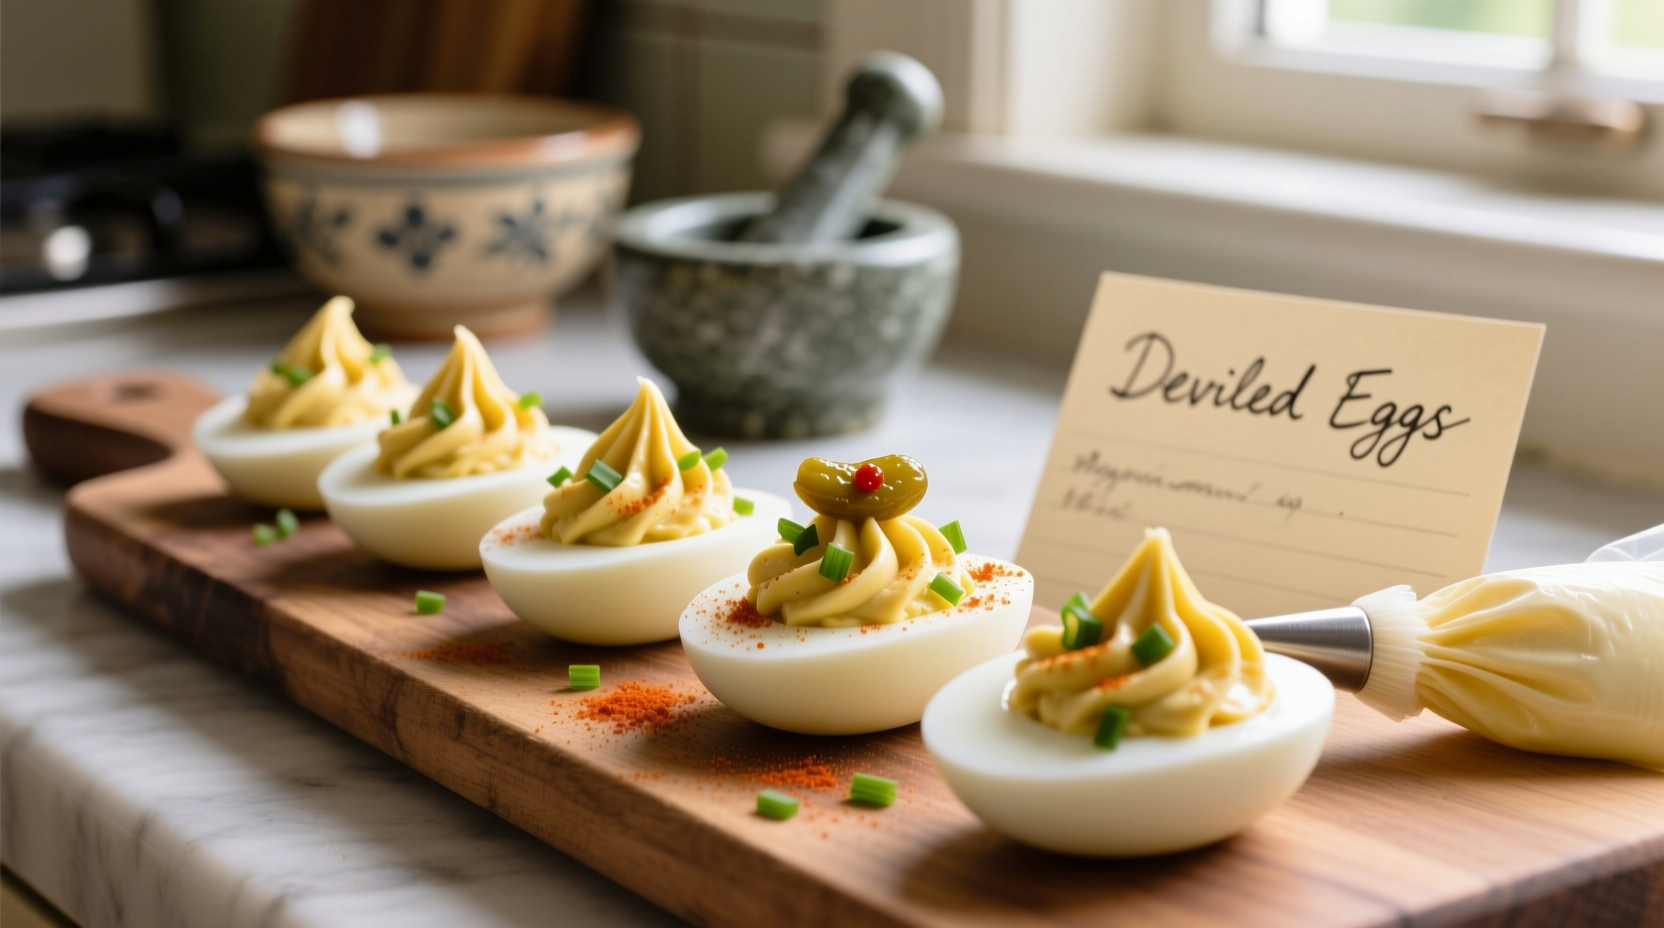
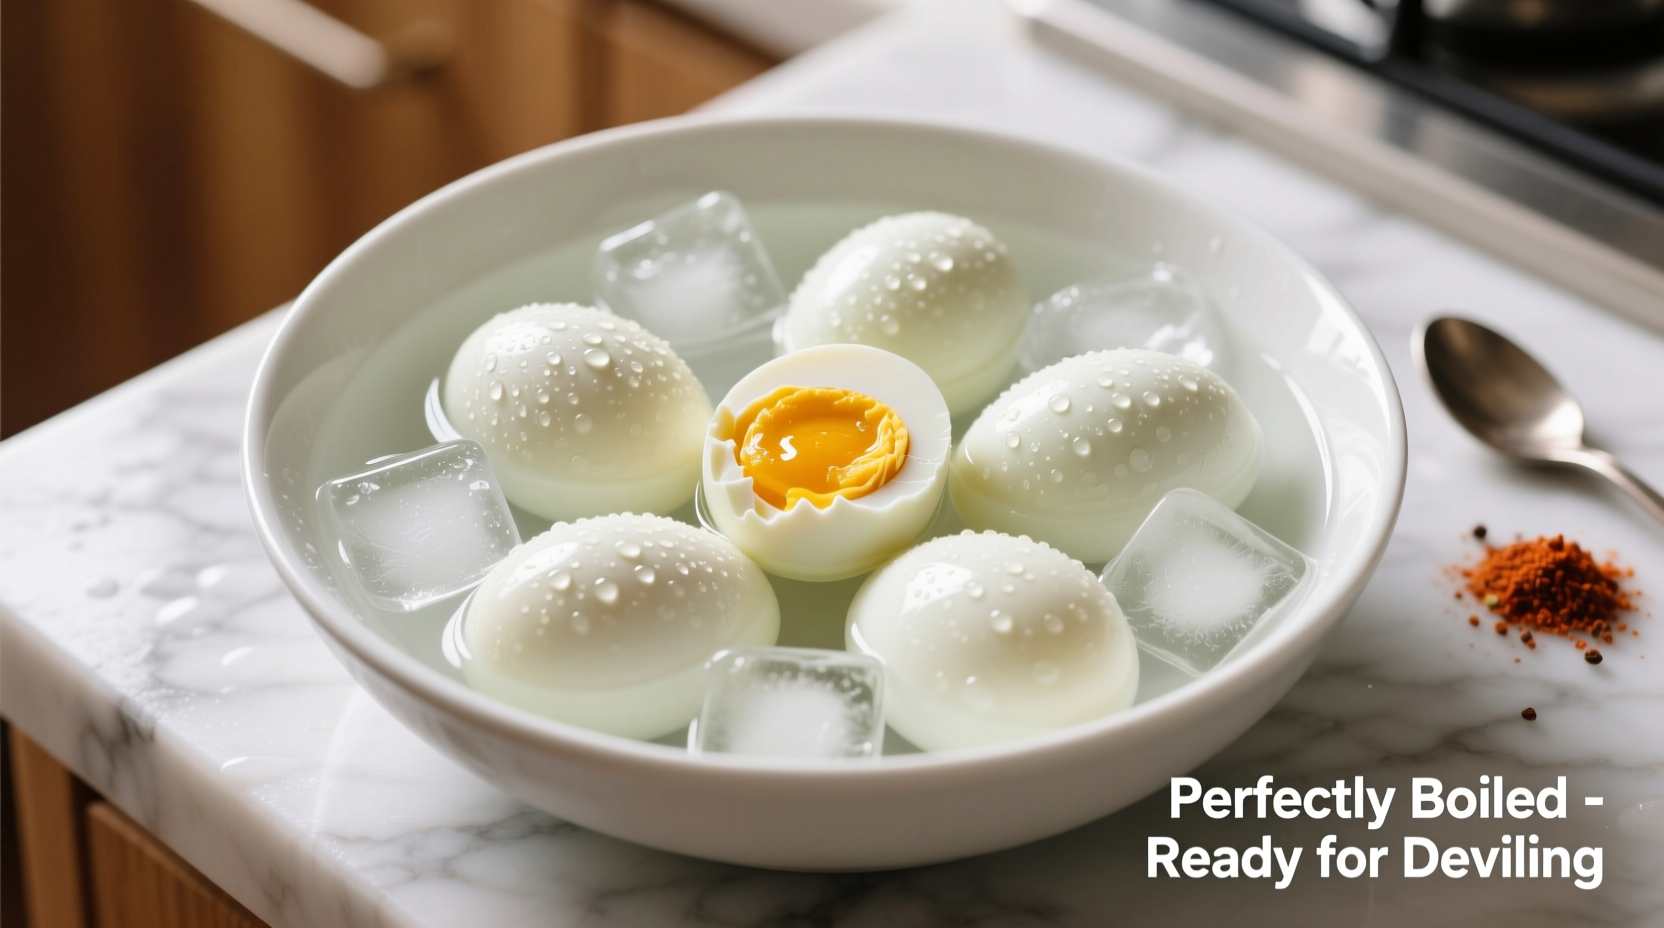
Perfectly cooked hard-boiled eggs for deviled eggs require 12 minutes of boiling followed by immediate transfer to an ice bath for 15 minutes. This precise timing prevents the green sulfur ring around yolks, ensures easy peeling, and creates the ideal firm-yet-creamy texture needed for smooth filling.
Getting the egg preparation right is the foundation of exceptional deviled eggs. Many home cooks struggle with rubbery whites, discolored yolks, or eggs that refuse to peel cleanly—problems that ruin the presentation and texture of this classic appetizer. The solution lies not in complicated techniques, but in understanding the precise science of egg cooking specifically for deviled egg preparation.
Why Standard Hard-Boiling Methods Fail for Deviled Eggs
Regular hard-boiling instructions often produce eggs unsuitable for deviled eggs. Overcooking creates that unappetizing green-gray ring around the yolk caused by iron and sulfur compounds reacting at high temperatures. Undercooked eggs won't slice cleanly, while eggs boiled too long develop chalky, dry yolks that won't blend smoothly with other filling ingredients.
| Boiling Time | Yolk Texture | Common Issues |
|---|---|---|
| 8-10 minutes | Slightly soft center | Difficult to slice evenly |
| 11-12 minutes | Firm but creamy | Perfect for deviled eggs |
| 13-15 minutes | Dry, chalky | Green sulfur ring appears |
| 16+ minutes | Crumbly, discolored | Peeling becomes extremely difficult |
The Complete Guide to Perfect Deviled Egg Eggs
Selecting the Right Eggs
Egg age significantly impacts peeling success. The American Egg Board recommends using eggs that are 7-10 days old for hard-boiling, as the air cell enlarges over time, creating natural separation between the shell and membrane. According to egg safety experts, fresher eggs have lower pH levels that cause the albumen to bind more tightly to the inner shell membrane, making them notoriously difficult to peel.
Preparation Before Boiling
Gently place eggs in a single layer at the bottom of a saucepan. Cover with cold water to a depth of at least 1 inch above the eggs. Adding 1 teaspoon of vinegar or 1/2 teaspoon of baking soda to the water can help prevent cracking and improve peeling. Pierce the wider end of each egg with an egg pricker to create a small air channel, reducing the likelihood of cracking during heating.
The Boiling Process: Timing is Everything
Bring the water to a rolling boil over medium-high heat, then immediately reduce to a gentle simmer. Set your timer for exactly 12 minutes. This precise duration allows the egg white to fully set while keeping the yolk at the ideal temperature (165°F/74°C) for creamy texture without developing the green sulfur ring that begins to form at temperatures above 170°F (77°C).
The Critical Ice Bath Step
When the timer sounds, immediately drain the hot water and transfer the eggs to a large bowl filled with ice water. The rapid cooling stops the cooking process and causes the egg contents to contract slightly, creating that crucial air gap between the egg and shell. Leave eggs in the ice bath for 15 minutes—any less and they'll continue cooking from residual heat; any longer and the cold can make whites rubbery.
Peeling Technique for Flawless Results
Tap each egg gently on the counter to create fine cracks across the entire surface. Roll the egg between your palms to loosen the shell further. Begin peeling at the wider end where the air pocket resides. Hold the egg under cool running water while peeling—the water helps separate the shell from the membrane. For stubborn spots, peel underwater for the smoothest results.
Troubleshooting Common Problems
Green ring around yolk: Caused by overcooking or insufficient cooling. Always use the 12-minute boil with immediate ice bath.
Eggs won't peel cleanly: You're likely using very fresh eggs. Next time, select eggs that have been refrigerated for at least a week.
Cooked unevenly: Ensure eggs are in a single layer with adequate water coverage during boiling.
Cracked during cooking: Eggs may have been too cold when added to water, or water was boiling too vigorously. Start with room-temperature eggs and maintain a gentle simmer.
Advanced Tips from Professional Kitchens
Many chefs add 1 tablespoon of salt to the boiling water, which helps solidify the egg white more quickly if a crack occurs. For absolutely perfect halves when slicing, use a thin dental floss instead of a knife—simply wrap the floss around the egg and pull through for a clean cut without crushing the whites. Store prepared egg halves on a damp paper towel in an airtight container until ready to fill, which prevents drying while maintaining shape.
Frequently Asked Questions
Can I use fresh farm eggs for deviled eggs?
Farm-fresh eggs are actually more difficult to peel than store-bought eggs of the same age. For best results with farm eggs, wait at least 7 days after collection before boiling. The natural aging process allows the air cell to expand, creating separation between the shell and membrane.
How far in advance can I prepare deviled egg components?
You can cook and peel eggs up to 2 days in advance. Store them in an airtight container with a damp paper towel at the bottom to prevent drying. Fill the eggs no more than 6 hours before serving for optimal freshness and food safety.
Why do some recipes add vinegar to the boiling water?
Vinegar (about 1 teaspoon per quart of water) helps coagulate egg white proteins more quickly if a crack occurs during cooking, minimizing the "feathering" effect where egg white leaks out. It has minimal impact on peeling success despite popular belief.
What's the best way to slice boiled eggs for deviled eggs?
A sharp knife dipped in hot water works well, but for absolutely perfect halves without crushing, use unflavored dental floss. Wrap the floss around the egg at the center point and pull through with even pressure for a clean cut every time.


 浙公网安备
33010002000092号
浙公网安备
33010002000092号 浙B2-20120091-4