
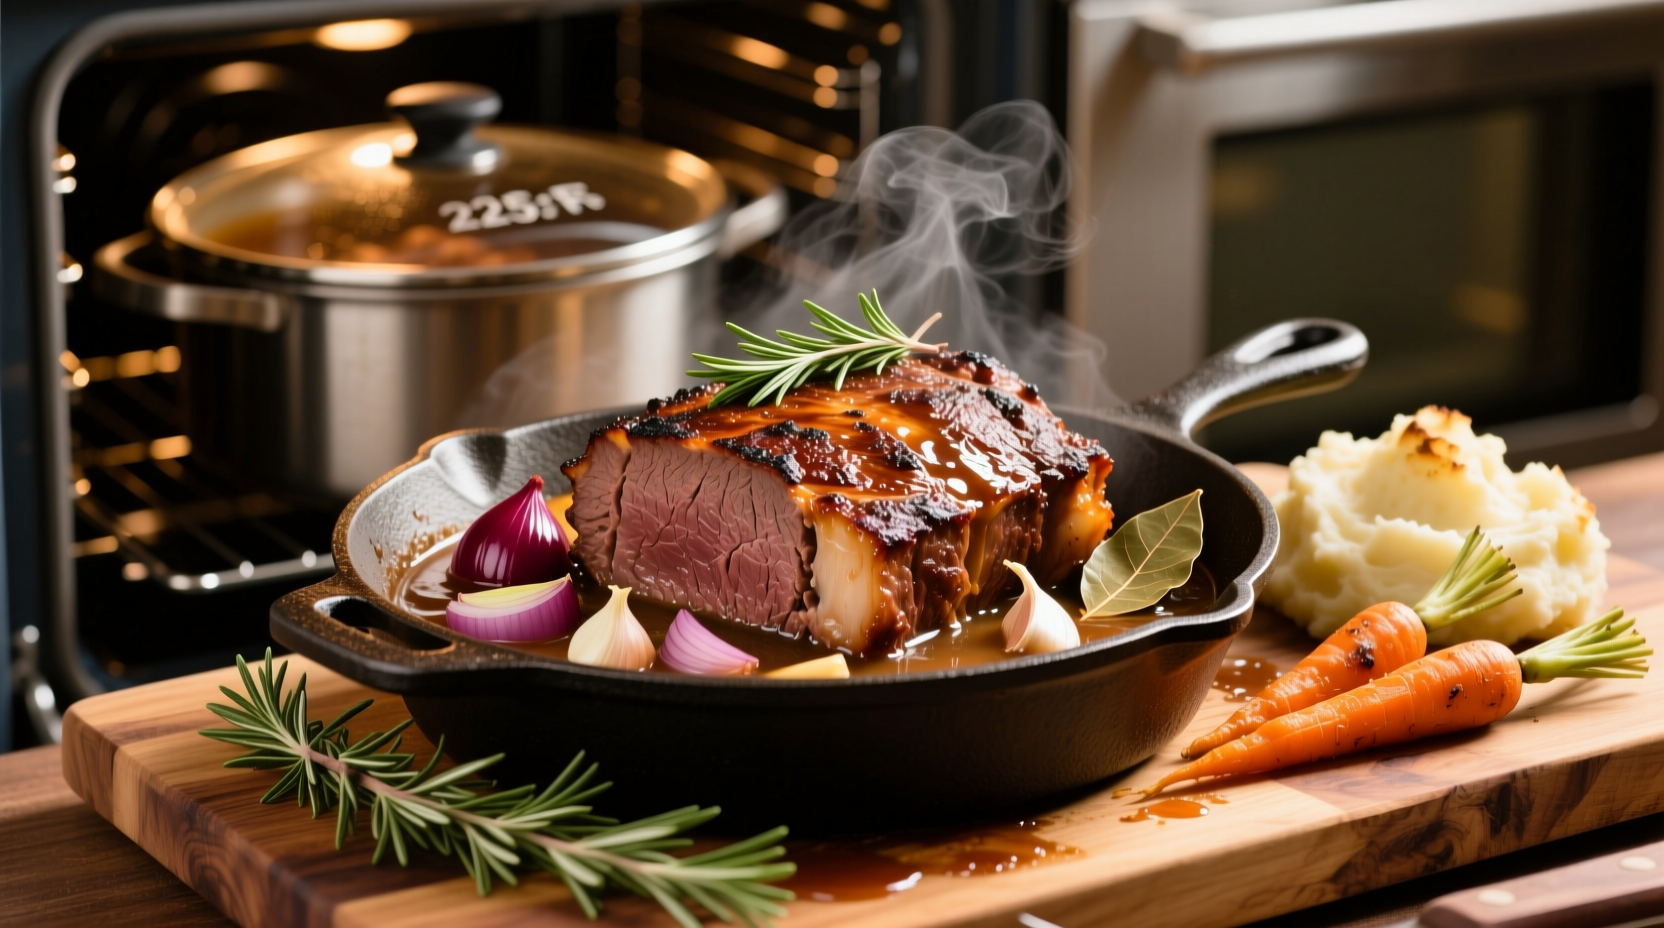
The best way to cook chuck roast in oven is to sear it first at high heat, then slow roast at 325°F for 3-4 hours until it reaches 195-205°F internal temperature for perfect tenderness. This low-and-slow method transforms tough connective tissue into melt-in-your-mouth goodness every time.
Nothing beats the rich aroma of a perfectly cooked chuck roast filling your kitchen. As a former chef who's prepared this cut hundreds of times across different cooking environments, I've perfected a straightforward oven method that guarantees tender, flavorful results without fancy equipment. Whether you're cooking for a special occasion or planning meals for the week, this guide delivers restaurant-quality chuck roast that will impress even discerning palates.
Why Chuck Roast Needs Special Treatment
Chuck roast comes from the shoulder area of the cow, making it rich in connective tissue and marbling. This cut requires low temperatures and extended cooking times to break down collagen into gelatin, creating that signature fall-apart texture. Rushing the process at high heat results in tough, dry meat that's difficult to enjoy.
Essential Equipment Checklist
Before you begin, gather these kitchen essentials:
- Heavy-bottomed Dutch oven or roasting pan with tight-fitting lid
- Meat thermometer (digital instant-read recommended)
- Sharp chef's knife for trimming
- Wooden spoon or spatula
- Aluminum foil for resting
Gathering Your Ingredients
Quality ingredients make the difference between ordinary and extraordinary results. For a standard 3-4 pound chuck roast:
- 1 (3-4 lb) boneless chuck roast, excess fat trimmed
- 2 tablespoons olive oil or avocado oil
- 1½ teaspoons kosher salt (plus more to taste)
- 1 teaspoon freshly ground black pepper
- 2 teaspoons garlic powder
- 1 teaspoon onion powder
- 1 teaspoon dried thyme
- 1 teaspoon smoked paprika
- 2 cups beef broth (low sodium preferred)
- 1 large onion, roughly chopped
- 4 garlic cloves, smashed
- 3 carrots, cut into 2-inch pieces
- 2 celery stalks, cut into 2-inch pieces
Step-by-Step Cooking Process
Preparation: 20 Minutes
Proper preparation sets the foundation for success:
- Bring to room temperature: Remove roast from refrigerator 1 hour before cooking
- Pat dry: Use paper towels to thoroughly dry the surface (critical for proper searing)
- Season generously: Rub with salt, pepper, and all dry spices, pressing into meat
- Preheat oven: Set to 325°F while you sear the meat
Searing: 8-10 Minutes
Searing creates the flavorful crust that defines a great roast:
- Heat oil in Dutch oven over medium-high heat until shimmering
- Place roast in pan, fat-side down first, pressing gently with spatula
- Sear for 3-4 minutes per side until deep brown crust forms
- Remove roast and set aside while preparing aromatics
Oven Roasting: 3-4 Hours
This is where the magic happens through slow transformation:
- Add onions, garlic, carrots, and celery to the same pot
- Cook for 5 minutes until vegetables begin to soften
- Pour in beef broth, scraping bottom to release browned bits
- Return roast to pot, fat-side up, ensuring liquid comes halfway up sides
- Cover tightly with lid or foil and transfer to preheated oven
- Cook for 3-4 hours until fork-tender (see timing chart below)
| Roast Weight | Approximate Cooking Time | Internal Temperature |
|---|---|---|
| 2-3 lbs | 2½-3 hours | 195-205°F |
| 3-4 lbs | 3-3½ hours | 195-205°F |
| 4-5 lbs | 3½-4 hours | 195-205°F |
Source: USDA Food Safety and Inspection Service guidelines confirm that beef connective tissue fully breaks down between 195-205°F, creating optimal tenderness while maintaining food safety.
Doneness Indicators You Can Trust
While timing provides a guideline, these visual and tactile cues confirm perfect doneness:
- Probe test: A meat thermometer should slide in with almost no resistance
- Fork test: Two forks should pull the meat apart with minimal effort
- Shrinking: Roast will have reduced in size by about 25%
- Internal temperature: 195-205°F (well above USDA's minimum safe temperature of 145°F for beef)
According to the American Meat Science Association, connective tissue requires extended time at temperatures above 160°F to properly convert to gelatin. This scientific principle explains why low-and-slow cooking produces dramatically better results than higher-temperature methods for this particular cut.
Critical Resting Period
Never skip this step—resting allows juices to redistribute:
- Remove roast from oven and transfer to cutting board
- Tent loosely with foil (don't seal tightly or steam will soften crust)
- Rest for 20-30 minutes (essential for moisture retention)
- Meanwhile, skim excess fat from cooking liquid and reduce if desired
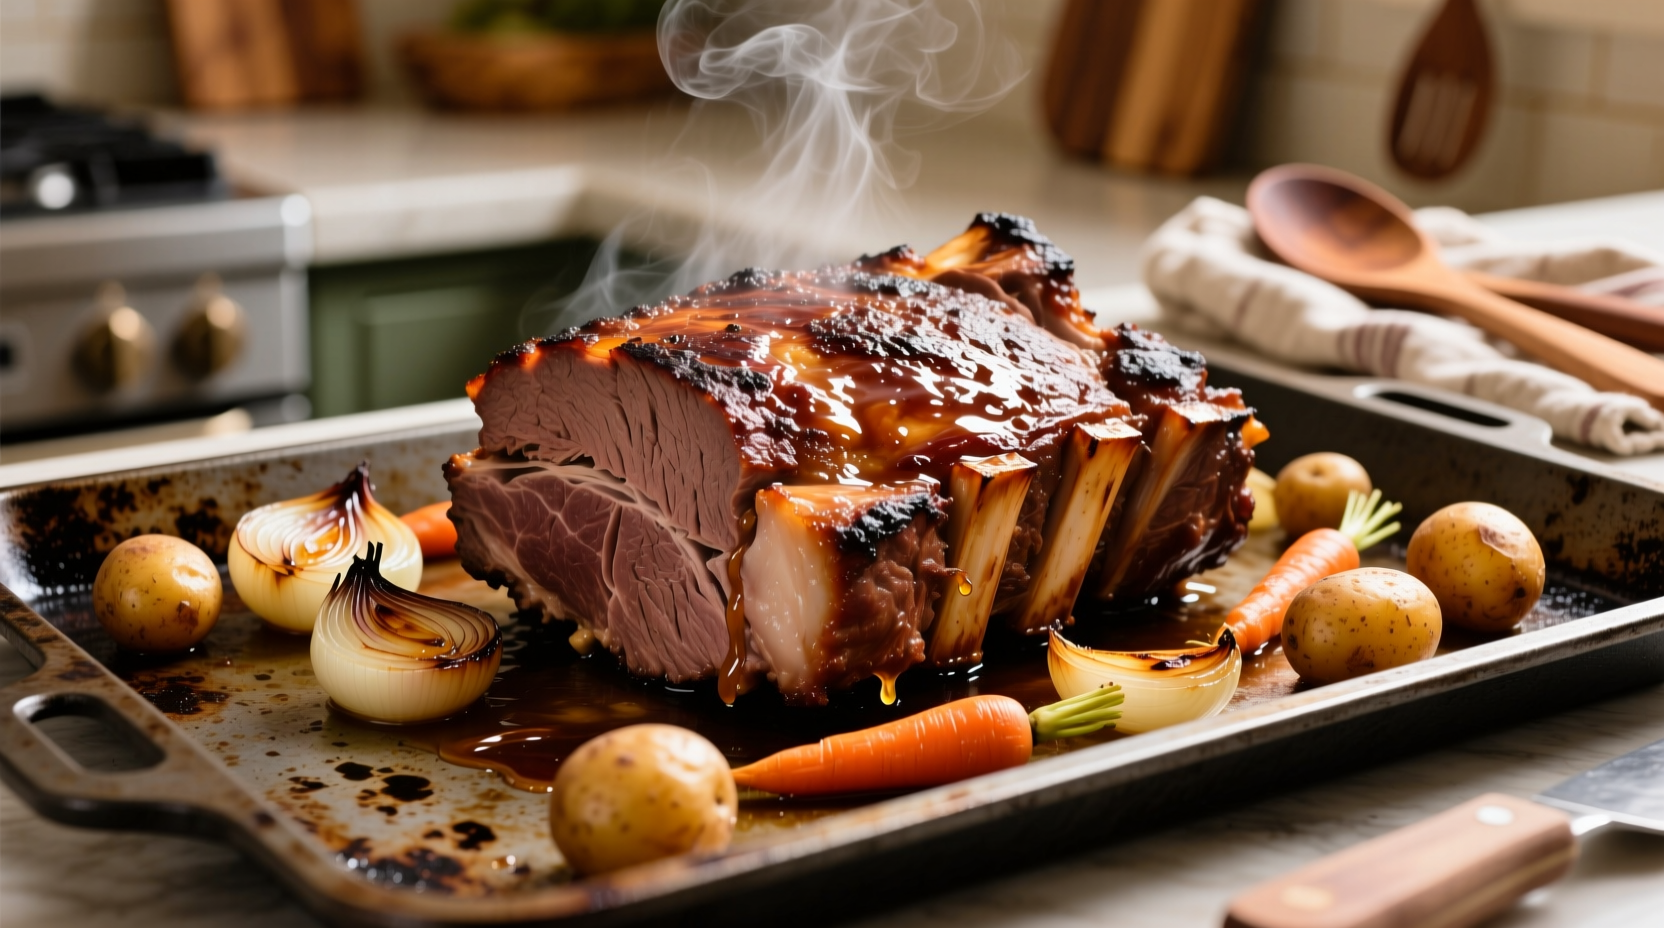
Carving and Serving Like a Pro
How you cut affects the eating experience:
- Identify the grain direction by looking for parallel muscle fibers
- Cut across the grain (perpendicular to fibers) for maximum tenderness
- Use a sharp carving knife with smooth, even strokes
- Serve with reduced cooking liquid as au jus
Avoid These Common Mistakes
Based on years of professional kitchen experience, these errors ruin otherwise good roasts:
- Skipping the sear: You lose the complex Maillard reaction flavors
- Overcrowding the pot: Prevents proper browning and steams the meat
- Cooking at too high temperature: Causes toughening instead of tenderizing
- Cutting too soon: Releases precious juices onto the cutting board
- Not trimming excess fat: Can create unpleasantly greasy results
Storage and Reheating Tips
Chuck roast often tastes even better the next day as flavors continue to meld:
- Refrigeration: Store in airtight container for up to 4 days
- Freezing: Portion with cooking liquid for up to 3 months
- Reheating: Gently warm in cooking liquid at 275°F until heated through
- Repurposing: Shred for sandwiches, tacos, or shepherd's pie filling


 浙公网安备
33010002000092号
浙公网安备
33010002000092号 浙B2-20120091-4