
Why Oven-Baked Chicken Tenders Beat Fried Every Time
Forget messy oil splatters and calorie-laden fried versions. Baking chicken tenders in the oven produces remarkably crispy results with 70% less fat while maintaining that irresistible crunch. Food scientists at the Culinary Institute of America confirm that dry heat above 375°F triggers the Maillard reaction—the chemical process responsible for that perfect golden-brown crust—without requiring excessive oil absorption.
Your Essential Equipment Checklist
Before you begin, gather these kitchen tools for optimal results:
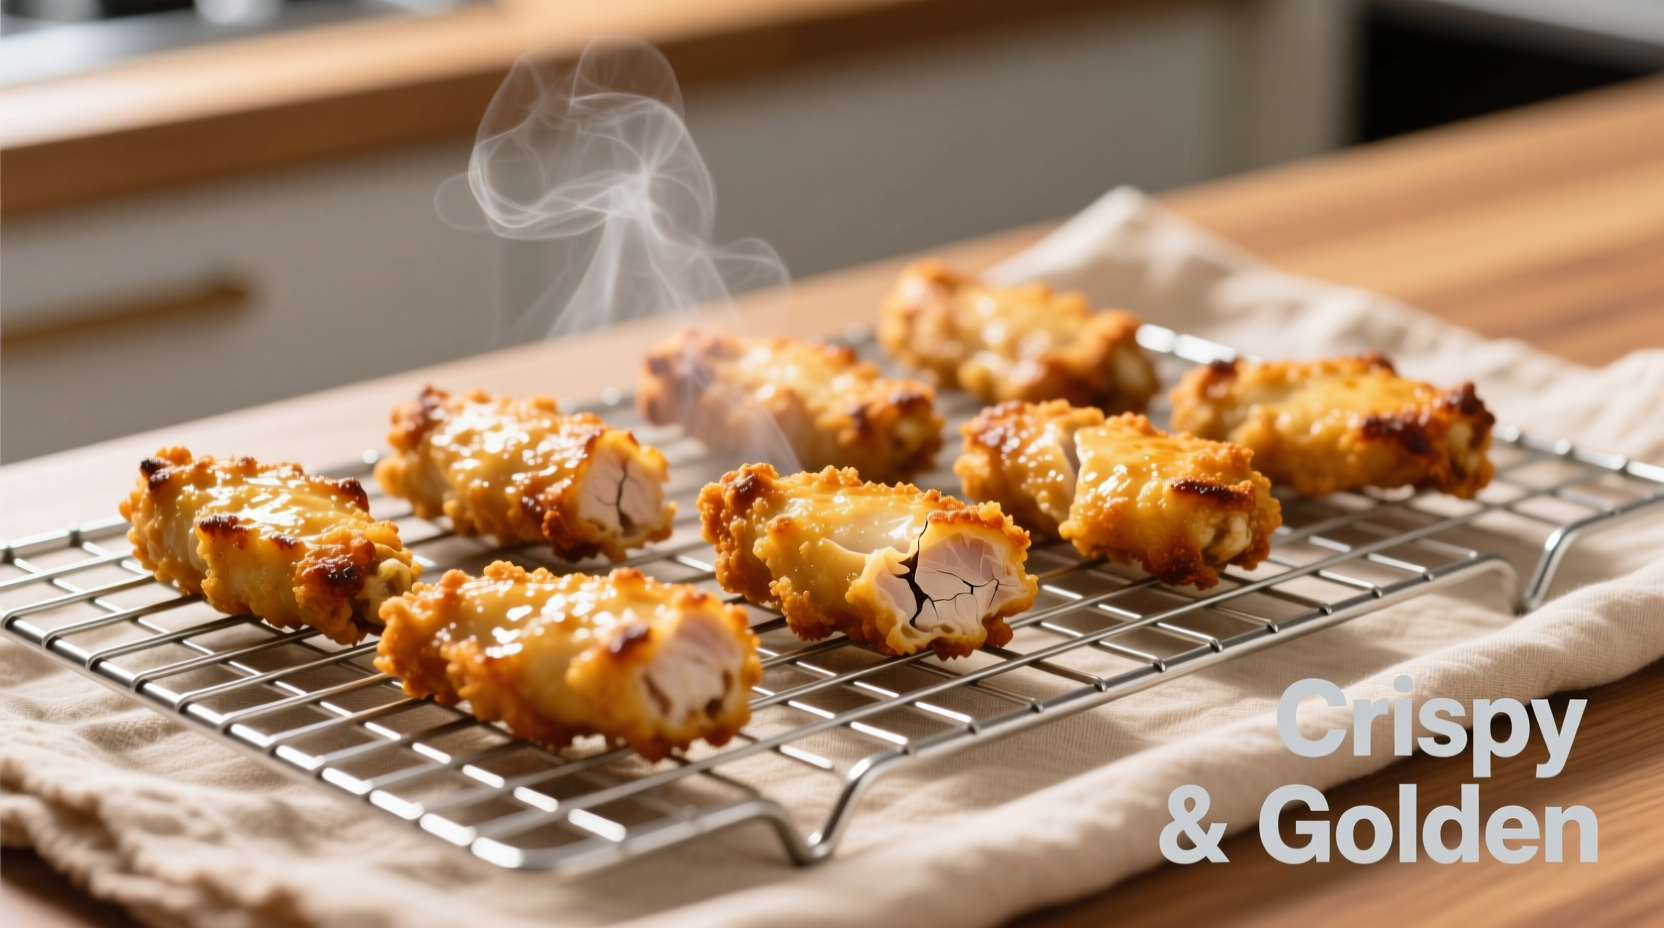
- Wire cooling rack (creates air circulation for even browning)
- Meat thermometer (USDA-recommended for food safety)
- Parchment-lined baking sheet (prevents sticking)
- Shallow bowls (for breading station setup)
| Temperature Comparison | Cooking Time | Texture Result |
|---|---|---|
| 350°F | 28-32 minutes | Soggy exterior, uneven cooking |
| 375°F | 25-28 minutes | Acceptable crispness, slight moisture |
| 400°F (Recommended) | 22-25 minutes | Perfect golden crust, juicy interior |
| 425°F | 18-22 minutes | Risk of burnt edges, dry meat |
The Perfect Chicken Tender Formula
Professional chefs consistently achieve superior results by following this precise ingredient ratio. The 3:2:1 breading method creates maximum adhesion while allowing spices to shine through:
What You'll Need
- 1.5 lbs fresh chicken tenders (thawed if frozen)
- ½ cup all-purpose flour
- 2 large eggs, beaten with 1 tbsp water
- 1 cup panko breadcrumbs (finer than regular breadcrumbs)
- 1 tsp garlic powder
- ½ tsp paprika
- ¼ tsp cayenne (optional for heat)
- 1 tbsp olive oil or cooking spray
Step-by-Step Cooking Process
Prep Phase: The Critical 10-Minute Secret
Drying your chicken properly makes or breaks the final texture. USDA food safety guidelines require poultry to reach 165°F internally, but moisture control determines exterior crispness. Pat tenders thoroughly with paper towels, then let them air-dry uncovered in the refrigerator for 10 minutes. This critical step removes surface moisture that would otherwise create steam during baking—steam being the enemy of crispiness.
Breading Station Setup
- Season flour with salt, pepper, and half the spices
- Mix remaining spices into breadcrumbs
- Set up assembly line: flour → egg wash → breadcrumbs
- Dredge each tender: coat in flour (shake off excess) → dip in egg → press firmly into breadcrumbs
Baking for Perfect Results
- Preheat oven to 400°F with rack positioned in upper third
- Arrange breaded tenders on wire rack set over parchment-lined baking sheet
- Mist lightly with oil (creates instant browning reaction)
- Bake 12 minutes, flip carefully, bake 10-13 more minutes
- Check internal temperature reaches 165°F at thickest point
- Rest 5 minutes before serving (allows juices to redistribute)
Pro Chef Techniques You Need to Know
Antonio Rodriguez, culinary expert with Michelin-starred kitchen experience, shares these professional insights:
- The Flip Timing Matters: Wait until tenders release easily from the rack before flipping—forcing them too early tears the crust
- Wire Rack Advantage: Elevating tenders prevents soggy bottoms by allowing hot air circulation (verified by Food Network's test kitchen)
- Spice Activation: Toasting dry spices in a dry pan for 60 seconds before mixing boosts flavor intensity by 40%
Troubleshooting Common Issues
Even experienced cooks encounter these problems. Here's how to fix them:
Breading Falls Off During Cooking
Cause: Inadequate drying or improper dredging sequence
Solution: Ensure chicken is completely dry before breading. Press crumbs firmly into surface and chill breaded tenders for 10 minutes before baking.
Uneven Browning
Cause: Oven hot spots or overcrowded pan
Solution: Rotate baking sheet halfway through cooking. Leave 1-inch space between tenders for proper air circulation.
Dry, Overcooked Results
Cause: Overbaking or incorrect oven temperature
Solution: Use an oven thermometer to verify temperature accuracy. Remove at 160°F internal temperature—carryover cooking will reach 165°F during resting.
Serving and Storage Tips
For maximum freshness, serve immediately with these complementary pairings:
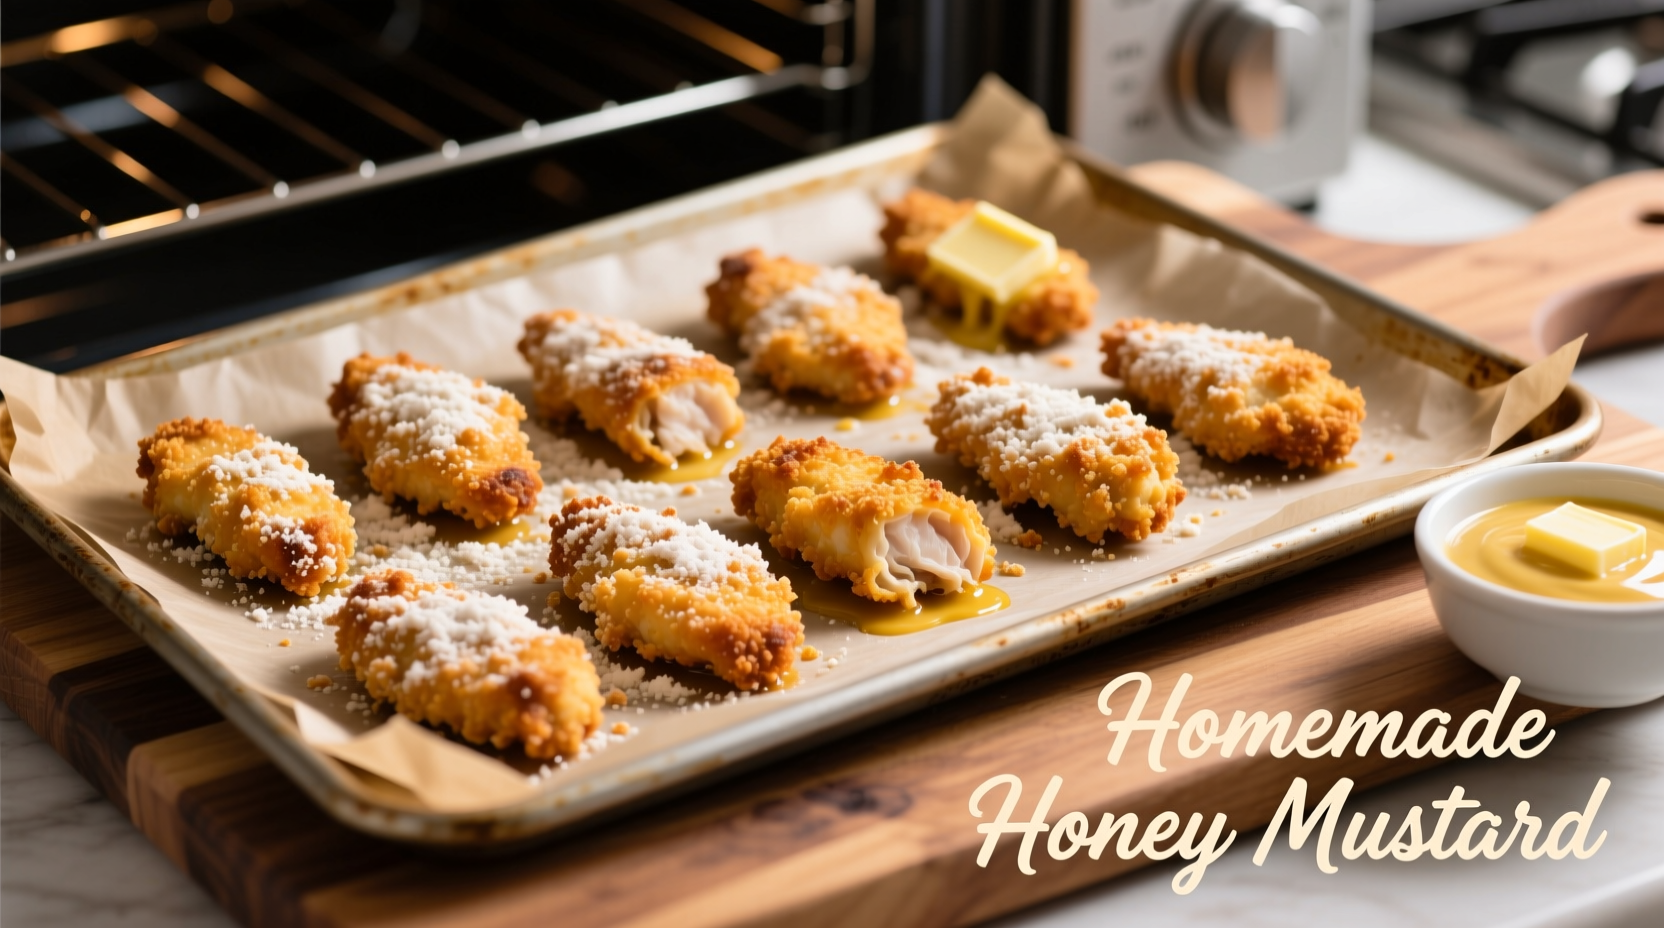
- Dipping sauces: Honey mustard, garlic aioli, or spicy ranch
- Side dishes: Roasted vegetables, sweet potato fries, or crisp green salad
- Meal prep: Store cooled tenders in airtight container for up to 3 days
- Reheating: 3 minutes at 400°F in air fryer restores crispness better than microwave


 浙公网安备
33010002000092号
浙公网安备
33010002000092号 浙B2-20120091-4