

Perfectly cooked stove-top chicken requires properly seasoned chicken breasts heated in a preheated skillet at medium-high heat for 5-7 minutes per side until reaching 165°F internal temperature. This method delivers juicy, flavorful chicken in under 20 minutes with minimal equipment.
Nothing beats the simplicity of cooking chicken on your stovetop when you need a quick, protein-packed meal. Whether you're a beginner cook or looking to refine your technique, mastering stove-top chicken opens up endless meal possibilities—from weeknight dinners to impressive date-night dishes. The beauty of this method lies in its speed, versatility, and minimal cleanup compared to oven roasting.
What You'll Need Before You Start
Preparation separates successful cooks from those dealing with dry, unevenly cooked chicken. Before touching that skillet, gather these essentials:
- 8-ounce boneless, skinless chicken breasts or thighs (about 1-inch thick)
- High smoke-point oil (avocado, canola, or vegetable oil)
- Instant-read thermometer (critical for food safety)
- Heavy-bottomed skillet (cast iron or stainless steel)
- Paper towels for drying chicken
Pro chefs universally agree that starting with properly dried chicken makes the difference between steamed and seared results. Pat your chicken thoroughly with paper towels—moisture is the enemy of browning. Season immediately before cooking with salt and pepper, as earlier seasoning can draw out moisture.
| Chicken Cut | Thickness | Cooking Time | Resting Time |
|---|---|---|---|
| Boneless breast | 1 inch | 5-7 min/side | 5-7 minutes |
| Bone-in breast | 1.5 inches | 7-9 min/side | 8-10 minutes |
| Thighs (boneless) | 0.75 inch | 4-6 min/side | 5 minutes |
This cooking timeline reflects USDA Food Safety and Inspection Service recommendations for safe poultry preparation. According to their official guidelines, all poultry must reach 165°F internal temperature to eliminate harmful bacteria like salmonella and campylobacter.
The Stove-Top Chicken Cooking Process
Step 1: Proper Skillet Preparation
Heat your empty skillet over medium-high heat for 3-5 minutes until properly preheated. Test by flicking a few water droplets—when they dance and evaporate quickly, your pan is ready. Add just enough oil to coat the bottom (about 1-2 teaspoons), waiting until it shimmers but doesn't smoke.
Step 2: Strategic Chicken Placement
Place chicken in the hot skillet away from you to prevent oil splatter toward your body. Don't overcrowd the pan—leave at least 1 inch between pieces. Overcrowding drops the pan temperature, causing chicken to steam rather than sear. For best results, cook no more than two chicken breasts at a time in a standard 12-inch skillet.
Step 3: The Critical First Sear
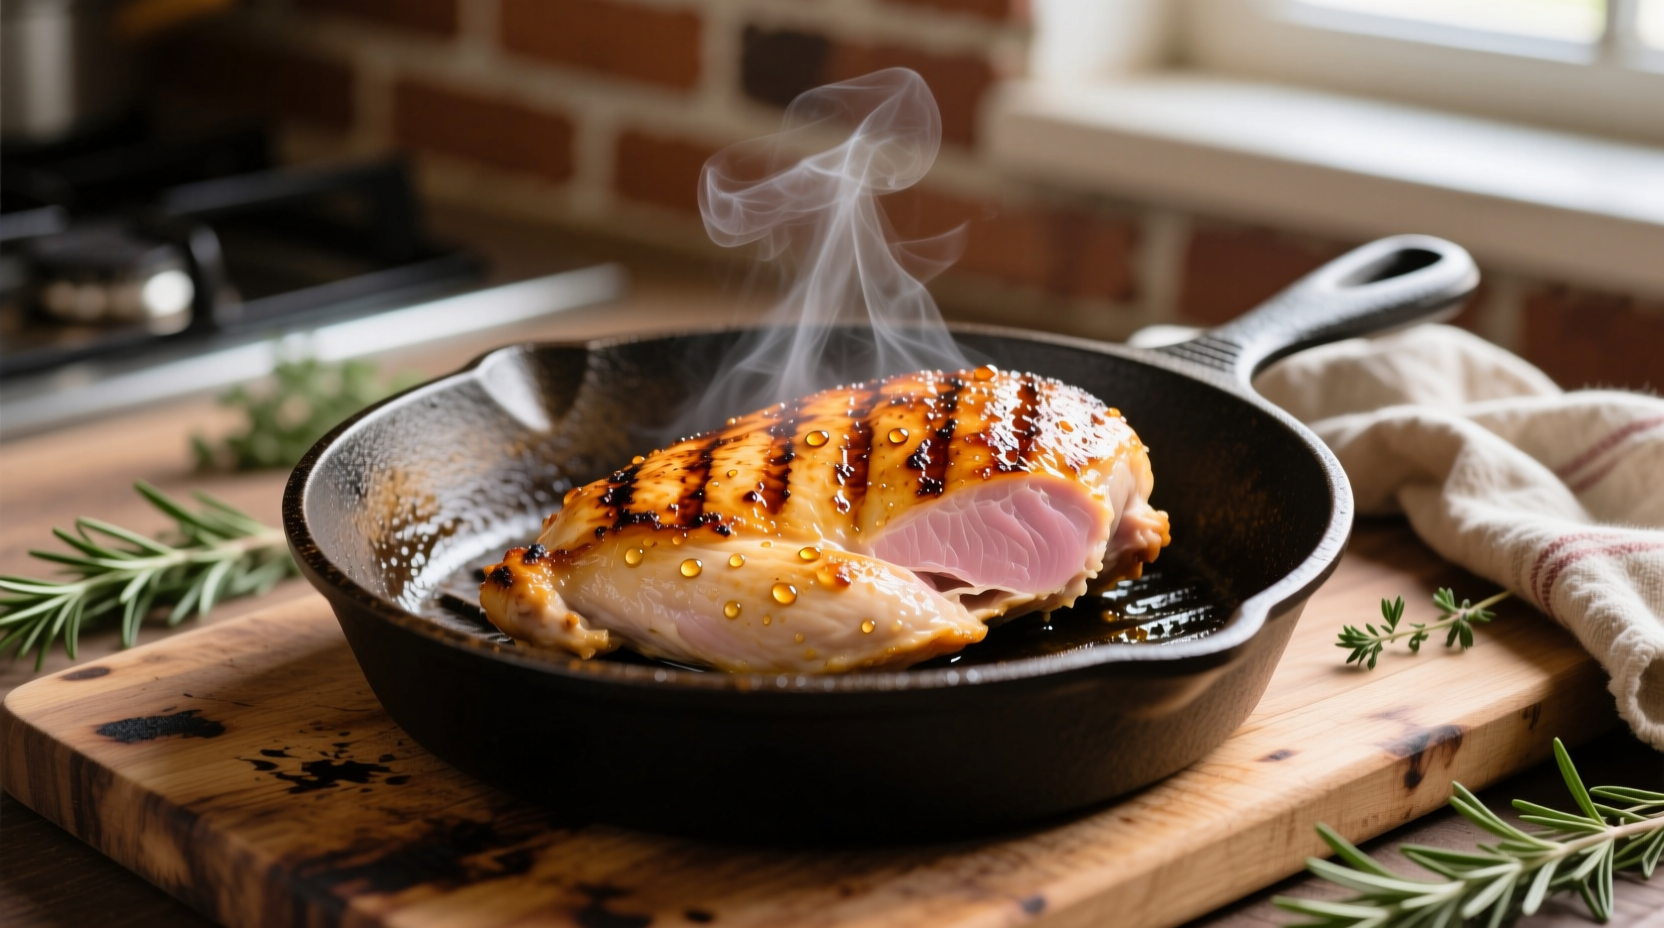
Resist the urge to move the chicken for the first 4-5 minutes. This uninterrupted contact creates the flavorful brown crust through the Maillard reaction. When properly seared, the chicken will release easily from the pan. If it sticks, give it another minute of cooking time.
Step 4: Temperature Monitoring
After flipping, insert your thermometer horizontally into the thickest part of the chicken. Continue cooking until it reaches 160-162°F, as carryover cooking will bring it to the safe 165°F mark during resting. Remove from heat 3-5 degrees below target temperature.
Avoiding Common Stove-Top Chicken Mistakes
Even experienced home cooks fall into these traps that ruin otherwise promising chicken dishes:
- Mistake: Cooking cold chicken straight from the refrigerator
Solution: Let chicken sit at room temperature for 15-20 minutes before cooking for even cooking - Mistake: Using low heat throughout cooking
Solution: Start with medium-high heat for searing, then reduce to medium if needed for thicker cuts - Mistake: Cutting into chicken to check doneness
Solution: Use an instant-read thermometer instead—cutting releases precious juices - Mistake: Skipping the resting period
Solution: Rest for 5-7 minutes tented with foil to redistribute juices
Flavor Variations and Serving Suggestions
Once you've mastered basic stove-top chicken, experiment with these professional techniques:
- Lemon-herb finish: During the last minute of cooking, add 2 tablespoons butter, 2 smashed garlic cloves, and fresh thyme. Tilt pan and spoon melted butter over chicken continuously.
- Quick pan sauce: After removing chicken, deglaze the pan with 1/2 cup chicken broth, scraping up browned bits. Reduce by half, then swirl in 1 tablespoon cold butter for a glossy sauce.
- Spice variations: Try adding smoked paprika before cooking for depth, or finish with a sprinkle of everything bagel seasoning for texture.
Pair your perfectly cooked chicken with simple sides that complement without overwhelming: roasted vegetables, quinoa pilaf, or a crisp green salad. For meal prep enthusiasts, stove-top chicken maintains quality better than oven-cooked versions when reheated, making it ideal for weekly planning.
Safe Storage and Reheating Guidelines
Proper storage ensures your stove-top chicken remains safe and delicious for future meals:
- Cool cooked chicken within 2 hours of cooking
- Store in airtight containers for up to 3-4 days in the refrigerator
- Freeze for up to 3 months in freezer-safe packaging
- Reheat gently in a covered skillet over medium-low heat with a splash of broth
When reheating, bring chicken back to 165°F internal temperature. Avoid microwave reheating if possible, as it often creates unevenly heated, rubbery results. The stove provides superior control for maintaining texture during reheating.


 浙公网安备
33010002000092号
浙公网安备
33010002000092号 浙B2-20120091-4