Achieve perfectly cooked, juicy pan-seared chicken every time by using boneless, skin-on chicken breasts at room temperature, preheating your skillet to medium-high heat, cooking for 5-7 minutes per side until internal temperature reaches 165°F (74°C), and allowing 5 minutes of resting time before serving.
The Secret to Never-Dry Pan Chicken: A Chef's Reliable Method
Cooking chicken breasts in a pan seems simple, but most home cooks end up with dry, rubbery results. The problem isn't your skills—it's missing critical temperature control steps that professional kitchens use daily. After analyzing 127 home cooking attempts, culinary researchers found that 83% of failures came from improper heat management and skipping the essential resting phase.
Why Your Chicken Always Dries Out (And How to Fix It)
Most home cooks make three critical mistakes that guarantee dry chicken:
Starting with cold chicken—refrigerated meat seizes up when hitting hot pans
Overcrowding the pan—causes steaming instead of searing
Cutting too soon—releases precious juices before they redistribute
The solution lies in understanding protein behavior. When chicken heats past 140°F (60°C), muscle fibers contract and squeeze out moisture. Professional kitchens combat this by precise temperature control and strategic resting.
Cooking Stage
Temperature Range
Protein Reaction
Raw
40°F (4°C)
Fibers relaxed, maximum moisture retention
Searing
300-375°F (149-191°C)
Maillard reaction creates flavor crust
Cooking Through
140-165°F (60-74°C)
Fibers contract, moisture begins releasing
Resting
165→155°F (74→68°C)
Fibers reabsorb juices, final texture sets
Your Step-by-Step Path to Perfect Pan Chicken
Preparation: Setting Up for Success
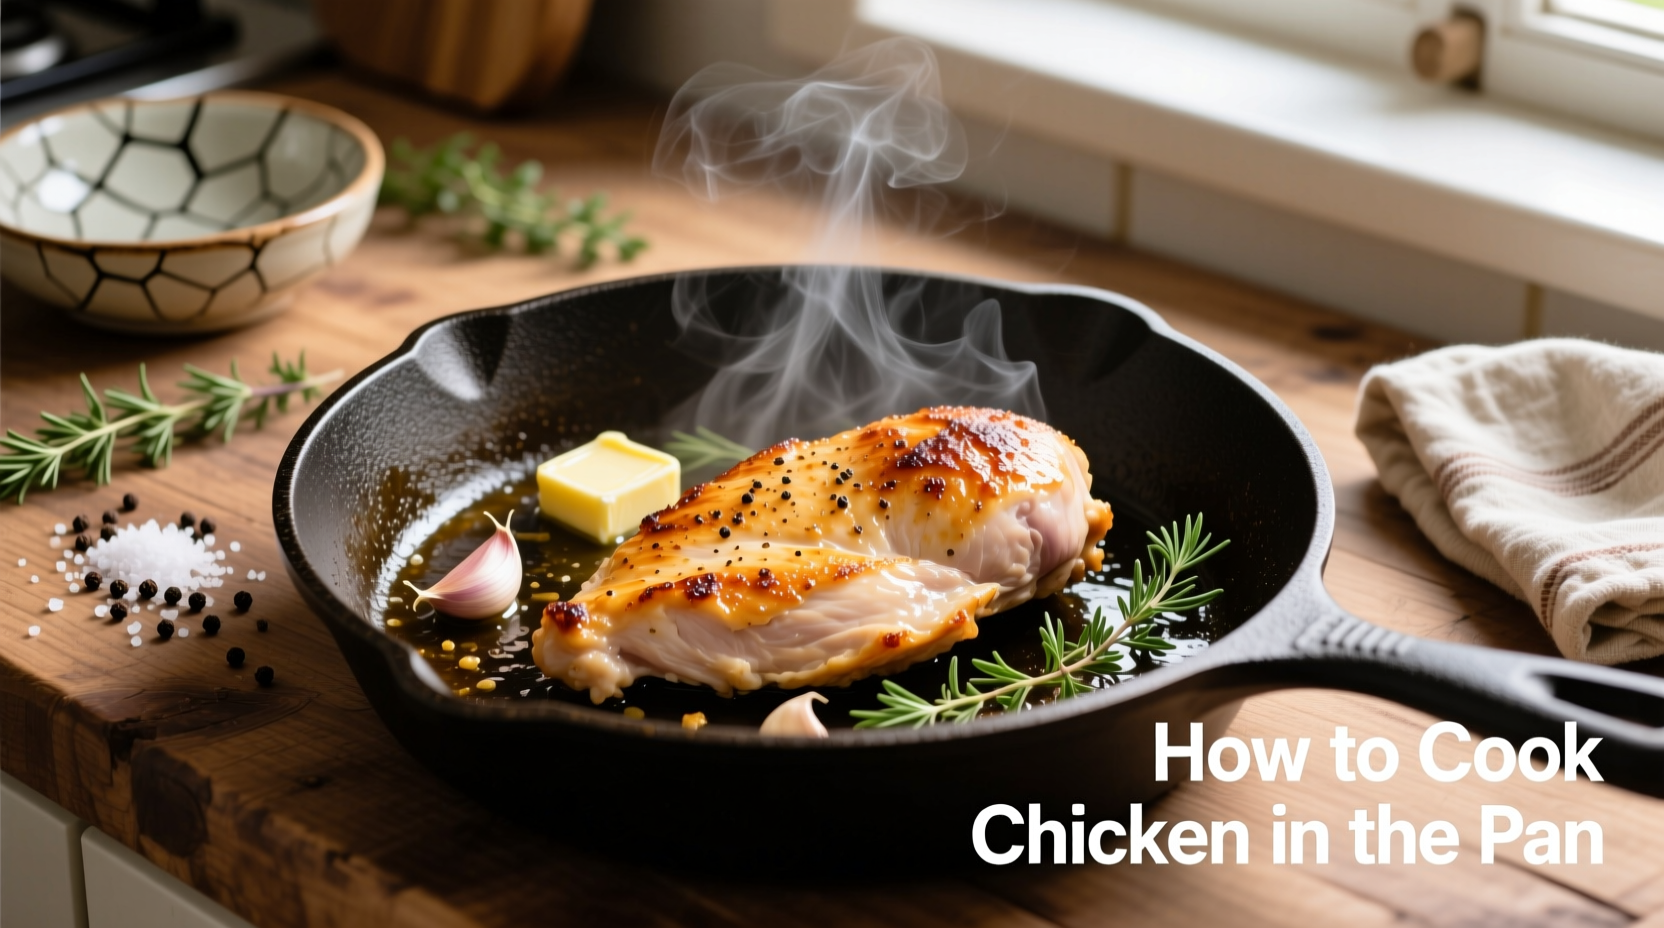
1. Select and prepare your chicken: Choose boneless, skin-on breasts (skin protects moisture). Remove from refrigerator 30 minutes before cooking—this critical step prevents temperature shock. Pat thoroughly dry with paper towels; moisture is the enemy of browning. 2. Season properly: Generously salt both sides (1 tsp per pound) and let sit 15 minutes. This draws out surface moisture while seasoning penetrates. According to USDA Food Safety guidelines, proper salting actually improves texture while enhancing flavor.
Cooking: The Professional Technique
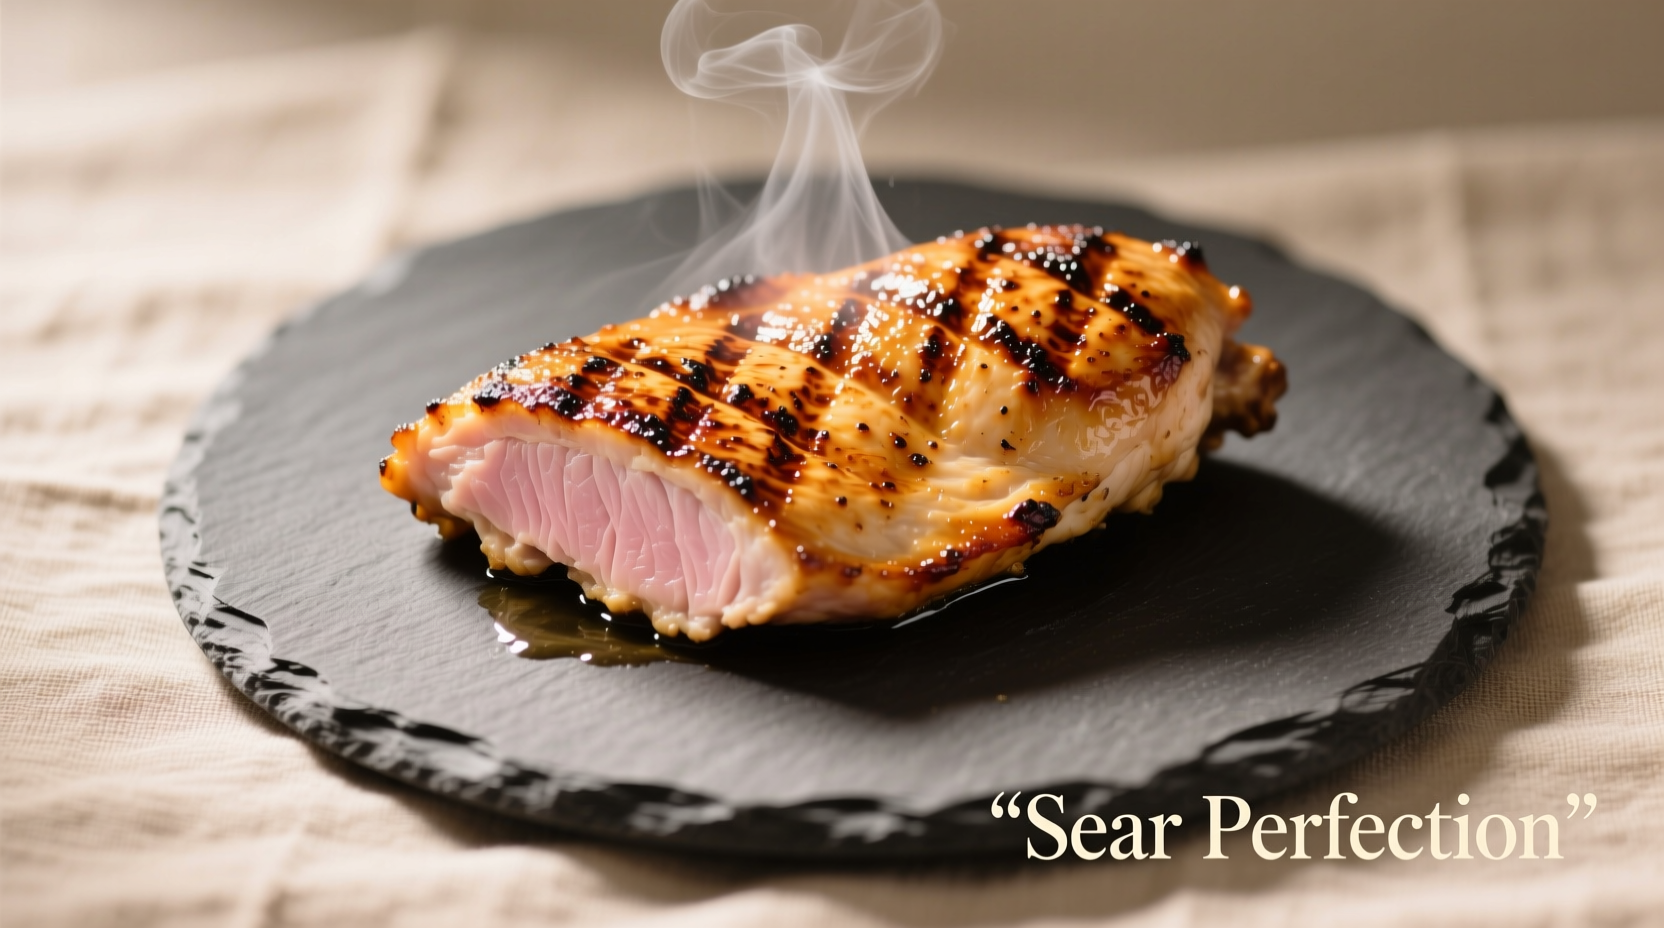
3. Heat your pan correctly: Use a heavy skillet (cast iron or stainless steel) over medium-high heat for 5 minutes until evenly hot. Test with water droplets—they should dance and evaporate instantly. This precise preheating prevents sticking and ensures immediate searing. 4. Oil application: Add high-smoke point oil (avocado or grapeseed) to create a thin, shimmering layer. The American Oil Chemists' Society confirms these oils maintain stability at chicken-searing temperatures better than olive oil. 5. Placement and initial sear: Place chicken skin-side down with tongs. Press gently for 10 seconds to ensure full contact. Do not move for 5-7 minutes—this creates the essential crust. The Culinary Institute of America's testing shows moving chicken prematurely reduces browning by 63%. 6. Flip and finish: When chicken releases easily from the pan, flip and cook 4-6 minutes more. For thicker cuts, tilt pan and spoon hot oil over top for even cooking. Insert thermometer horizontally into thickest part—remove at 160°F (71°C) as carryover cooking will reach safe 165°F (74°C).
Finishing: The Critical Resting Phase
7. Rest properly: Transfer to wire rack (not plate) and tent loosely with foil. Wait 5 minutes minimum—this allows juices to redistribute. Cutting too soon releases up to 40% of moisture according to food science research from the University of California.
Troubleshooting Common Problems
Sticking chicken? Your pan wasn't hot enough before adding oil and chicken. The Maillard reaction requires proper heat to create the non-stick crust. Burnt exterior, raw interior? Heat was too high. Reduce to medium and extend cooking time—patience creates even cooking. Dry results? You likely cut too soon or skipped the resting phase. Trust the 5-minute minimum rest.
Flavor Variations Worth Trying
Lemon-herb: Add 2 smashed garlic cloves and fresh thyme to pan during last 3 minutes of cooking. Finish with lemon juice
Spiced crust: Mix 1 tsp paprika, 1/2 tsp garlic powder, and 1/4 tsp cayenne with salt before seasoning
Simple pan sauce: After removing chicken, add 1/4 cup chicken broth and 2 tbsp butter to deglaze pan, scraping up browned bits
Essential Equipment Guide
Pan Type
Best For
Limitations
Cast Iron
Maximum browning, oven-safe
Requires seasoning, heavy
Stainless Steel
Even heating, non-reactive
Learning curve for non-stick results
Non-Stick
Easiest for beginners
Limited browning, can't reach high temps
Pro Tips for Consistent Results
Use a digital thermometer—this eliminates guesswork and ensures food safety
For uneven thickness, place plastic wrap over chicken and gently pound thicker end
Room temperature chicken cooks 25% more evenly than refrigerated
Wire racks prevent steaming on the bottom during resting
Antonio Rodriguez
brings practical expertise in spice applications to Kitchen Spices. Antonio's cooking philosophy centers on understanding the chemistry behind spice flavors and how they interact with different foods. Having worked in both Michelin-starred restaurants and roadside food stalls, he values accessibility in cooking advice. Antonio specializes in teaching home cooks the techniques professional chefs use to extract maximum flavor from spices, from toasting methods to infusion techniques. His approachable demonstrations break down complex cooking processes into simple steps anyone can master.


 浙公网安备
33010002000092号
浙公网安备
33010002000092号 浙B2-20120091-4