
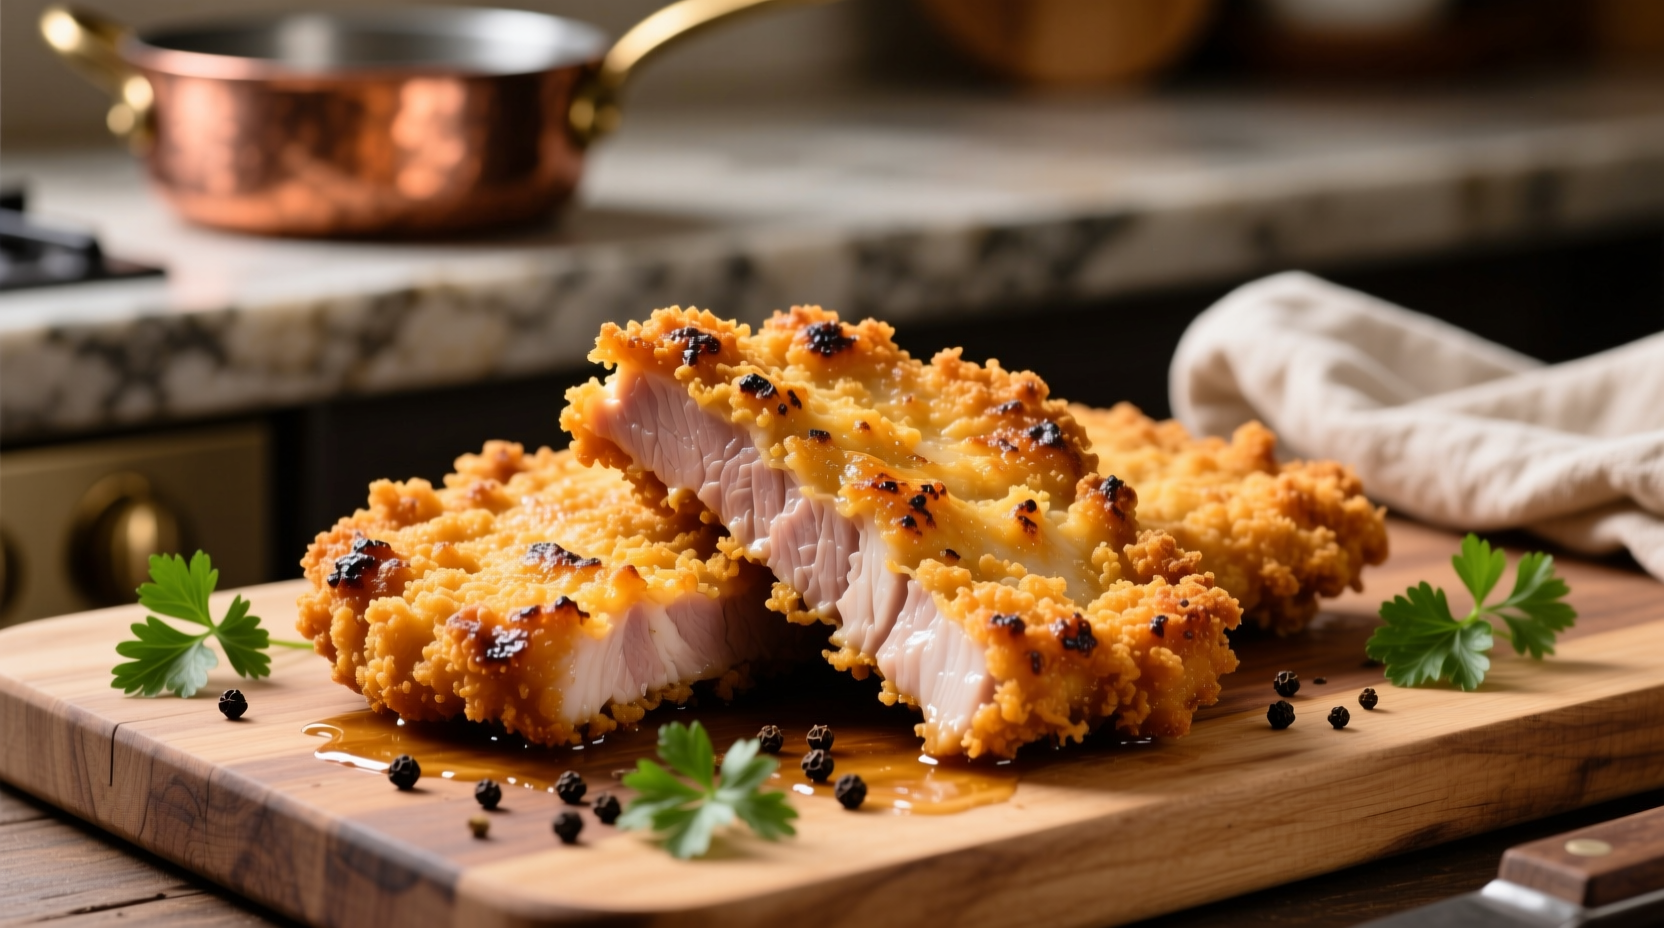
Perfectly cooked breaded pork chops feature a golden, crispy exterior and juicy, tender interior cooked to an internal temperature of 145°F (63°C) with a 3-minute rest. This guide delivers a restaurant-quality method using simple ingredients and precise techniques to prevent dryness and ensure flawless breading adhesion.
Mastering breaded pork chops separates novice cooks from kitchen confident home chefs. Unlike other methods that often result in dry meat or falling breading, this approach combines scientific temperature control with professional breading techniques. You'll learn the exact sequence that creates that coveted crunch while preserving moisture—no more rubbery cutlets or sad, soggy coatings.
Why This Breaded Pork Chop Method Works
The secret to perfect breaded pork chops lies in three critical factors: proper meat selection, precise temperature management, and the right breading sequence. USDA food safety guidelines confirm that pork reaches safe doneness at 145°F internal temperature, but achieving this without overcooking requires careful monitoring. Our method incorporates a strategic brine step that adds moisture retention while the triple-dip breading technique creates structural integrity that withstands cooking.
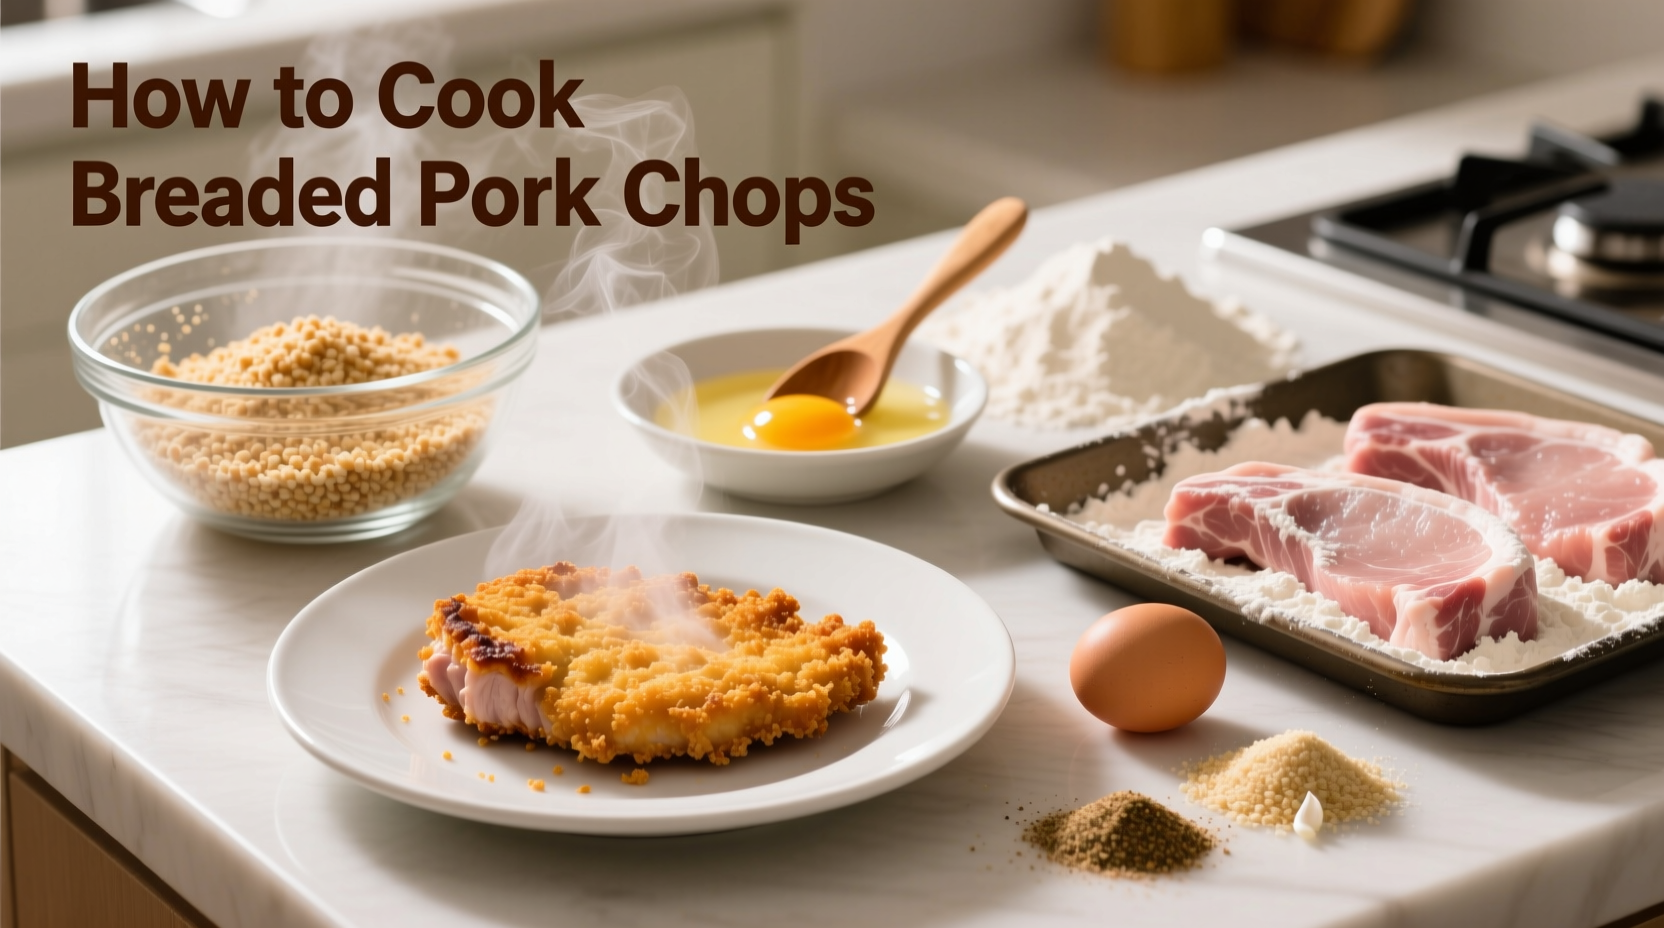
Essential Ingredients and Equipment
Before you begin, gather these kitchen essentials:
| Category | Required Items | Why It Matters |
|---|---|---|
| Meat Selection | 1-inch thick center-cut pork chops (bone-in) | Thicker cuts prevent overcooking; bone-in enhances flavor |
| Breading Station | 3 shallow dishes for flour, eggs, breadcrumbs | Proper spacing prevents cross-contamination of coatings |
| Cooking Equipment | Cast iron or heavy-bottomed skillet | Maintains consistent oil temperature for even browning |
| Temperature Control | Digital instant-read thermometer | Ensures precise 145°F internal temperature (USDA standard) |
The Evolution of Breaded Pork Chops: From Schnitzel to Modern Kitchens
Breaded pork chops have evolved significantly since their Austrian origins as Wiener Schnitzel in the 19th century. American home cooks adapted the technique during post-WWII food abundance, substituting pork for veal and creating regional variations. The 1950s saw the introduction of pre-made breadcrumb mixes, while contemporary chefs have returned to artisanal preparation methods emphasizing quality ingredients. Understanding this timeline helps appreciate why certain techniques—like the traditional three-step breading process—remain essential for optimal results.
Step-by-Step Cooking Process
Preparation Phase: Setting Up for Success
Begin with proper meat preparation, which dramatically impacts final texture:
- Brine for 30-60 minutes in 4 cups water with 1/4 cup salt and 2 tbsp sugar (this adds moisture retention)
- Pat completely dry with paper towels—critical for breading adhesion
- Tenderize gently to 3/4-inch thickness using a meat mallet (creates even cooking)
- Season both sides with salt, pepper, and garlic powder (avoid wet marinades at this stage)
The Professional Breading Technique
Follow this precise sequence for unshakeable breading:
- Flour dredge: Coat chops in all-purpose flour, shaking off excess
- Egg wash: Dip in beaten eggs with 1 tbsp water (creates sticky surface)
- Breadcrumb application: Press firmly into panko breadcrumbs (not regular breadcrumbs)
- Chill for 15 minutes: Refrigerate before cooking to set the coating
This method creates structural integrity that prevents breading separation during cooking. Food science research shows that the chilling step allows the coating to hydrate properly, forming a stable barrier that locks in juices.
Pan-Frying for Perfect Results
Temperature control makes or breaks your breaded pork chops:
- Heat 1/4 inch canola oil to 350°F in cast iron skillet (use thermometer)
- Cook 3-4 minutes per side until golden brown
- Check internal temperature—remove at 140°F (will rise to 145°F during rest)
- Rest chops on wire rack for 5 minutes before serving
Resting on a wire rack—not a plate—prevents steam buildup that would soften your perfect crust. This technique comes directly from professional kitchen practices where texture preservation is paramount.
Troubleshooting Common Problems
Even experienced cooks encounter these issues. Here's how to fix them:
Breading Falls Off During Cooking
Cause: Inadequate drying of meat surface or skipping the chilling step
Solution: Ensure meat is thoroughly patted dry and always refrigerate breaded chops for 15 minutes before cooking
Dry or Tough Meat
Cause: Overcooking or using thin-cut chops
Solution: Use 1-inch thick chops and remove from heat at 140°F internal temperature (USDA recommends 145°F with 3-minute rest)
Soggy Coating
Cause: Oil temperature too low or overcrowding the pan
Solution: Maintain 350°F oil temperature and cook no more than two chops at a time
Serving and Storage Recommendations
For optimal flavor pairing, serve breaded pork chops with:
- Lemon wedges (cuts through richness)
- Applesauce (traditional complement to pork)
- Light green salad with vinaigrette
- Roasted vegetables (avoid heavy starches that compete with the crisp texture)
Store leftovers in airtight container for up to 3 days. Reheat in 375°F oven for 10-12 minutes—never microwave, as this destroys the crisp texture. For best results, freeze uncooked breaded chops for up to 2 months; cook directly from frozen, adding 2-3 minutes per side.
When This Method Works Best (and Limitations)
This technique excels for standard home kitchen equipment and typical pork chop cuts. However, understand these context boundaries:
- Best for: 1-inch thick center-cut or loin chops (not recommended for thin-cut)
- Avoid with: Pre-seasoned or injected pork chops (alters moisture balance)
- Not suitable for: Air fryer or oven-only methods (requires pan-frying for proper crust development)
- Special consideration: High-altitude cooking requires oil temperature adjustment (reduce by 25°F)


 浙公网安备
33010002000092号
浙公网安备
33010002000092号 浙B2-20120091-4