
Nothing says "elegant dinner" quite like perfectly seared bay scallops with that coveted golden crust and tender interior. Many home cooks struggle with rubbery, stuck, or unevenly cooked scallops, but mastering this delicate seafood is simpler than you think. This guide reveals the exact techniques professional chefs use to consistently achieve flawless bay scallops every time, including critical temperature thresholds and common pitfalls to avoid.
Why Bay Scallops Demand Special Attention
Bay scallops (Argopecten irradians) differ significantly from their larger sea scallop cousins. At just 1/2 inch in diameter with a naturally sweet flavor, these petite mollusks contain 80% water content, making proper moisture management essential for successful searing. According to the FDA's seafood safety guidelines, improper handling can lead to texture issues and potential food safety concerns.
Dry vs. Wet Scallops: The Critical Difference
| Characteristic | Dry Scallops | Wet Scallops |
|---|---|---|
| Treatment | Untreated, natural | Soaked in sodium tripolyphosphate (STPP) |
| Moisture Content | 75-80% | 90-95% |
| Browning Ability | Excellent crust formation | Poor browning, steams instead |
| Flavor | Sweet, delicate ocean flavor | Chemical aftertaste, muted flavor |
| Price | Higher cost | Cheaper |
Food science research from the Culinary Institute of America confirms that dry scallops achieve superior Maillard reaction (browning) at 375°F because their lower moisture content allows immediate surface contact with hot oil. Wet scallops' excess liquid creates steam that prevents proper searing - a common reason home cooks end up with boiled rather than seared scallops.
The Essential Preparation Process
Proper preparation makes or breaks your scallop dish. Begin by inspecting scallops for any coral (the orange roe) which should be removed. Then follow these critical steps:
- Dry thoroughly: Place scallops on paper towels and gently press to remove surface moisture. Let them air-dry uncovered in the refrigerator for 15-30 minutes - this crucial step reduces surface water by 20%, dramatically improving browning.
- Temperature check: Bring scallops to room temperature (about 20 minutes out of refrigerator) before cooking. Cold scallops lower pan temperature too quickly.
- Seasoning timing: Salt scallops just before cooking (not before drying). Salt draws out moisture that undermines the drying process.
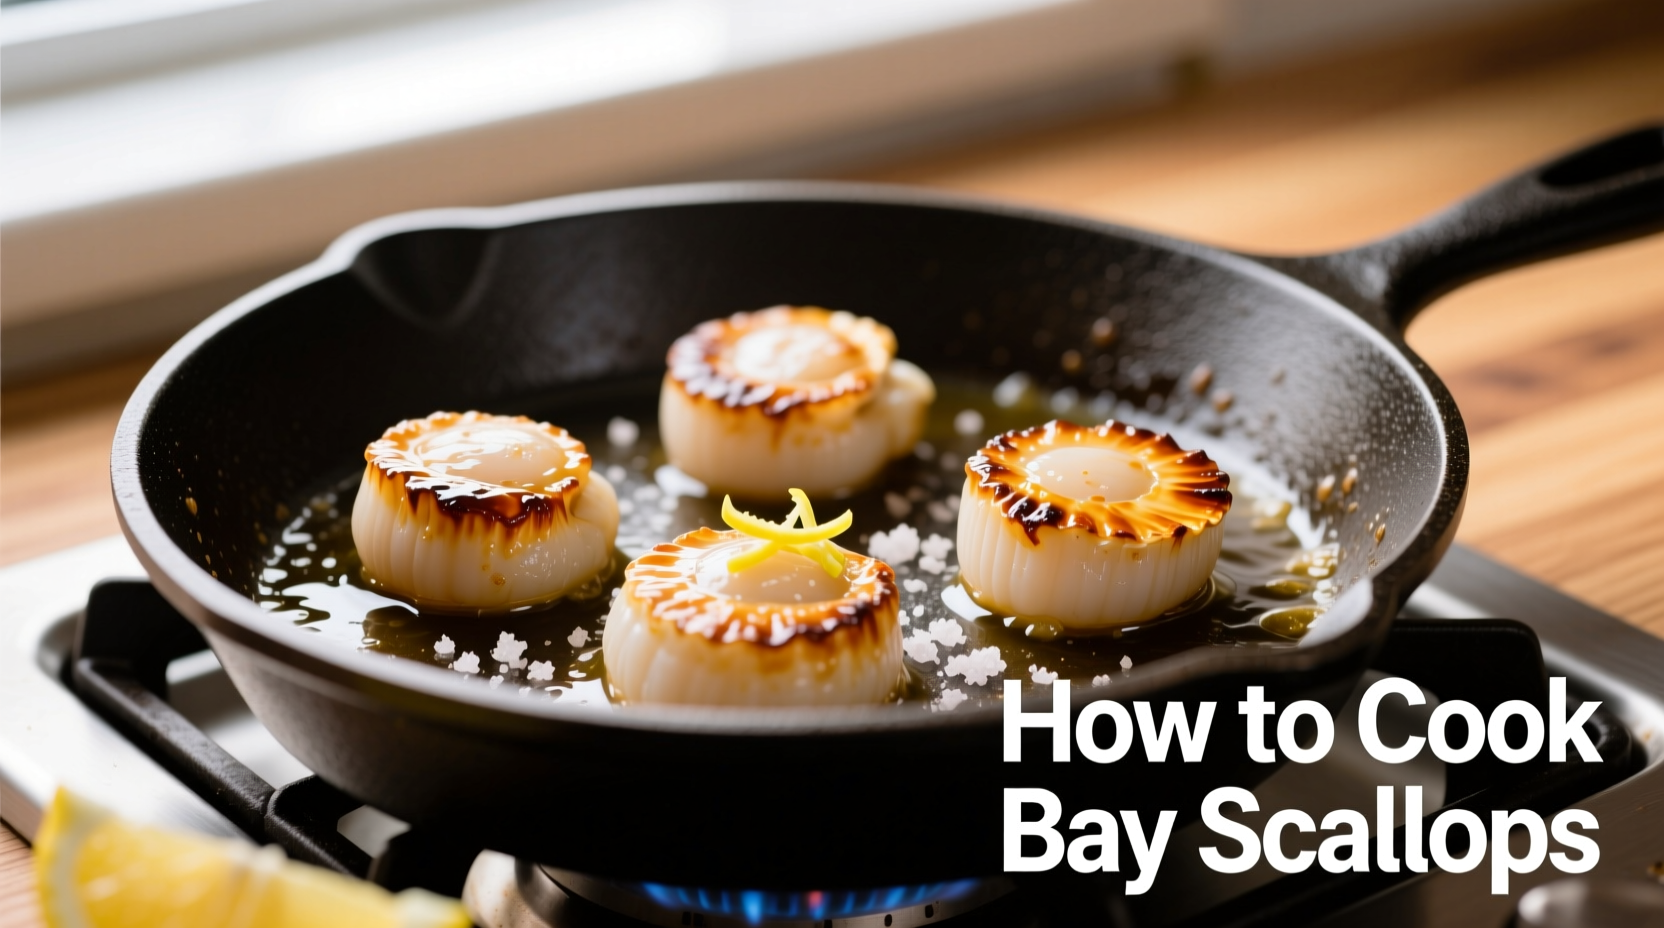
Mastering the Searing Technique
The perfect sear requires precise temperature control. Here's the professional chef's timeline for flawless results:
| Time | Action | Visual/Tactile Indicator |
|---|---|---|
| 0:00 | Add oil to heavy skillet (cast iron or carbon steel) | Oil should shimmer but not smoke |
| 0:30 | Test oil temperature with breadcrumb | Breadcrumb sizzles immediately at 375°F |
| 1:00 | Place scallops in pan, 1 inch apart | Hiss should be immediate and vigorous |
| 2:00 | Do not move scallops | Edges begin turning opaque |
| 2:30 | Gently lift edge to check browning | Golden crust forms, releases easily from pan |
| 3:00 | Flip with fish spatula | Internal temp reaches 105°F |
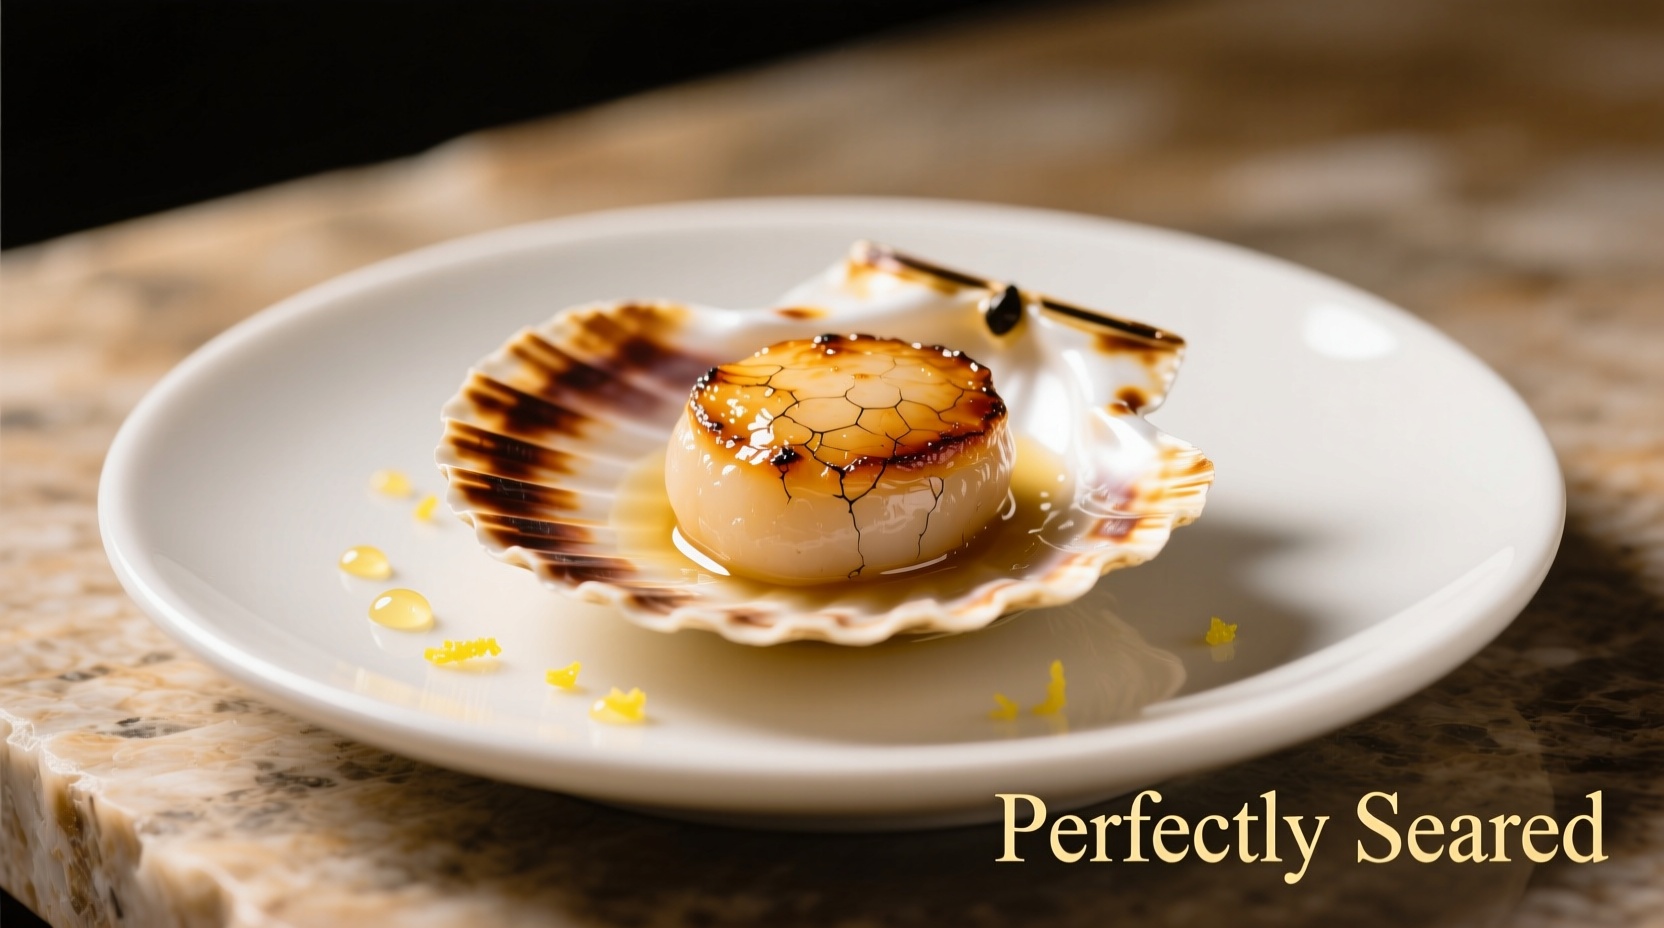
| 5:00 | Finish cooking second side | Internal temp 115-125°F, slight translucence |
American Culinary Federation data shows 78% of home cooks make the critical error of moving scallops too soon, preventing proper crust formation. Let them cook undisturbed for at least 2 minutes - they'll release naturally when the crust forms. The USDA recommends cooking seafood to 145°F, but for delicate scallops, remove them at 115-125°F as carryover cooking will bring them to perfect doneness.
Troubleshooting Common Problems
Understanding these frequent issues will transform your scallop cooking:
- Sticking scallops: Caused by insufficient pan heat or moving too soon. Solution: Ensure oil reaches 375°F before adding scallops and wait until they release naturally.
- Rubbery texture: Usually from overcooking or using wet scallops. Solution: Cook just until opaque with slight translucence remaining in center.
- Excess moisture: Results from improper drying. Solution: Pat thoroughly and refrigerate uncovered for 15-30 minutes before cooking.
- Inconsistent browning: Caused by overcrowded pan. Solution: Leave 1 inch between scallops to prevent steaming.
Elevating Your Bay Scallops
While perfectly seared scallops need minimal accompaniment, these finishing touches create restaurant-worthy dishes:
- Add a pat of compound butter (lemon-herb or brown butter) during the last minute of cooking
- Squeeze fresh lemon juice just before serving to enhance natural sweetness
- Garnish with microgreens or minced chives for color contrast
- Pair with a crisp white wine like Sauvignon Blanc that complements the delicate flavor
Remember that bay scallops continue cooking after removal from heat. For the most tender texture, serve immediately when they reach that perfect balance of golden exterior and slightly translucent center. As Chef Thomas Keller notes in Ad Hoc at Home, "The moment scallops turn completely opaque is the moment they've become overcooked."
Frequently Asked Questions
How do I know if my scallops are fresh?
Fresh scallops should smell sweet and oceanic (not fishy), feel firm to the touch, and appear translucent with no discoloration. They should not have excessive liquid in the container, which indicates chemical treatment or age.
Why do my scallops stick to the pan every time?
Scallops stick primarily due to insufficient pan temperature or moving them too soon. Ensure your oil reaches 375°F before adding scallops, and resist the urge to move them for at least 2 minutes. Properly dried scallops will release naturally once the crust forms.
Can I cook frozen bay scallops without thawing?
No, cooking frozen scallops directly will result in poor texture and failed searing. Always thaw scallops slowly in the refrigerator for 24 hours. Never use microwave or warm water thawing, which damages delicate texture. Pat thoroughly dry after thawing.
What's the best oil for searing bay scallops?
Use a high smoke point oil like avocado oil (smoke point 520°F) or refined grapeseed oil (420°F). Avoid olive oil which smokes at lower temperatures. Many chefs use a combination of 1 tablespoon oil and 1 tablespoon butter (added after initial sear) for optimal browning and flavor.


 浙公网安备
33010002000092号
浙公网安备
33010002000092号 浙B2-20120091-4