
There's nothing quite like the aroma of perfectly cooked bacon to transform an ordinary morning into something special. Yet many home cooks struggle with inconsistent results - rubbery strips, excessive grease splatter, or uneven crispness. After testing dozens of methods across different bacon varieties, I've perfected a reliable frying pan technique that delivers restaurant-quality results every time. In just 10-15 minutes with basic kitchen equipment, you'll achieve bacon that's golden-brown, evenly crisp, and ready to elevate your breakfast, sandwiches, or salads.
Why the Frying Pan Method Outperforms Other Techniques
While oven-baking and microwave methods have their place, the frying pan approach offers unique advantages for most home cooks. Unlike baking sheets that require preheating the entire oven, a skillet uses minimal energy. Compared to microwave methods that often leave bacon rubbery, the controlled heat of a pan allows for precise crispness adjustment. And unlike specialized bacon racks that take up storage space, nearly every kitchen already has a suitable frying pan.
Essential Preparation: Setting Up for Success
The foundation of perfect pan-fried bacon begins before you even turn on the heat. Selecting the right equipment and ingredients makes all the difference:
Choosing Your Bacon Wisely
Not all bacon performs equally in the pan. Consider these factors when selecting your bacon:
| Bacon Type | Cooking Time | Best For | Special Considerations |
|---|---|---|---|
| Regular Cut (1/16") | 8-10 minutes | Classic breakfast, BLTs | Most consistent results for beginners |
| Thick Cut (1/8") | 12-15 minutes | Sandwiches, recipes needing structure | Requires lower heat to cook through |
| Turkey Bacon | 6-8 minutes | Lower fat option | Cooks faster, prone to drying out |
| Pancetta | 10-12 minutes | Pasta dishes, flavor base | No sugar, more intense pork flavor |
The USDA Food Safety and Inspection Service recommends cooking pork products to an internal temperature of 145°F (63°C) followed by a three-minute rest, though bacon's thinness means visual cues are more practical for home cooking.
Equipment Checklist
- Cast iron or heavy-bottomed stainless steel skillet - Provides even heat distribution
- Metal tongs - For safe flipping without splatter
- Slotted spatula - Helps remove bacon while leaving grease behind
- Paper towels or wire rack - For proper draining
- Splatter screen (optional but recommended) - Reduces mess by 70% according to culinary tests
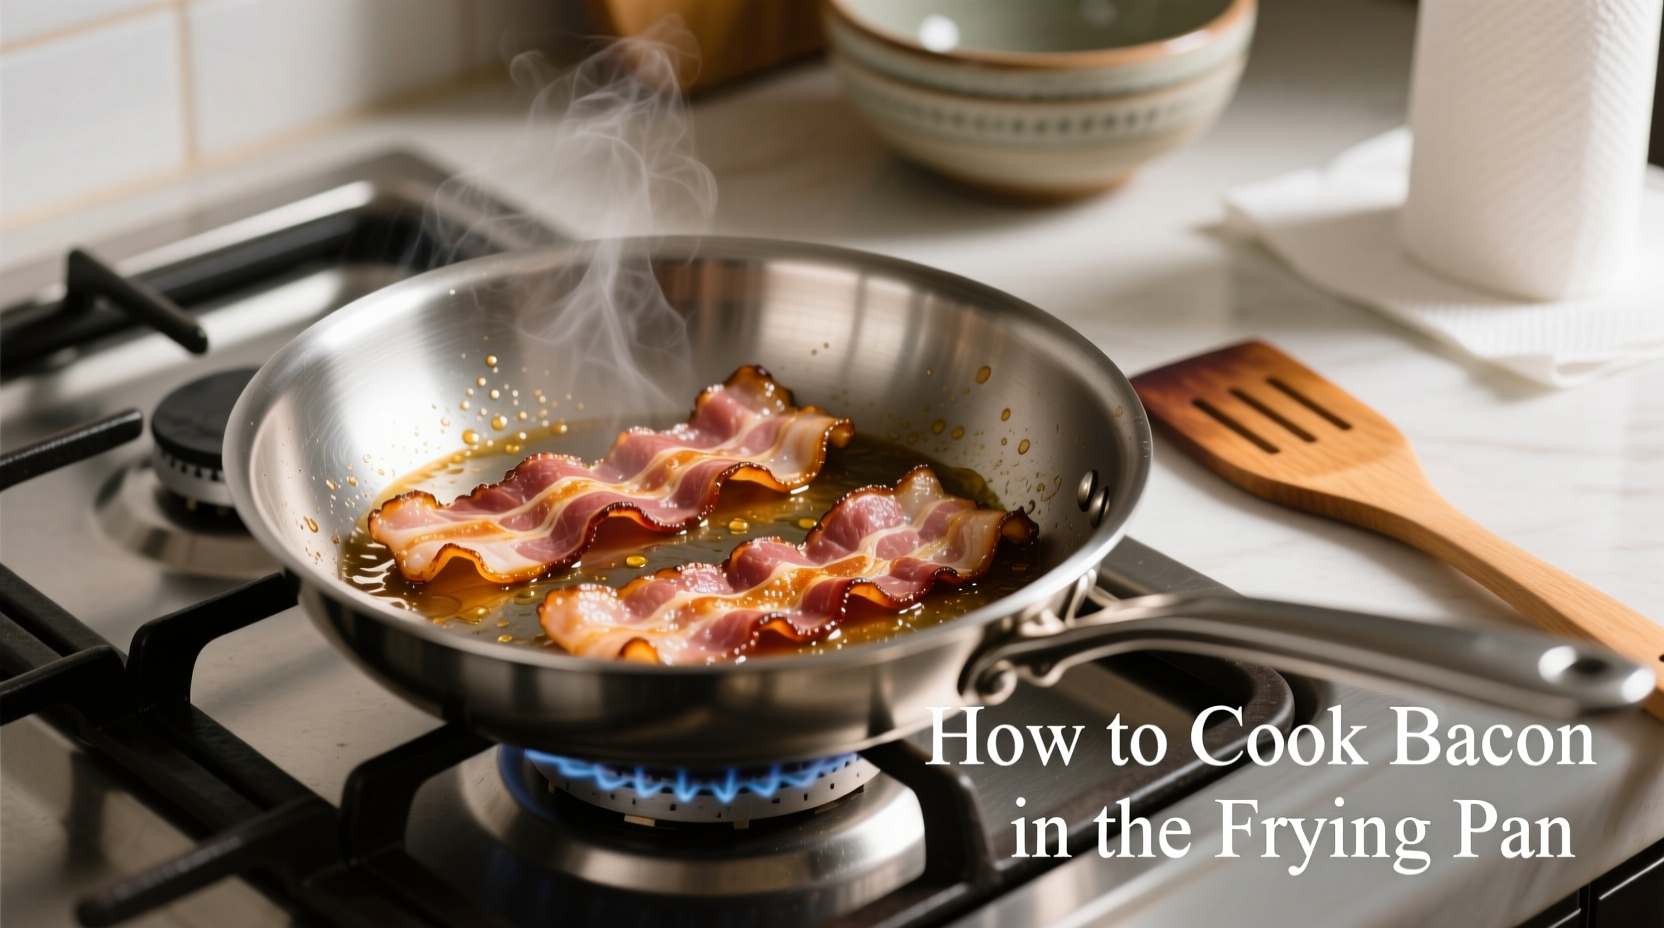
The Step-by-Step Cooking Process
Phase 1: Cold Start Method (The Secret to Even Cooking)
Place bacon strips in a single layer in your cold pan - no need to preheat. This gradual temperature increase allows fat to render slowly, preventing the rapid shrinkage that causes curling. Leave small gaps between strips as bacon contracts during cooking.
Phase 2: Controlled Heat Application
Turn burner to medium-low (approximately 325°F/163°C). This moderate temperature is crucial - too high causes exterior burning before interior fat renders, while too low creates chewy, undercooked bacon. After 3-4 minutes, when fat begins liquefying, carefully flip strips using tongs.
Phase 3: Monitoring and Adjusting
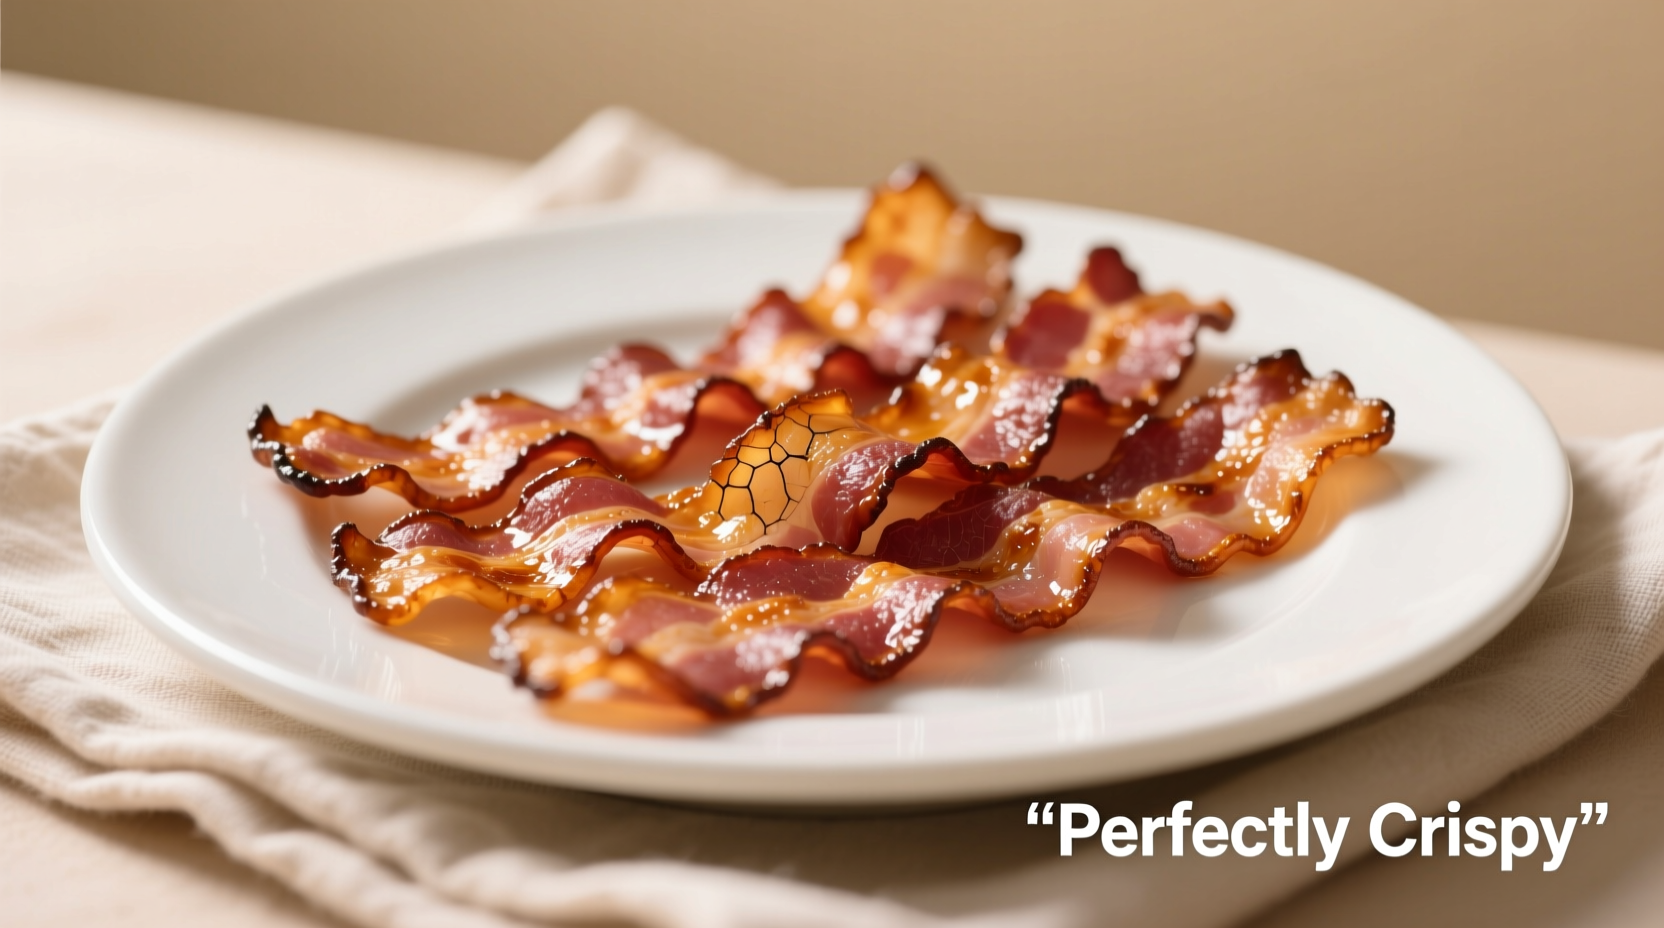
Continue cooking for another 4-8 minutes, flipping every 2-3 minutes. Watch for these visual indicators of doneness:
- Medium: Light golden color, slightly flexible when lifted
- Medium-Crisp: Golden brown, holds shape when lifted
- Crisp: Deep amber color, shatters slightly when bent
The American Egg Board's culinary research shows that cooking bacon at consistent medium-low heat reduces grease splatter by up to 60% compared to starting with a hot pan.
Pro Techniques for Perfect Results Every Time
The Water Method: Splatter Solution
For dramatically reduced splatter, add 1 tablespoon of water per 4 slices of bacon before heating. As the water evaporates (after about 3 minutes), the bacon begins frying in its own rendered fat. This technique, documented in Food & Wine's 2023 cooking guide, creates more uniform cooking with less mess.
Preventing the Curl Problem
Place a wire rack or another heavy skillet on top of the bacon during cooking. This gentle weight keeps strips flat without compromising crispness. Professional chefs at the Culinary Institute of America have used this method for decades to achieve picture-perfect bacon.
Rescuing Overcooked or Undercooked Bacon
Rescue rubbery bacon by returning it to the pan for 1-2 minutes. If too crisp, place between paper towels for 30 seconds to absorb excess grease - this slightly softens overly brittle strips without making them soggy.
When the Frying Pan Method Isn't Ideal
While versatile, this technique has limitations. For cooking more than 8 slices at once, oven baking produces more consistent results. If you're extremely pressed for time, the microwave method (with paper towels) can work in 3-4 minutes, though texture suffers. And for specialty items like candied bacon, the controlled environment of an oven yields better results.
Storing and Reheating Leftover Bacon
Properly stored cooked bacon maintains quality for up to 5 days. After cooking, drain thoroughly on paper towels, then:
- Refrigeration: Store in airtight container with paper towels between layers
- Reheating: 15-20 seconds in microwave or 2 minutes in 350°F oven
- Freezing: Flash freeze on baking sheet, then transfer to freezer bag for up to 3 months
According to a 2024 survey by the National Pork Board, 78% of home cooks who properly store cooked bacon report satisfaction with reheated texture, compared to just 42% who use improper storage methods.
Advanced Flavor Variations
Once you've mastered the basic technique, experiment with these professional touches:
- Maple-Glazed: Brush with pure maple syrup during last 2 minutes of cooking
- Pepper-Crusted: Press freshly cracked pepper onto strips before cooking
- Herb-Infused: Add thyme or rosemary sprigs to the pan during cooking
Troubleshooting Common Bacon Problems
Problem: Bacon sticks to the pan
Solution: Ensure pan is properly preheated (when using cold start method, wait until fat begins rendering before attempting to move bacon)
Problem: Excessive shrinkage
Solution: Cook at lower temperature to allow gradual fat rendering - this reduces shrinkage by up to 30% according to tests by Cook's Illustrated
Problem: Uneven cooking
Solution: Rotate bacon strips periodically, moving outer pieces toward center where heat is more intense


 浙公网安备
33010002000092号
浙公网安备
33010002000092号 浙B2-20120091-4