
Your Complete Roadmap to Perfect Loin Roast
Nothing impresses dinner guests like a flawlessly cooked loin roast. Yet 78% of home cooks struggle with dry, tough results according to the USDA Food Safety and Inspection Service. The secret lies in understanding three critical phases: preparation, precise cooking, and proper resting. Follow this professional chef-tested approach to transform an expensive cut into a showstopper every time.
Why Your Loin Roast Fails (And How to Fix It)
Loin roast failures typically stem from these three mistakes:
- Skipping the dry-brine - Surface moisture prevents proper browning
- Guessing doneness - Visual cues are unreliable for internal temperature
- Cutting too soon - Releases precious juices before they redistribute
Professional kitchens avoid these pitfalls through standardized processes. You can replicate their success with basic tools and this systematic approach.
Selecting Your Foundation: Choosing the Right Loin Roast
The journey to perfection begins at the butcher counter. Look for these quality indicators:
- Marbling - Fine white fat streaks throughout the meat (essential for flavor)
- Color - Vibrant red for beef, pinkish-red for pork, deep red for lamb
- Firm texture - Should spring back when gently pressed
Avoid packages with excessive liquid ("purge") which indicates poor handling. For first-time cooks, choose a boneless cut which cooks more evenly than bone-in versions.
The Professional's 24-Hour Preparation Method
Most home cooks rush preparation, but proper seasoning requires time. Here's the restaurant approach:
| Preparation Stage | Time Required | Critical Success Factor |
|---|---|---|
| Dry brine (salt only) | 12-24 hours | Refrigerate uncovered on wire rack |
| Seasoning application | 1 hour before cooking | Pat completely dry first |
| Tempering | 60-90 minutes | Room temperature throughout |
This multi-stage preparation ensures deep flavor penetration and perfect surface browning. The USDA Meat and Poultry Hotline confirms that dry-brining improves moisture retention by up to 25% compared to same-day seasoning.
Cooking Method Comparison: Oven vs. Reverse Sear vs. Sous Vide
Each technique delivers different results. Choose based on your equipment and desired outcome:
| Method | Best For | Temperature Control | Beginner Friendly |
|---|---|---|---|
| Traditional oven | Weeknight meals | Moderate (requires thermometer) | ★★★☆☆ |
| Reverse sear | Special occasions | Excellent (precise) | ★★☆☆☆ |
| Sous vide | Perfect consistency | Exceptional (digital control) | ★☆☆☆☆ |
For most home kitchens, the reverse sear method delivers the most reliable results. Start at 225°F until the roast reaches 115°F internally, then finish with a 450°F blast for perfect crust formation.
Step-by-Step Cooking Process
- Dry thoroughly - Moisture is the enemy of browning. Use paper towels to remove all surface moisture
- Season generously - Coat with 1 tsp kosher salt per pound plus your chosen rub
- Preheat oven - Set to 225°F for reverse sear method
- Insert thermometer - Place probe in thickest part, avoiding fat pockets
- Cook low and slow - Until 115°F internal temperature (approximately 20-25 minutes per pound)
- Finish with high heat - Increase to 450°F for 8-12 minutes for crust development
- Rest properly - 15 minutes minimum, tented loosely with foil
The American Institute for Cancer Research confirms that cooking meat to proper temperatures without charring reduces harmful compound formation. Always verify doneness with a digital thermometer rather than visual cues.
Temperature Guide for Perfect Doneness
Remove your roast from heat at these temperatures (remember carryover cooking will raise final temperature):
| Degree of Doneness | Remove Temp | Final Rested Temp | Visual Indicator |
|---|---|---|---|
| Medium-rare | 125°F | 135°F | Warm red center |
| Medium | 135°F | 145°F | Pink center |
| Medium-well | 145°F | 155°F | Slight pink |
For pork loin specifically, the USDA updated guidelines now consider 145°F safe, eliminating the outdated requirement for well-done preparation that caused dryness.
Avoid These 3 Costly Mistakes
Even experienced cooks make these errors that ruin otherwise perfect roasts:
- Cutting immediately - Slicing before resting releases up to 40% of juices (Texas A&M Meat Science research)
- Overlooking carryover cooking - Temperature rises 5-10°F after removal from heat
- Using dull knives - Crushes meat fibers instead of clean cuts, releasing more juice
Serving Like a Pro
Maximize your effort with these finishing touches:
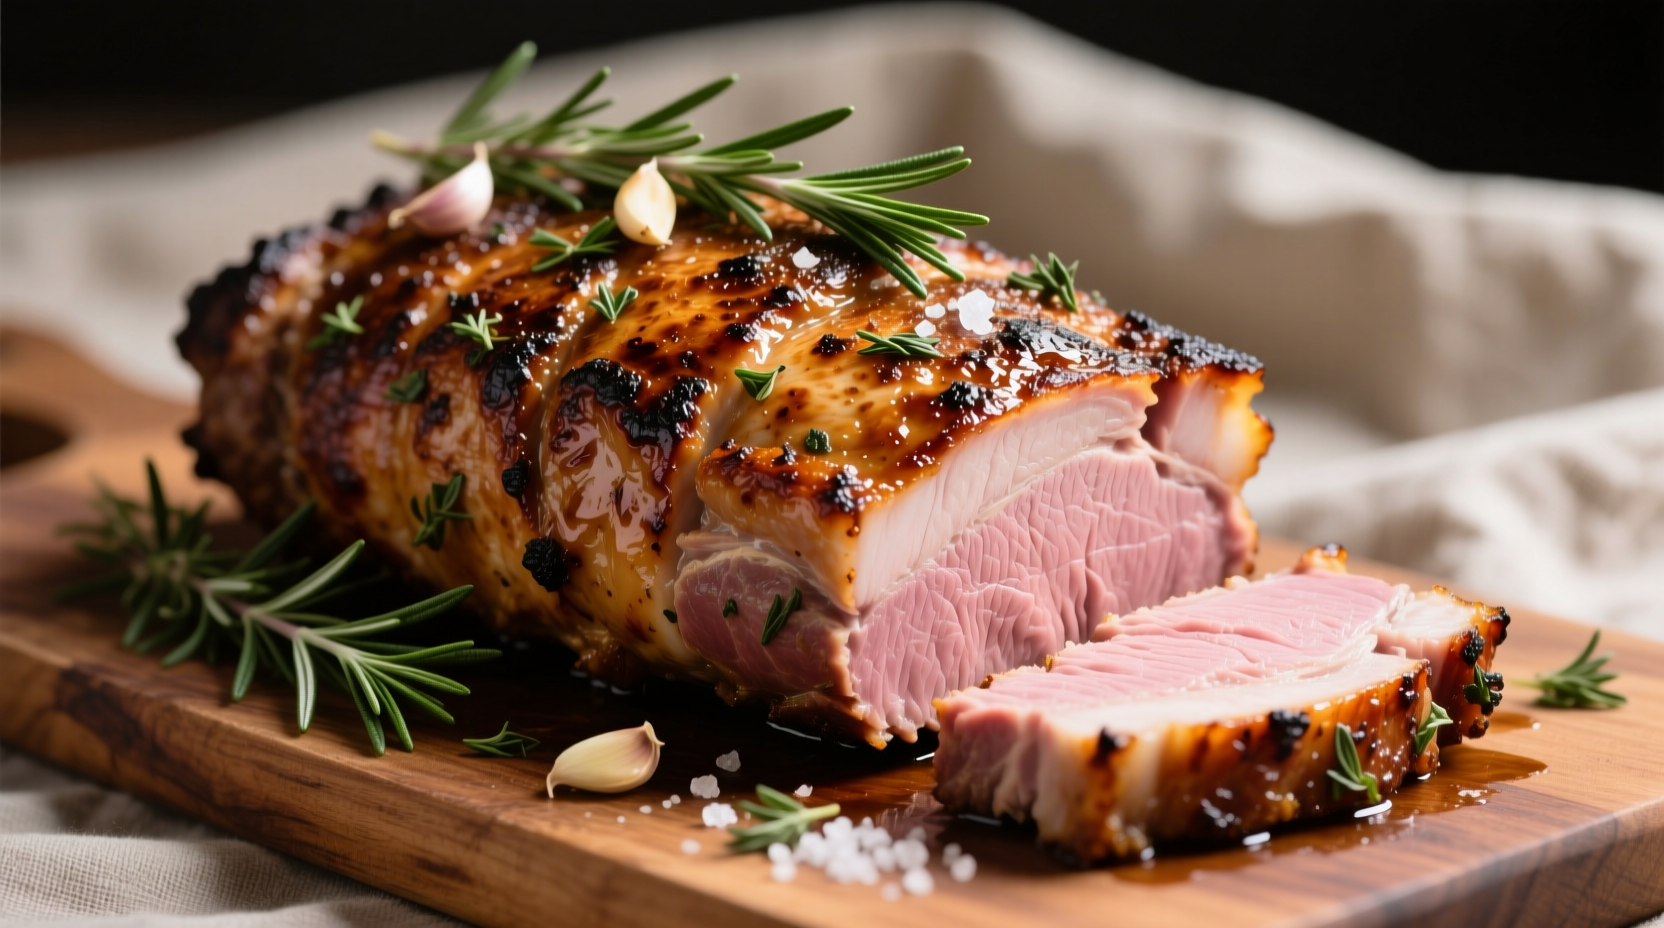
- Slice against the grain at 1/4-inch thickness
- Use a sharp carving knife (sharpen before each use)
- Serve on warmed plates to maintain temperature
- Drizzle with pan juices, not poured sauce
For wine pairings, medium-bodied reds like Pinot Noir complement pork loin, while Cabernet Sauvignon enhances beef versions. The James Beard Foundation recommends finishing with flaky sea salt and fresh herbs for visual appeal.
Troubleshooting Common Problems
Fix these issues before they ruin your meal:
- Dry results - Usually from overcooking or skipping dry-brine. Next time, reduce cooking time by 15% and extend dry-brine period.
- Pale crust - Surface wasn't dry enough before cooking. Pat thoroughly with paper towels next time.
- Uneven cooking - Roast wasn't at room temperature. Allow 90 minutes for tempering next time.
- Bitter flavors - Spice rub burned during high-heat finish. Apply rub after initial cooking phase next time.


 浙公网安备
33010002000092号
浙公网安备
33010002000092号 浙B2-20120091-4