
Discover exactly when and how to plant garlic for a bountiful harvest. This comprehensive guide reveals the science-backed planting techniques that transform ordinary cloves into plump, flavorful bulbs. Whether you're gardening in USDA Zone 3 or Zone 9, you'll learn the precise spacing, depth, and timing that professional growers use to maximize yield and flavor development.
Garlic Planting Quick Reference Guide
Before diving into details, here's what successful garlic growers know:
| Factor | Optimal Condition | Why It Matters |
|---|---|---|
| Planting Time | Fall: 4-6 weeks before first frost | Allows root development before winter dormancy |
| Soil pH | 6.0-7.5 | Maximizes nutrient availability for bulb formation |
| Spacing | 4-6 inches between cloves | Prevents competition for nutrients and water |
| Planting Depth | 2-3 inches below soil surface | Protects cloves while allowing easy shoot emergence |
Planning Your Garlic Planting Project
Successful garlic cultivation begins with proper planning. The timing of your planting directly impacts bulb size and quality. According to research from the University of Minnesota Extension, fall planting produces significantly larger bulbs than spring planting for most varieties because it allows for root development during cool autumn temperatures.
Choosing Between Hardneck and Softneck Varieties
Your climate determines which garlic type will thrive:
- Hardneck varieties (Rocambole, Porcelain, Purple Stripe) require cold exposure to form bulbs properly and perform best in USDA Zones 3-7
- Softneck varieties (Silverskin, Artichoke) tolerate warmer climates and excel in Zones 7-9 with milder winters
The Cornell University College of Agriculture and Life Sciences confirms that hardneck varieties typically produce larger individual cloves but fewer per bulb compared to softnecks, which explains why commercial growers often prefer softnecks for their higher clove count and longer storage life.
Preparing Your Garlic Bed
Soil preparation is non-negotiable for quality garlic production. Unlike many vegetables, garlic requires exceptionally well-draining soil to prevent rot during winter months. Here's how to prepare your bed properly:
Soil Amendment Protocol
- Test your soil pH 4-6 weeks before planting (ideal range: 6.0-7.5)
- Add 3-4 inches of compost or well-rotted manure to the planting area
- Mix in 5 pounds of blood meal or 10 pounds of bone meal per 100 square feet for essential nutrients
- Avoid fresh manure which can cause cloves to rot
According to the USDA Natural Resources Conservation Service, garlic performs poorly in compacted soils. They recommend double-digging beds to a depth of 12 inches to ensure proper root penetration and drainage. Raised beds 6-8 inches high work exceptionally well in areas with heavy rainfall or clay soils.
The Planting Process: Step-by-Step
Follow these precise steps for optimal garlic planting results:
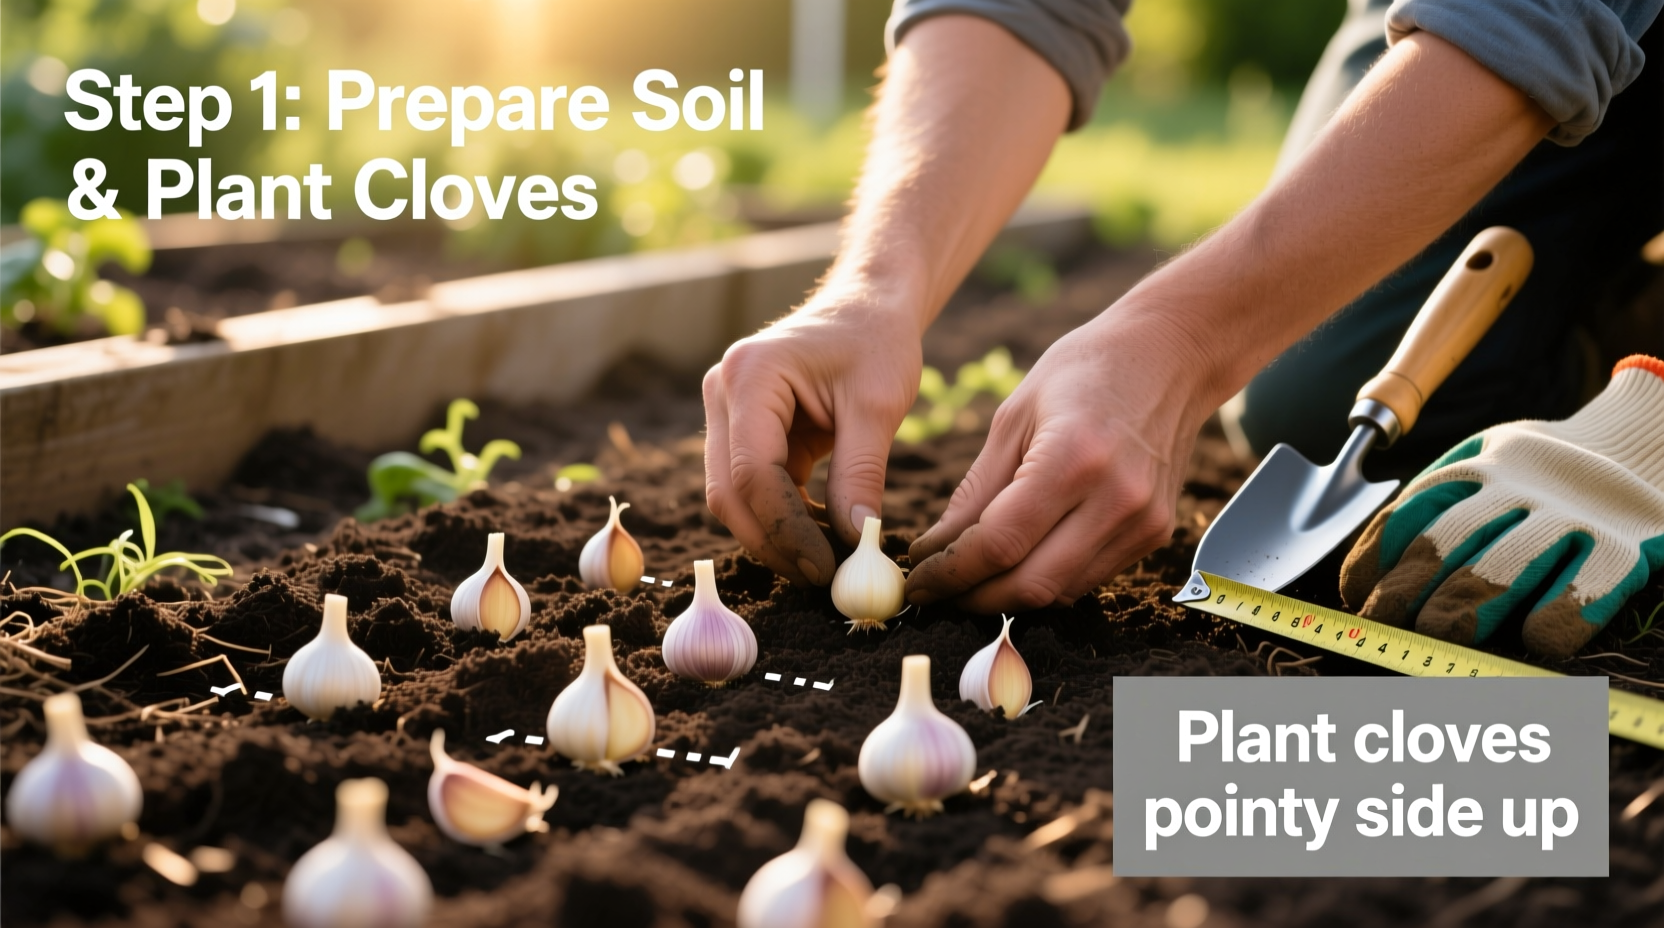
Step 1: Select and Prepare Your Cloves
Choose the largest, healthiest cloves from your bulb selection. Research from Oregon State University Extension shows that larger planting cloves produce significantly larger harvest bulbs. Separate cloves from bulbs 1-2 days before planting, keeping the papery husk intact.
Step 2: Proper Planting Technique
- Create furrows 2-3 inches deep using a hoe or stick
- Place cloves pointy-end up, flat root-end down
- Space cloves 4-6 inches apart within rows
- Space rows 12-18 inches apart for adequate air circulation
- Cover cloves with soil and gently firm the surface
Step 3: Critical Post-Planting Care
Immediately after planting, apply 4-6 inches of organic mulch (straw, shredded leaves, or grass clippings). The University of California Agriculture and Natural Resources emphasizes that proper mulching regulates soil temperature, prevents heaving during freeze-thaw cycles, and suppresses early weed growth. Water thoroughly after planting only if soil is dry.
Seasonal Care Timeline
Garlic requires specific care throughout its growth cycle:
| Season | Care Requirements | Common Mistakes to Avoid |
|---|---|---|
| Fall (after planting) | Mulch heavily once soil cools (32-40°F) | Applying mulch too early attracts rodents |
| Winter | Maintain mulch layer; no additional care needed | Removing mulch during warm spells |
| Early Spring | Remove mulch when shoots emerge; apply nitrogen fertilizer | Over-fertilizing which causes excessive leaf growth |
| Late Spring | Water consistently (1" per week); remove scapes on hardnecks | Ignoring scape removal which reduces bulb size |
Troubleshooting Common Planting Issues
Even experienced gardeners encounter these garlic growing challenges:
Problem: Cloves Rot Before Sprouting
Solution: This typically occurs in poorly draining soil. Amend soil with additional compost and perlite before replanting. The Royal Horticultural Society recommends planting in raised beds if you have heavy clay soil.
Problem: Weak or Stunted Growth
Solution: Often caused by insufficient nutrients or planting too shallow. Side-dress with blood meal in early spring and ensure cloves were planted at proper depth (2-3 inches).
Problem: Small Bulb Size
Solution: According to Washington State University Extension, the most common causes are late planting, insufficient spacing, or failure to remove scapes on hardneck varieties. Plant cloves earlier in the season and maintain proper spacing.
Harvest Timeline and Expectations
Garlic requires patience—most varieties take 7-9 months from planting to harvest. Watch for these maturity indicators:
- Lower leaves turn brown while 5-6 upper leaves remain green
- Bulb wrappers become dry and papery
- Cloves fill out the bulb casing
Harvest timing varies by variety and climate, but generally occurs in late June through August in the Northern Hemisphere. The National Gardening Association notes that harvesting too early produces small bulbs, while harvesting too late causes cloves to separate and reduce storage life.
Frequently Asked Questions
Can I plant supermarket garlic?
While possible, it's not recommended. Most supermarket garlic is treated with sprout inhibitors and may carry diseases. Garden centers and seed catalogs offer disease-free varieties specifically bred for your climate zone. The University of Vermont Extension confirms that grocery store garlic often fails to thrive due to chemical treatments and improper storage conditions.
How deep should I plant garlic cloves?
Plant cloves 2-3 inches deep in most climates, measured from the base of the clove to the soil surface. In extremely cold regions (USDA Zones 1-4), plant 3-4 inches deep and apply extra mulch. Shallow planting risks exposure to freezing temperatures, while planting too deep can delay emergence and reduce bulb size according to Colorado State University research.
What happens if I plant garlic in spring instead of fall?
Spring-planted garlic typically produces smaller bulbs because it misses the critical root development period that occurs in fall. The University of Maine Cooperative Extension reports that fall-planted garlic yields are typically 30-50% larger than spring-planted crops. If planting in spring, choose early-maturing varieties and plant as soon as soil can be worked.
How much space do I need between garlic plants?
Maintain 4-6 inches between cloves within rows and 12-18 inches between rows. Proper spacing prevents competition for nutrients and allows bulbs to develop fully. Research from the Rodale Institute shows that garlic planted at 4-inch spacing produces bulbs 25% larger than those planted at 2-inch spacing due to reduced competition for soil resources.
Should I remove the papery skin before planting garlic cloves?
No, always keep the papery husk intact when planting. This protective layer prevents moisture loss and protects against soil pathogens. The Cornell University Vegetable Program confirms that removing the skin increases the risk of rot and reduces successful sprouting rates by up to 40% compared to planting with husks intact.


 浙公网安备
33010002000092号
浙公网安备
33010002000092号 浙B2-20120091-4