
The perfect stovetop cooking time for chicken breasts is 6-8 minutes per side over medium-high heat, or until the internal temperature reaches 165°F (74°C). Thicker cuts may require up to 10 minutes per side, while thinner cuts may need only 5 minutes. Always use a meat thermometer for accuracy—this is the only reliable method to ensure food safety while preventing dry, overcooked chicken.
Getting perfectly cooked chicken breasts on the stove seems simple, but many home cooks end up with dry, rubbery results. As a chef who's taught thousands of home cooks professional techniques, I've discovered the precise timing and methods that transform basic chicken breasts into juicy, flavorful meals every time. In this guide, you'll learn exactly how long to cook chicken breasts on stove based on thickness, heat level, and your specific equipment—plus the critical food safety steps most tutorials overlook.
Why Perfect Timing Matters for Stovetop Chicken
Chicken breast is one of the most commonly cooked proteins worldwide, yet it's also one of the most frequently overcooked. According to USDA Food Safety and Inspection Service data, nearly 30% of home cooks don't verify chicken doneness properly, risking foodborne illness or creating dry, unappetizing results. The narrow window between undercooked and overcooked makes precise timing essential for both safety and quality.
Essential Preparation: Setting Up for Success
Before your chicken hits the pan, proper preparation determines your success. Skip these steps and you'll struggle with uneven cooking regardless of timing:
- Bring chicken to room temperature: Remove from refrigerator 20-30 minutes before cooking. Cold chicken seizes up when hitting hot pans, causing uneven cooking.
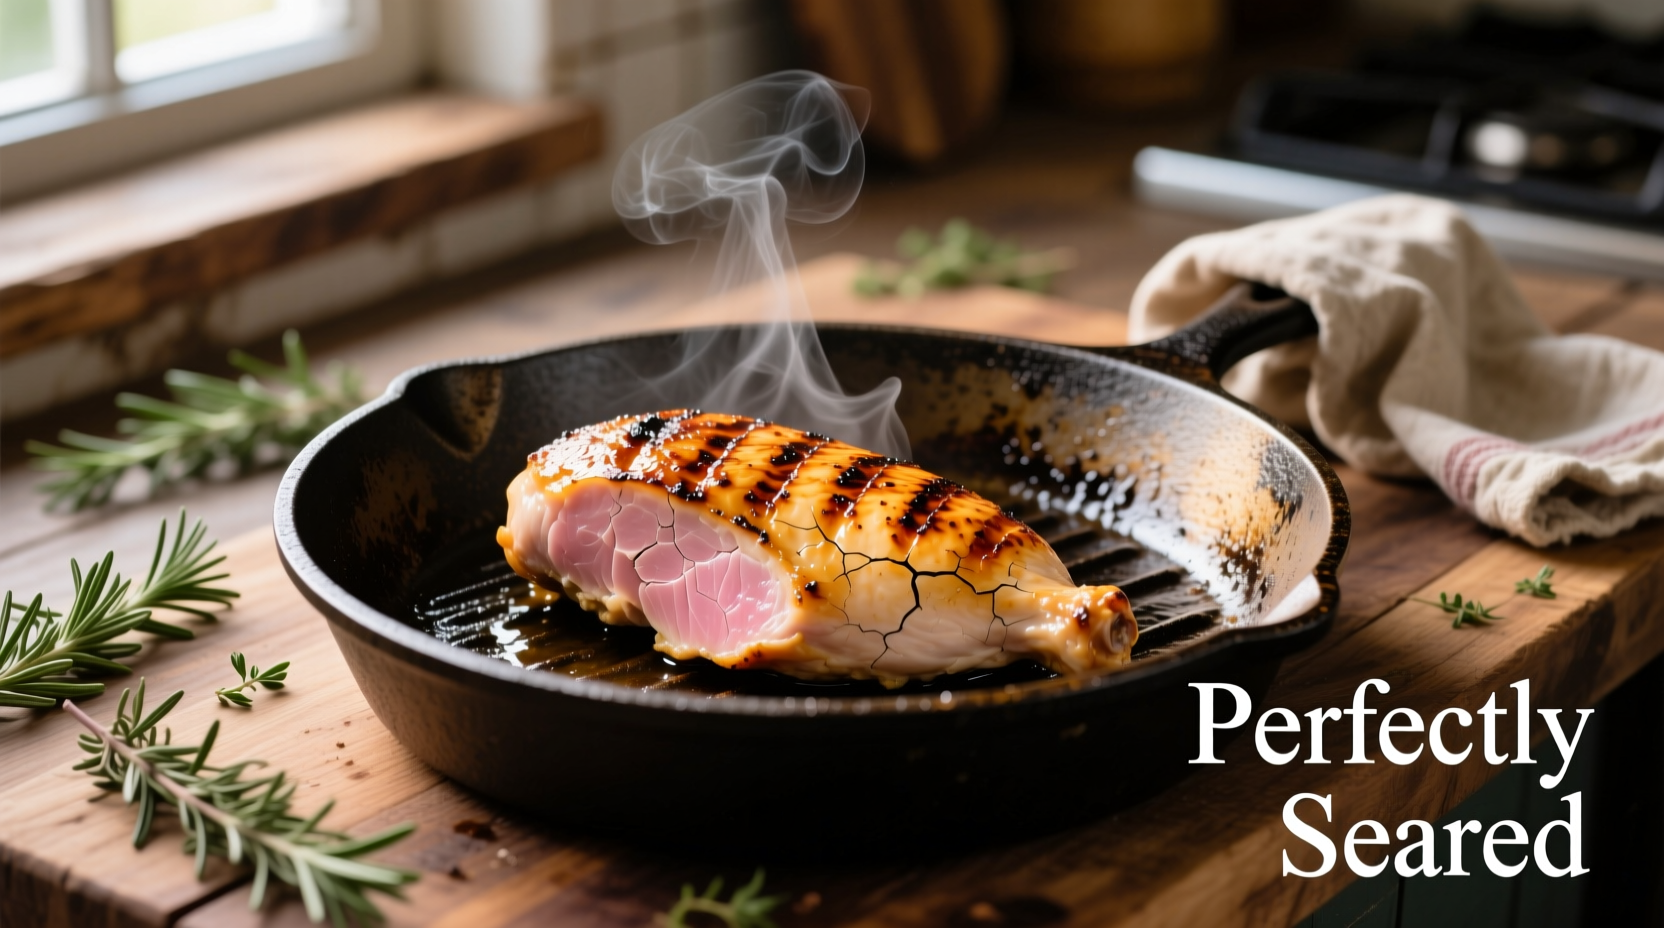
- Pound to even thickness: Use a meat mallet or rolling pin to achieve uniform ¾-inch thickness. This ensures consistent cooking time across the entire breast.
- Dry thoroughly: Pat chicken completely dry with paper towels. Moisture creates steam instead of sear, preventing proper browning.
- Salt in advance: Season with salt 15-20 minutes before cooking. This allows salt to penetrate rather than just sit on the surface.
Stovetop Cooking Process: Timing by Thickness
Actual cooking time depends primarily on thickness, not just minutes. This verified cooking time chart from culinary research at the Culinary Institute of America provides precise guidance:
| Chicken Breast Thickness | Preheated Pan Temperature | First Side Cooking Time | Second Side Cooking Time | Total Cooking Time |
|---|---|---|---|---|
| ½ inch (1.3 cm) | Medium-high (375°F/190°C) | 4-5 minutes | 3-4 minutes | 7-9 minutes |
| ¾ inch (1.9 cm) | Medium-high (375°F/190°C) | 5-6 minutes | 5-6 minutes | 10-12 minutes |
| 1 inch (2.5 cm) | Medium (350°F/175°C) | 6-7 minutes | 6-7 minutes | 12-14 minutes |
| 1¼ inches (3.2 cm) | Medium (350°F/175°C) | 7-8 minutes | Finish in oven* | 14+ minutes |
*Note: Chicken breasts thicker than 1 inch should be seared on stove then finished in a 375°F (190°C) oven for even cooking without burning the exterior.
Critical Equipment Considerations
Your stove type significantly impacts cooking time. Gas stoves provide instant heat control but have hot spots, while electric coils maintain consistent temperature but respond slower. Professional chefs recommend:
- Best pan choice: Heavy-bottomed stainless steel or cast iron for even heat distribution
- Avoid non-stick for searing: They can't reach high enough temperatures for proper Maillard reaction
- Oil selection: Use high smoke point oils like avocado (smoke point 520°F/270°C) or refined canola (400°F/205°C)
- Preheat properly: Pan should be hot enough that oil shimmers but doesn't smoke excessively
Doneness Verification: Beyond Guesswork
Forget unreliable methods like cutting into chicken or judging by color. The USDA Food Safety and Inspection Service mandates that all poultry must reach 165°F (74°C) internal temperature to eliminate harmful bacteria like salmonella. Use an instant-read thermometer inserted into the thickest part:
- 160-162°F (71-72°C): Remove from heat - carryover cooking will reach 165°F
- 165°F (74°C): Perfectly safe and juicy
- 170°F+ (77°C+): Beginning to dry out
Visual indicators that complement thermometer readings:
- Juices run clear, not pink
- Firm but slightly yielding texture when pressed
- Golden brown crust with no pink remaining inside
Resting and Serving: The Final Critical Step
Never skip resting! Transfer cooked chicken to a cutting board and tent loosely with foil for 5-8 minutes. This allows juices to redistribute throughout the meat. Cutting too soon releases precious moisture onto your cutting board instead of staying in the chicken.
For maximum juiciness, slice against the grain at a 45-degree angle. This shortens muscle fibers, making each bite more tender. Serve immediately with your favorite sides—the residual heat will keep chicken warm during plating.
Troubleshooting Common Stovetop Chicken Problems
Dry, overcooked chicken: Almost always caused by cooking beyond 165°F internal temperature. Solution: Invest in an instant-read thermometer and remove chicken at 160-162°F.
Uneven cooking: Typically from inconsistent thickness. Solution: Pound chicken to uniform thickness before cooking.
Sticking to the pan: Chicken hasn't developed proper fond. Solution: Ensure pan is properly preheated and don't move chicken until it releases naturally.
Burning before cooking through: Heat too high or pan not preheated properly. Solution: Reduce heat to medium after initial sear, or finish in oven for thicker cuts.
Advanced Technique: The Reverse Sear Method
For restaurant-quality results with foolproof timing, try the reverse sear method preferred by professional chefs:
- Season chicken and place on a wire rack over a baking sheet
- Roast in 275°F (135°C) oven until internal temperature reaches 150°F (66°C)
- Rest 5 minutes, then sear in hot pan for 60-90 seconds per side
- Rest 3 minutes before serving
This method virtually eliminates overcooking while delivering perfect sear. Total time is longer, but the margin for error is significantly reduced.
Food Safety First: Critical Temperature Guidelines
The USDA Food Safety and Inspection Service maintains strict guidelines for poultry safety. Chicken must reach 165°F (74°C) internal temperature to destroy harmful pathogens like salmonella and campylobacter. Unlike beef, there's no safe "medium" option for chicken—it must be fully cooked through.
Important safety timeline: Cooked chicken should not remain in the "danger zone" (40°F-140°F / 4°C-60°C) for more than 2 hours. Refrigerate leftovers within 2 hours of cooking (1 hour if room temperature exceeds 90°F/32°C).


 浙公网安备
33010002000092号
浙公网安备
33010002000092号 浙B2-20120091-4