
Nothing beats the comforting aroma of a perfectly cooked pot roast filling your kitchen, but getting the timing right separates a tender, flavorful meal from a disappointing dinner. As someone who's tested countless roasts across professional kitchens and home stoves, I've seen how small timing adjustments transform tough cuts into succulent masterpieces. Whether you're preparing Sunday dinner or meal prepping for the week, understanding the variables that affect cooking duration ensures consistent results every time.
Why Pot Roast Timing Matters More Than You Think
Pot roast isn't just about setting a timer and walking away. The connective tissues in chuck roast and similar cuts require specific temperature ranges maintained for precise durations to properly break down collagen into gelatin. Too little time leaves you with chewy, tough meat; too much causes the muscle fibers to dry out despite being submerged in liquid. The sweet spot? 200-205°F internal temperature maintained for at least 30 minutes — this scientific approach delivers consistently tender results where traditional "hours per pound" guidelines often fail.
| Cooking Method | Prep Time | Active Cooking Time | Total Hands-Off Time | Best For |
|---|---|---|---|---|
| Oven (Dutch Oven) | 20 min | 3-4 hours | 3.5-4.5 hours | Deep flavor development |
| Slow Cooker | 15 min | 8-10 hours | 8-10 hours | All-day unattended cooking |
| Instant Pot | 15 min | 60-90 min | 15 min release | Weeknight time constraints |
| Stovetop | 15 min | 2.5-3 hours | Constant monitoring | Immediate temperature control |
Key Variables That Impact Your Pot Roast Timing
Understanding these factors prevents timing mistakes that ruin otherwise perfect roasts:
Meat Characteristics
- Weight matters less than thickness — A 3-pound roast that's 4 inches thick needs more time than a 4-pound roast that's 2.5 inches thick
- Marbling level — Well-marbled chuck roasts break down faster than leaner cuts like round roast
- Starting temperature — Chilled meat adds 30-45 minutes to cooking time versus room-temperature placement
Cooking Environment Factors
- Liquid volume — Too much liquid dilutes flavors and increases cooking time; maintain 1–1.5 inches depth
- Cover tightness — A loose-fitting lid increases evaporation, requiring longer cooking to achieve tenderness
- Acidity content — Tomatoes or wine added early can toughen meat; add after first 2 hours for best results
Step-by-Step Timing Guide for Foolproof Results
Pre-Cooking Preparation (15-20 Minutes)
Pat meat dry and season generously with salt 1-2 hours before cooking — this critical step (often skipped) allows salt to penetrate and improves texture. Sear on all sides over medium-high heat until deeply browned (5-7 minutes per side). This Maillard reaction creates complex flavors that simmering alone cannot achieve.
Cooking Phase: Method-Specific Timing
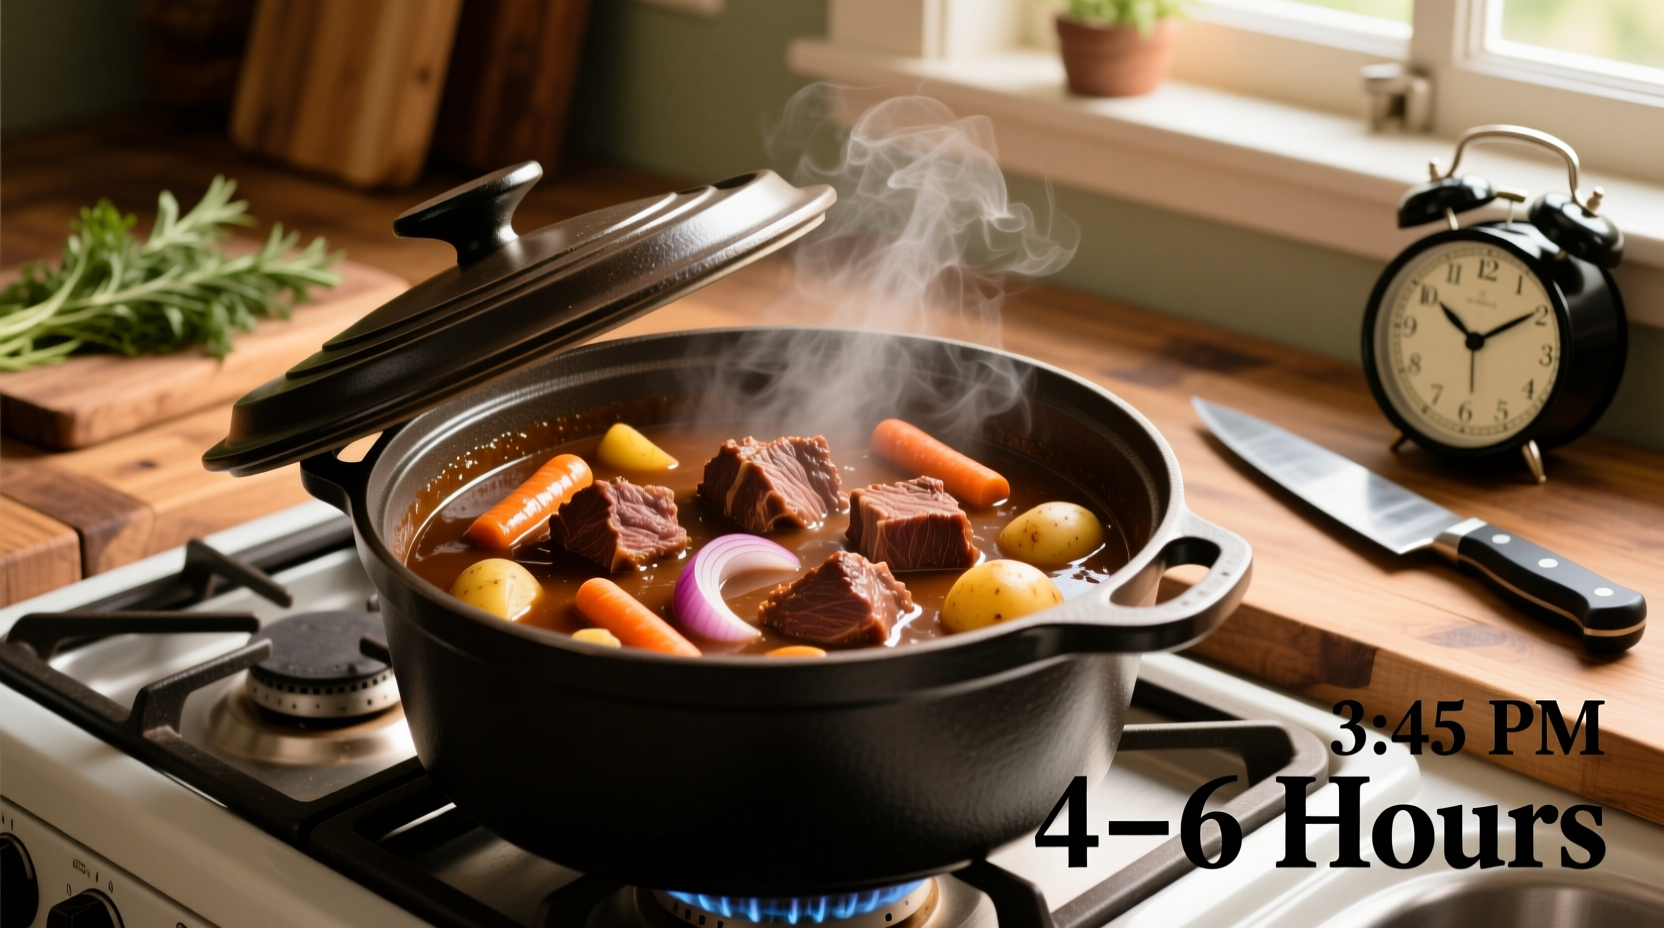
Oven Method (325°F / 163°C)
After searing, transfer to a preheated oven with aromatics and liquid. Cook covered for 3 hours, then check tenderness. Most 3-4 pound roasts reach 200°F internal temperature between 3½-4 hours. The USDA Food Safety and Inspection Service confirms that beef connective tissues require 190-205°F for proper breakdown, well beyond standard medium-rare temperatures.
Slow Cooker Method
Place seared roast in cooker with vegetables and 2 cups liquid. Cook on LOW for 8 hours for 3-pound roasts, or 9-10 hours for 4-pound cuts. HIGH setting reduces time to 5-6 hours but risks uneven cooking. Always position meat submerged in liquid for consistent results.
Instant Pot Method
After searing, add 1 cup liquid and cook on HIGH pressure for 65 minutes for 3-pound roasts, 75 minutes for 4-pound cuts. Allow 15-20 minutes for natural pressure release — this crucial step prevents sudden temperature changes that make meat tough.
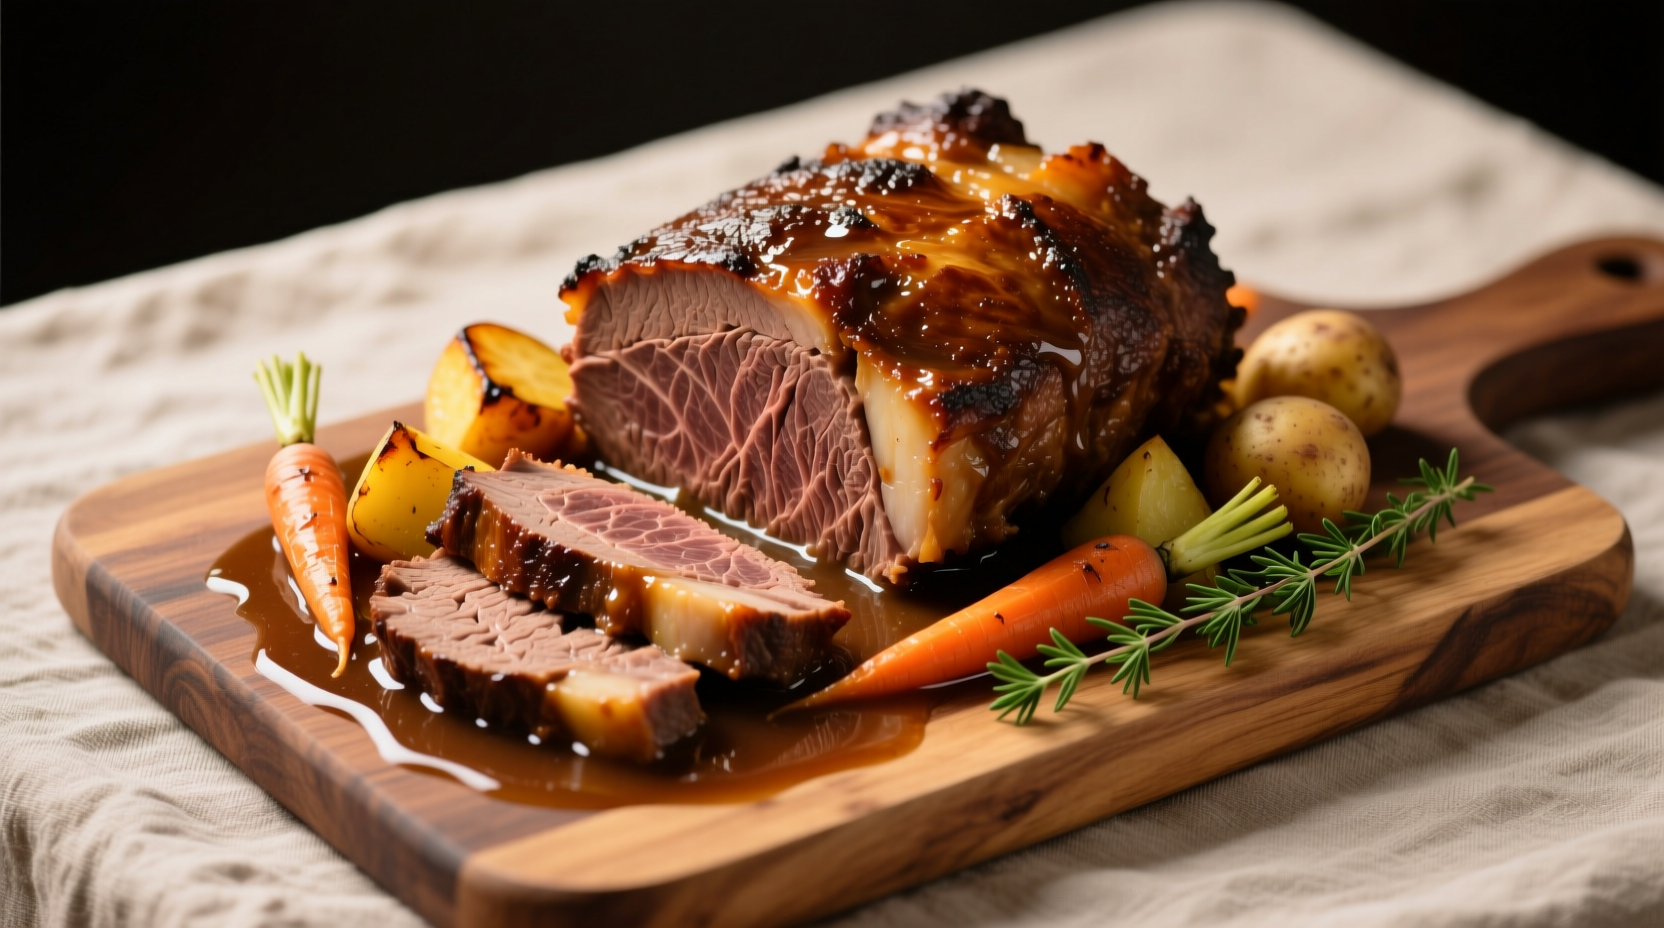
How to Verify Perfect Doneness (Beyond the Timer)
Timers provide estimates, but these verification methods guarantee success:
- Internal temperature — Insert thermometer into thickest part: 195°F indicates beginning tenderness, 200-205°F delivers ideal pull-apart texture
- Fork test — Twist fork gently; properly cooked meat separates easily with minimal resistance
- Shrinking observation — Roast should have reduced by about 25% from original size as collagen converts to gelatin
Troubleshooting Common Timing Issues
"My Roast Is Still Tough After Recommended Time"
This usually indicates insufficient breakdown of collagen. Return to heat and check every 30 minutes until fork-tender. Remember: time alone doesn't tenderize meat — it's the combination of time and temperature. A thermometer reading below 195°F explains why the connective tissues haven't properly converted.
"My Roast Fell Apart Too Soon"
Overcooking occurs when temperature exceeds 210°F for extended periods. Next time, reduce cooking time by 30-45 minutes and check temperature earlier. Acidic ingredients added at the beginning can also accelerate breakdown — add tomatoes or wine after the first 2 hours.
Pro Timing Tips for Consistent Results
- Plan for resting time — Allow 15-20 minutes off-heat before serving; this lets juices redistribute
- Size matters — For gatherings, cook two smaller roasts rather than one giant cut for more even results
- Batch vegetables separately — Add root vegetables during the last 45-60 minutes to prevent mushiness
- Track your variables — Note meat weight, starting temp, and final internal temp for future reference


 浙公网安备
33010002000092号
浙公网安备
33010002000092号 浙B2-20120091-4