
Planning Your Perfect Roast Chicken Timeline
Before you even preheat your oven, understanding the variables affecting cooking time prevents dry or undercooked chicken. The standard formula provides a reliable starting point, but these factors significantly impact your timeline:
| Chicken Weight | 375°F Cooking Time | Total Time (Incl. Rest) | Internal Temp Target |
|---|---|---|---|
| 3 lbs (1.4 kg) | 60 minutes | 75 minutes | 165°F (74°C) |
| 4 lbs (1.8 kg) | 80 minutes | 95 minutes | 165°F (74°C) |
| 5 lbs (2.3 kg) | 100 minutes | 115 minutes | 165°F (74°C) |
| 6 lbs (2.7 kg) | 120 minutes | 135 minutes | 165°F (74°C) |
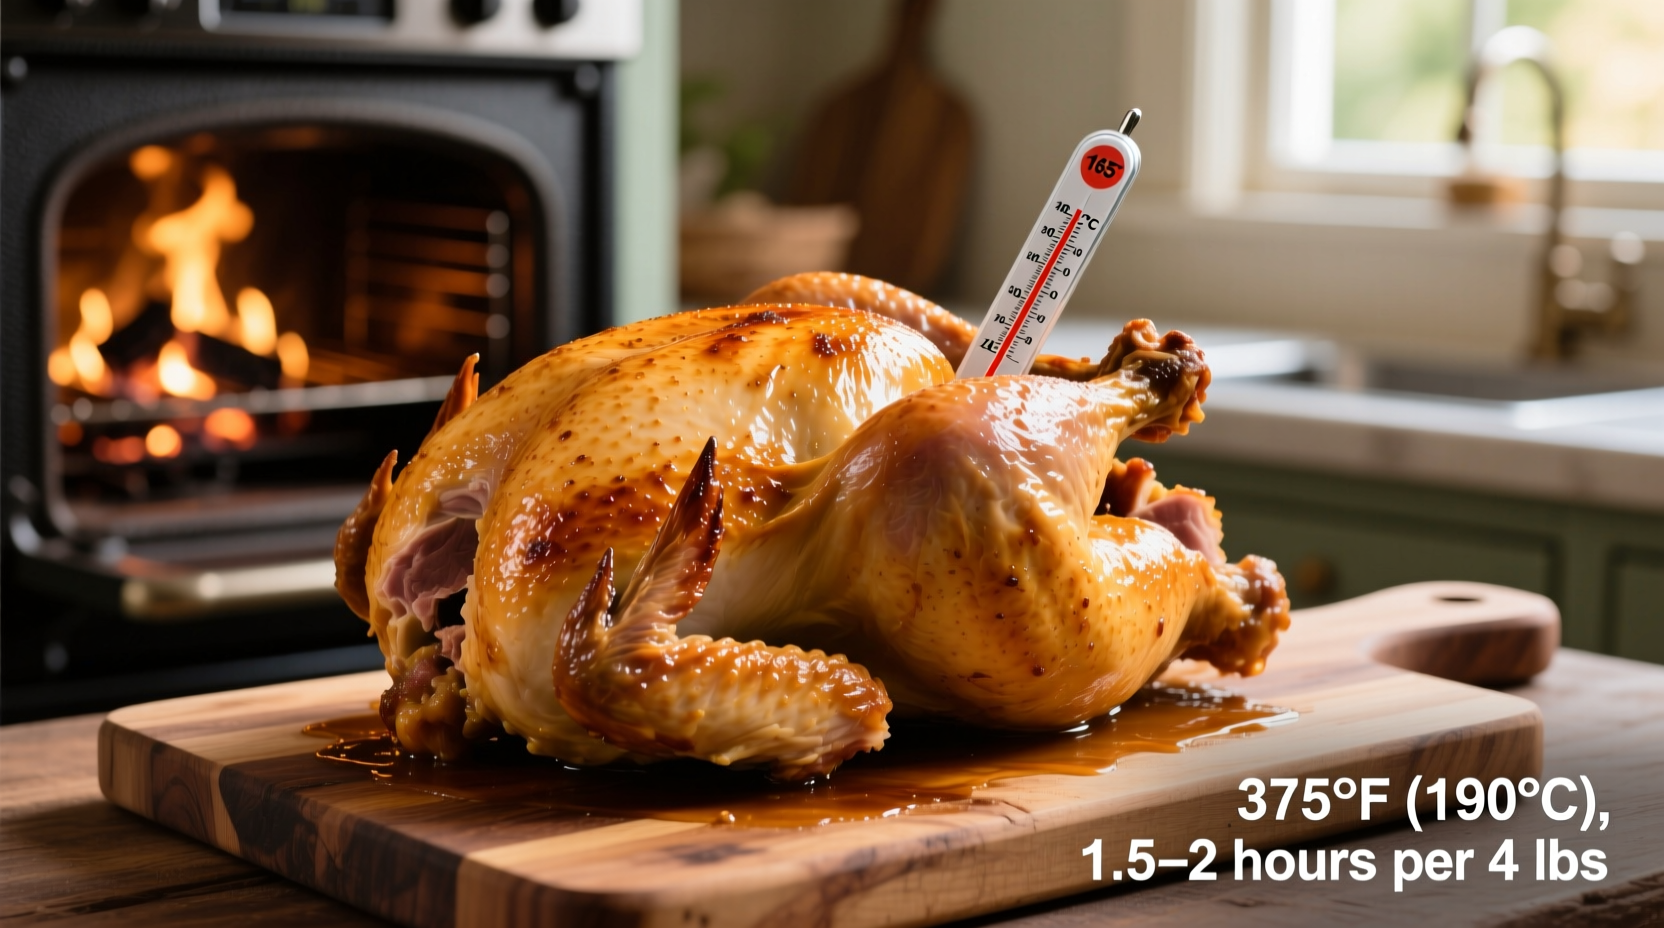
This USDA-approved temperature guideline ensures food safety while maintaining optimal texture. According to the USDA Food Safety and Inspection Service, poultry must reach 165°F internally to eliminate harmful bacteria like salmonella.
Preparation: Setting Up for Success
Proper preparation directly impacts cooking time accuracy and final results. Follow these professional kitchen-tested steps:
- Thaw completely - A frozen or partially frozen chicken adds 25-50% to cooking time and creates uneven results. Allow 24 hours per 4-5 pounds in the refrigerator.
- Dry the skin thoroughly - Pat the entire surface with paper towels for 2-3 minutes. Moisture creates steam, preventing crisp skin.
- Bring to room temperature - Let the chicken sit out for 30-60 minutes before roasting. A cold bird straight from the fridge requires longer cooking.
- Truss properly - Tying the legs together with kitchen twine creates even heat distribution and prevents wing tips from burning.
Temperature Options and Their Impact
While 375°F is the standard recommendation for how long to cook a whole chicken, different temperatures yield distinct results:
- 325°F (163°C) - Adds 15-20% to cooking time but produces exceptionally tender meat, ideal for larger birds (5+ pounds). Total time: 25 minutes per pound.
- 400°F (204°C) - Reduces cooking time by 10-15% with crispier skin. Best for chickens under 4 pounds. Total time: 18 minutes per pound.
- 425°F (218°C) blast - Start at high heat for 30 minutes, then reduce to 350°F. Creates restaurant-quality crispy skin while maintaining moisture.
Professional chefs at America's Test Kitchen found that starting at higher temperatures then reducing creates the optimal balance between crispy skin and juicy meat, reducing overall cooking time by approximately 10% compared to consistent medium-heat methods.
Monitoring Progress Without Guesswork
Knowing exactly when your chicken is done prevents the common pitfalls of undercooked poultry or dry, overcooked meat. Follow this verification process:
- Insert thermometer correctly - Place in the thickest part of the thigh, avoiding bone. The USDA recommends checking multiple spots.
- Check at the calculated time - Start checking 10 minutes before expected finish time.
- Look for visual cues - Clear juices when pierced, golden brown skin, and legs that wiggle easily in their sockets.
- Verify final temperature - Remove at 160°F (71°C) as carryover cooking will raise it to 165°F during resting.
A common mistake when determining how long to cook a whole chicken is relying solely on time without temperature verification. Food science research shows that oven variances, chicken density, and starting temperature can create up to 20 minutes difference in actual cooking time for identical weights.
The Critical Resting Period
Many home cooks skip resting, but this 15-minute period transforms your roast chicken. During resting:
- Internal temperature rises 5-10°F from carryover cooking
- Proteins relax, redistributing juices throughout the meat
- Skin maintains crispness while interior reaches ideal tenderness
- Carving becomes significantly easier with cleaner cuts
Cover loosely with foil to retain heat without steaming the skin. Cutting too soon releases precious juices onto your cutting board rather than staying in the meat.
Troubleshooting Common Issues
Even with careful planning, challenges arise. Here's how to address them:
Problem: Uneven Cooking (Dark Meat Done Before White)
Solution: Position chicken breast-side down for first 30 minutes, then flip. Or tent breast with foil when it reaches 150°F (66°C).
Problem: Skin Not Crisping Properly
Solution: Increase oven temperature to 425°F for final 10-15 minutes. Ensure skin is completely dry before roasting.
Problem: Chicken Cooking Too Slowly
Solution: Verify oven temperature with independent thermometer. Most home ovens run 25°F cooler than displayed.
Problem: Juices Run Pink Near Bones
Solution: This is hemoglobin, not blood. As long as internal temperature reaches 165°F, the chicken is safe regardless of juice color.
Advanced Techniques for Perfect Results Every Time
Professional kitchens use these methods to consistently roast perfect chicken:
- Dry brine overnight - Rub 1 teaspoon kosher salt per pound under skin and on surface. Refrigerate uncovered for 12-24 hours.
- Use a roasting rack - Elevates chicken for even heat circulation and prevents bottom from steaming in its own juices.
- Add aromatics - Place lemon halves, garlic, and herbs inside cavity for subtle flavor infusion without affecting cooking time.
- Check early and often - Start monitoring temperature 15 minutes before expected finish time to prevent overcooking.
Remember that how long to cook a whole chicken varies based on your specific conditions. The time-per-pound formula provides a reliable starting point, but temperature verification remains the only foolproof method. When in doubt, check early rather than late—you can always return the chicken to the oven, but you cannot reverse overcooking.


 浙公网安备
33010002000092号
浙公网安备
33010002000092号 浙B2-20120091-4