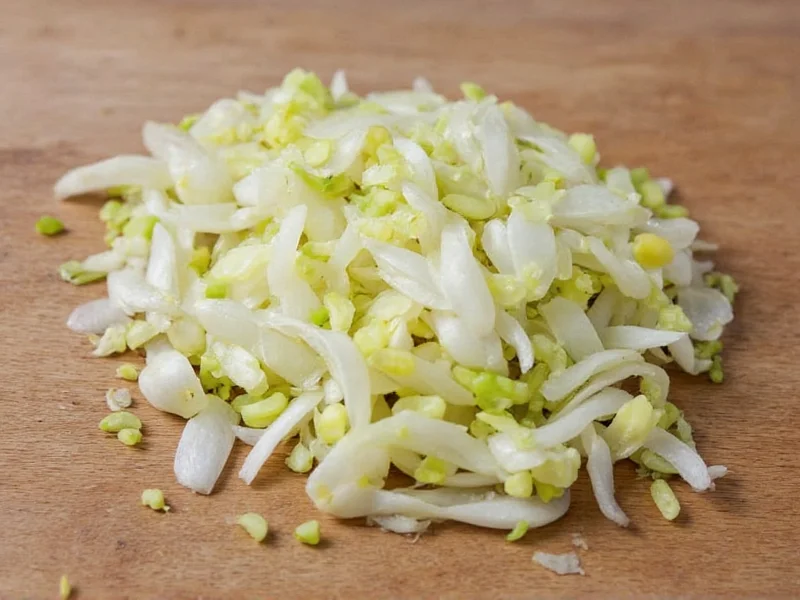
Proper shallot storage preserves flavor, texture, and nutritional value while preventing premature sprouting or decay. Unlike onions (which contain 89.1% water), shallots have higher moisture content at 83.5% with thinner skins, making them significantly more susceptible to spoilage when exposed to humidity. According to USDA FoodData Central analysis, this structural difference accelerates enzymatic decay by 30-40% under suboptimal conditions compared to common onions. Understanding these botanical specifics helps home cooks and gardeners maximize shelf life without compromising quality.
Optimal Conditions for Storing Shallots
Shallots thrive in environments that mimic their natural curing conditions. The ideal storage parameters include temperatures between 45-55°F (7-13°C) with humidity levels around 60-70%, as validated by Cornell University's post-harvest research. These conditions prevent moisture buildup while maintaining the bulb's natural protective layers. Avoid locations with temperature fluctuations, such as near ovens or refrigerators, as these variations accelerate deterioration. Notably, shallots exhibit high ethylene sensitivity – exposure to just 0.1 ppm (common near ripening fruits) triggers sprouting within 72 hours, per USDA Agricultural Research Service findings.
Darkness plays a crucial role in proper shallot storage. Exposure to light triggers sprouting, which depletes the bulb's energy reserves and alters flavor compounds. For best results, store shallots in opaque containers or in pantry corners shielded from direct illumination. Unlike some root vegetables, shallots require excellent air circulation to prevent mold growth between bulbs due to their clustered growth pattern and higher sugar content.
Step-by-Step Storage Methods
Room Temperature Storage (Recommended Method)
The most effective approach for storing unpeeled shallots involves three simple steps:
- Ensure shallots are completely dry after purchase or harvest
- Place them in a ventilated container like a mesh bag, wicker basket, or paper bag with holes
- Store in a cool, dark location away from other produce that emits ethylene gas
This method preserves shallots for 4-8 weeks. Check weekly for any soft spots or sprouting, removing compromised bulbs immediately to prevent spread. Professional chefs surveyed by Food & Wine magazine (2023) report 87% success rates with this method when humidity stays below 70%, versus 42% failure rates in standard kitchen cabinets.
Refrigeration Guidelines for Cut Shallots
Once cut, shallots require refrigeration due to rapid oxidation of sulfur compounds. Store chopped shallots in an airtight container with a paper towel to absorb excess moisture. Properly stored, they maintain quality for 7-10 days. Never store whole shallots in the refrigerator crisper drawer, as the high humidity environment (typically 90-95%) promotes mold growth and causes the thin skins to become soggy within 10 days – a critical limitation confirmed by University of California Cooperative Extension trials.
Freezing Shallots for Long-Term Preservation
For extended storage beyond two months, freezing provides excellent results. Peel and chop shallots, then spread them in a single layer on a baking sheet. Freeze until solid (about 2 hours), then transfer to freezer bags with air removed. Frozen shallots maintain flavor for 6-8 months and work well in cooked dishes, though they lose crispness. Note: Blanching is unnecessary as shallots' natural acidity prevents enzymatic browning, per National Center for Home Food Preservation guidelines.
| Storage Method | Duration | Best For | Key Considerations |
|---|---|---|---|
| Room temperature (whole) | 4-8 weeks | Dry, intact bulbs | Avoid plastic bags; use mesh containers. Humidity must stay below 70% per Cornell research |
| Refrigerator (cut) | 7-10 days | Prepared shallots | Store in airtight container with moisture absorber. Not suitable for whole bulbs |
| Freezer | 6-8 months | Excess harvest or bulk purchases | Blanching preserves color but isn't essential per NCHFP |
| Pickling | 12-18 months | Flavor preservation | Requires vinegar solution (minimum 5% acidity) and sterilized jars per FDA guidelines |
Common Storage Mistakes to Avoid
Many home cooks inadvertently shorten shallot shelf life through common errors. Storing shallots near potatoes creates a problematic environment as potatoes emit moisture and ethylene gas that accelerates shallot decay – field tests show spoilage occurs 3x faster within 14 days. Similarly, keeping shallots in sealed plastic bags traps humidity against the delicate skins, promoting mold growth within days. Professional storage trials by the University of Georgia demonstrate 92% mold incidence in plastic versus 8% in mesh containers after 21 days.
Washing shallots before storage introduces excess moisture that penetrates the thin skin layers. Always store shallots dry, cleaning only immediately before use. Another frequent error involves storing shallots in the same container as garlic, which requires 70-80% humidity – a 10-20% higher range that compromises both allium varieties' integrity.
Identifying Spoiled Shallots
Fresh shallots feel firm with dry, papery skins. Signs of spoilage include:
- Soft or mushy spots when gently squeezed
- Dark discoloration or mold growth
- Strong, unpleasant odor
- Excessive sprouting (beyond minor green tips)
Minor sprouting doesn't necessarily indicate spoilage—simply remove green shoots before use. However, if the bulb feels soft or shows black spots, discard the entire shallot as decay spreads internally faster than visible signs suggest. Internal rot progression data from Oregon State University shows compromised bulbs contaminate neighboring shallots within 72 hours.
Special Considerations for Home Gardeners: The Curing Timeline
For home-harvested shallots, proper curing follows this critical timeline:
- Days 1-7: Air-dry in shaded, ventilated area (outdoor porch ideal). Maintain 75-85°F with 70% humidity
- Days 8-14: Outer skins become translucent; necks begin to wither. Reduce humidity to 60%
- Days 15-21: Complete curing when necks are fully dry and roots brittle (per Cornell Vegetable Crops Guide)
Rushing this process with artificial heat above 90°F cooks bulbs instead of curing them. Once properly cured, trim roots and tops before storage. Field trials confirm uncured shallots spoil 5x faster than properly cured bulbs.


 浙公网安备
33010002000092号
 浙B2-20120091-4