
The most effective way to plant ginger is to select a fresh, plump ginger root with visible eye buds, soak it in water overnight, then plant it in well-draining soil with the buds facing upward about 2 inches below the surface. Ginger thrives in warm, humid conditions with partial shade and consistent moisture, requiring 8-10 months to reach harvest maturity.
Complete Guide to Planting Ginger Successfully at Home
Growing your own ginger is simpler than many gardeners realize. This tropical rhizome plant can thrive in home gardens or containers with the right conditions and care. Whether you're an experienced gardener or just starting out, cultivating ginger provides fresh, organic spice right from your backyard or even indoors.
Why Grow Your Own Ginger?
Homegrown ginger offers superior flavor and freshness compared to store-bought options. You control the growing conditions, ensuring organic methods without pesticides or chemicals. Plus, growing ginger is cost-effective—just one piece of ginger root can produce multiple harvests over time. Many gardeners find the process rewarding as they watch the lush green foliage develop into a beautiful ornamental plant that also produces edible rhizomes.
Best Time to Plant Ginger
The optimal time for planting ginger is during spring, after the last frost has passed and soil temperatures reach at least 70°F (21°C). In tropical climates where ginger originates, it can be planted year-round. For gardeners in temperate zones, starting ginger indoors 4-6 weeks before the last frost allows for earlier establishment. If growing ginger in containers, you can begin planting anytime as long as you can provide warm, humid conditions.
Materials Needed for Planting Ginger
Before you start planting ginger, gather these essential items:
- Fresh ginger root with visible eye buds (look for plump, firm pieces)
- Organic potting mix or well-prepared garden soil
- Container with drainage holes (if growing indoors) or garden bed
- Watering can or spray bottle
- Organic fertilizer
- Mulch material
Step-by-Step Ginger Planting Process
Follow these detailed steps for successful ginger cultivation:
1. Selecting Quality Ginger Root
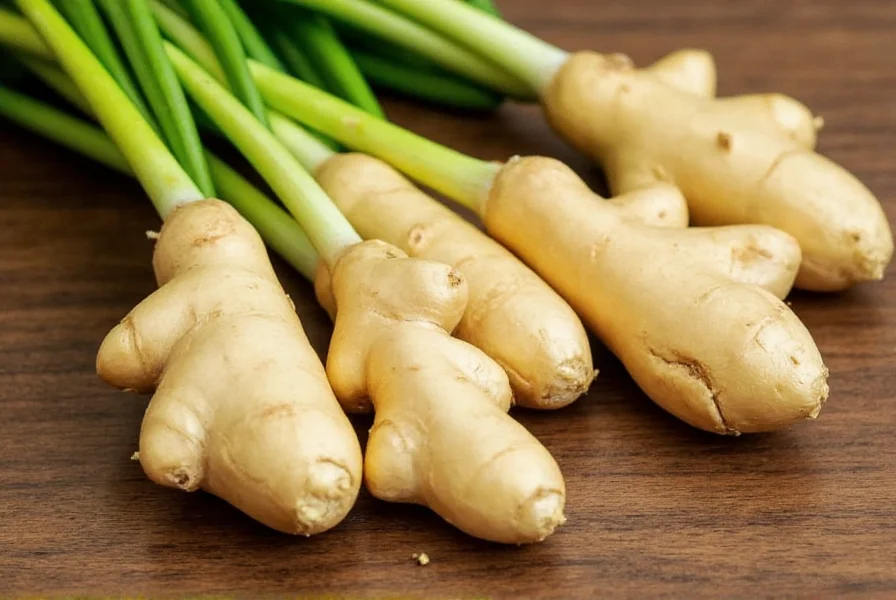
Choose organic ginger root whenever possible, as conventional grocery store ginger may be treated with growth inhibitors. Look for pieces with multiple plump eye buds (the small bumps on the surface) and avoid any that appear shriveled or moldy. Each piece should be about 1-2 inches in length with at least one eye bud.
2. Preparing the Ginger Root
Soak the ginger root in warm water for 12-24 hours before planting. This rehydrates the rhizome and encourages sprouting. Some gardeners recommend dipping the cut ends in garden sulfur or ash to prevent rot, though this isn't strictly necessary with proper soil conditions.
3. Soil Preparation
Ginger requires loose, well-draining soil rich in organic matter. Create a mix of equal parts potting soil, compost, and perlite or sand. The ideal pH range is slightly acidic to neutral (5.5-7.0). If planting directly in garden soil, amend with plenty of compost to improve drainage and fertility.
| Ginger Planting Requirements | Details |
|---|---|
| Planting Depth | 1-2 inches below soil surface |
| Spacing | 8-12 inches between rhizomes |
| Soil Temperature | 70-90°F (21-32°C) |
| Light Requirements | Partial shade (2-5 hours of morning sun) |
| Water Needs | Consistent moisture, never waterlogged |
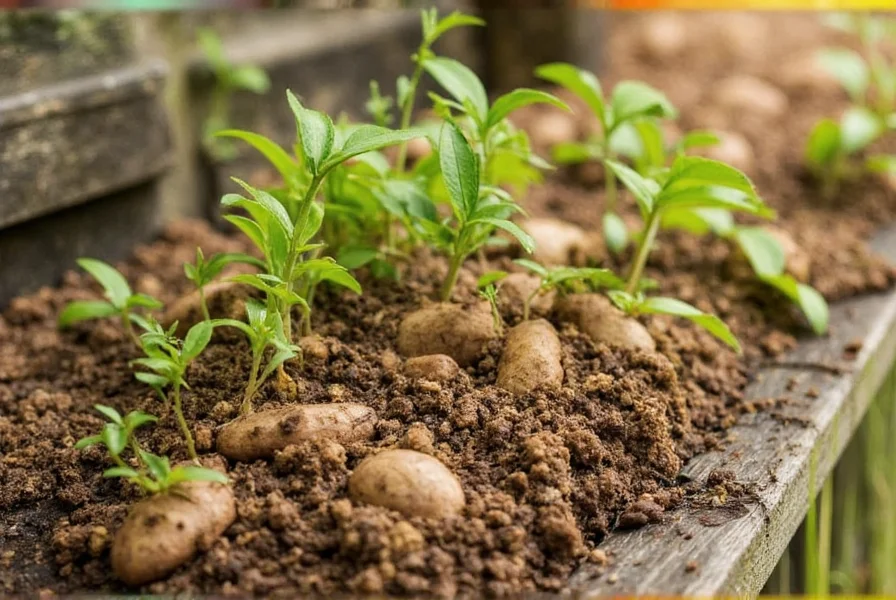
4. Planting the Ginger
Place the ginger root pieces in the prepared soil with the eye buds facing upward. Cover with 1-2 inches of soil. If planting multiple pieces, space them 8-12 inches apart. Water thoroughly after planting, but avoid creating standing water.
5. Creating the Ideal Growing Environment
Ginger thrives in warm, humid conditions similar to its native tropical habitat. Maintain temperatures between 70-90°F (21-32°C) and provide high humidity. Outdoors, choose a location with dappled sunlight or morning sun with afternoon shade. Indoors, place near an east-facing window or provide supplemental lighting.
Caring for Your Ginger Plants
Proper care ensures healthy growth and maximum yield:
Watering Requirements
Keep the soil consistently moist but not soggy. Ginger prefers regular watering—about 1 inch per week—but cannot tolerate standing water. During dry periods, increase watering frequency. Reduce watering as harvest time approaches to allow rhizomes to mature properly.
Fertilizing Schedule
Feed ginger plants every 4-6 weeks with a balanced organic fertilizer or compost tea. During the active growing season (spring and summer), use a fertilizer higher in nitrogen. As the plants mature (late summer), switch to a fertilizer higher in phosphorus and potassium to encourage rhizome development.
Mulching Benefits
Apply 2-3 inches of organic mulch around ginger plants to maintain consistent soil moisture, regulate temperature, and suppress weeds. Straw, shredded leaves, or compost work well as mulch materials for ginger cultivation.
Harvesting Your Homegrown Ginger
Ginger typically reaches maturity 8-10 months after planting. You'll know it's ready when the leaves begin to yellow and die back. For a full harvest, wait until the entire plant has died back, which usually occurs in late fall or early winter.
To harvest, carefully dig around the plant to expose the rhizomes. Gently lift the entire root system from the soil. Shake off excess soil and trim the stems about 1 inch above the rhizomes. Allow the ginger to cure in a cool, dry place for 2-3 days before storing.
Troubleshooting Common Ginger Growing Problems
Even with proper care, ginger growers may encounter some challenges:
Rotting Rhizomes
This usually indicates overwatering or poor drainage. Ensure your soil has excellent drainage and allow the top inch of soil to dry slightly between waterings. If rot appears, remove affected portions immediately.
Yellowing Leaves
While natural at harvest time, premature yellowing may indicate nutrient deficiency, underwatering, or too much direct sunlight. Adjust your care routine accordingly and consider a balanced fertilizer application.
Pests and Diseases
Ginger is relatively pest-resistant but may occasionally attract spider mites, aphids, or fungal diseases. Treat infestations with insecticidal soap or neem oil, and ensure good air circulation around plants to prevent fungal issues.
Storing Your Harvested Ginger
After harvesting, store ginger in a cool, dark place with good air circulation. For short-term storage (2-3 weeks), keep it in the refrigerator in a paper bag. For longer storage, freeze ginger pieces or preserve them in vinegar. Properly stored ginger can last several months while maintaining its flavor and medicinal properties.
Frequently Asked Questions About Planting Ginger
Can I grow ginger indoors year-round?
Yes, ginger makes an excellent indoor plant when provided with the right conditions. Use a container at least 12 inches deep with drainage holes, place it in a location with bright, indirect light, and maintain temperatures between 70-85°F (21-29°C). Mist the plant regularly to increase humidity, or place the pot on a pebble tray with water. Indoor ginger requires consistent moisture but should never sit in standing water.
How long does it take for ginger to sprout after planting?
Ginger typically begins to sprout 2-4 weeks after planting, depending on temperature and growing conditions. Warmer temperatures (80-90°F or 27-32°C) encourage faster sprouting. If your ginger hasn't sprouted after 6 weeks, check the rhizome for signs of rot or mold, which would indicate it's no longer viable. Patience is key with ginger, as it's a slow starter but will grow more vigorously once established.
Can I plant grocery store ginger?
While possible, grocery store ginger often presents challenges for home growers. Many commercial growers treat ginger with growth inhibitors to prevent sprouting during transport and storage. Organic ginger from the grocery store has a better chance of sprouting. For best results, source ginger rhizomes from a nursery or gardening supplier specifically intended for planting. If using grocery store ginger, soak it in water for 24 hours to potentially neutralize growth inhibitors before planting.
How much ginger can I expect to harvest from one plant?
A single ginger plant typically produces 0.5 to 1 pound of harvestable rhizomes when grown under optimal conditions for 8-10 months. The yield depends on several factors including the size of the original planting piece, growing conditions, and length of growing season. In ideal tropical conditions, yields can be higher. Remember that ginger is a slow grower—you won't see significant rhizome development until the latter part of the growing season.
Can I harvest ginger without killing the plant?
Yes, you can practice "cut-and-come-again" harvesting with ginger. About 4-6 months after planting, carefully dig around the edge of the plant and harvest only a portion of the rhizomes, leaving the main plant intact. This allows the plant to continue growing and producing more ginger. However, for maximum yield, most gardeners prefer to wait until the full 8-10 month growing period before harvesting the entire plant.


 浙公网安备
33010002000092号
浙公网安备
33010002000092号 浙B2-20120091-4