
Why Grow Your Own Garlic?
Homegrown garlic delivers superior flavor, freshness, and variety compared to store-bought options. Commercial garlic prioritizes shelf life over taste, while your garden produces complex flavors that vary by growing conditions. You'll also know exactly how your garlic was cultivated—no unwanted chemicals or treatments. Plus, growing your own saves money: a single bulb can yield 8-12 new bulbs when planted properly.
Garlic Varieties: Hardneck vs Softneck Compared
Choosing the right variety is critical for success in your climate. Here's how they compare:
| Characteristic | Hardneck Garlic | Softneck Garlic |
|---|---|---|
| Best Climate | Colder regions (USDA zones 1-6) | Warmer regions (USDA zones 7-10) |
| Flavor Profile | Bolder, more complex flavors | Milder, consistent flavor |
| Storage Life | 5-8 months | 9-12 months |
| Special Features | Produces edible scapes in spring | Easier to braid for storage |
According to Oregon State University Extension, hardneck varieties require 4-8 weeks of temperatures below 40°F (4°C) to form proper bulbs, making them ideal for northern climates. Softneck varieties lack this requirement, thriving in milder winters with longer growing seasons.
Planting Timeline: When to Grow Garlic
Timing your planting correctly is the most crucial factor for successful garlic cultivation. The optimal window is 4-6 weeks before your first expected fall frost, allowing roots to develop before winter dormancy.
- Northern regions (zones 3-5): Plant September to early October
- Mid-latitude regions (zones 6-7): Plant mid to late October
- Southern regions (zones 8-10): Plant October to November
Planting too early risks excessive top growth vulnerable to winter kill, while planting too late prevents sufficient root development. In extremely cold areas, apply 3-6 inches of straw mulch after the ground freezes to protect plants.
Preparing Your Garlic Bed for Success
Garlic thrives in well-draining soil rich in organic matter. Follow these preparation steps:
- Choose full sun location: Select a spot receiving 6-8 hours of direct sunlight daily
- Test and amend soil: Aim for pH 6.0-7.5; add lime to raise pH or sulfur to lower it
- Improve soil structure: Work in 2-3 inches of compost or well-rotted manure
- Add nutrients: Mix in balanced organic fertilizer or bone meal for phosphorus
- Create raised beds (if needed): Build 6-8 inch high beds in heavy clay soils
According to University of Minnesota Extension, proper soil preparation significantly impacts garlic bulb size and quality. Garlic has shallow roots and competes poorly with weeds, so starting with a clean bed is essential.
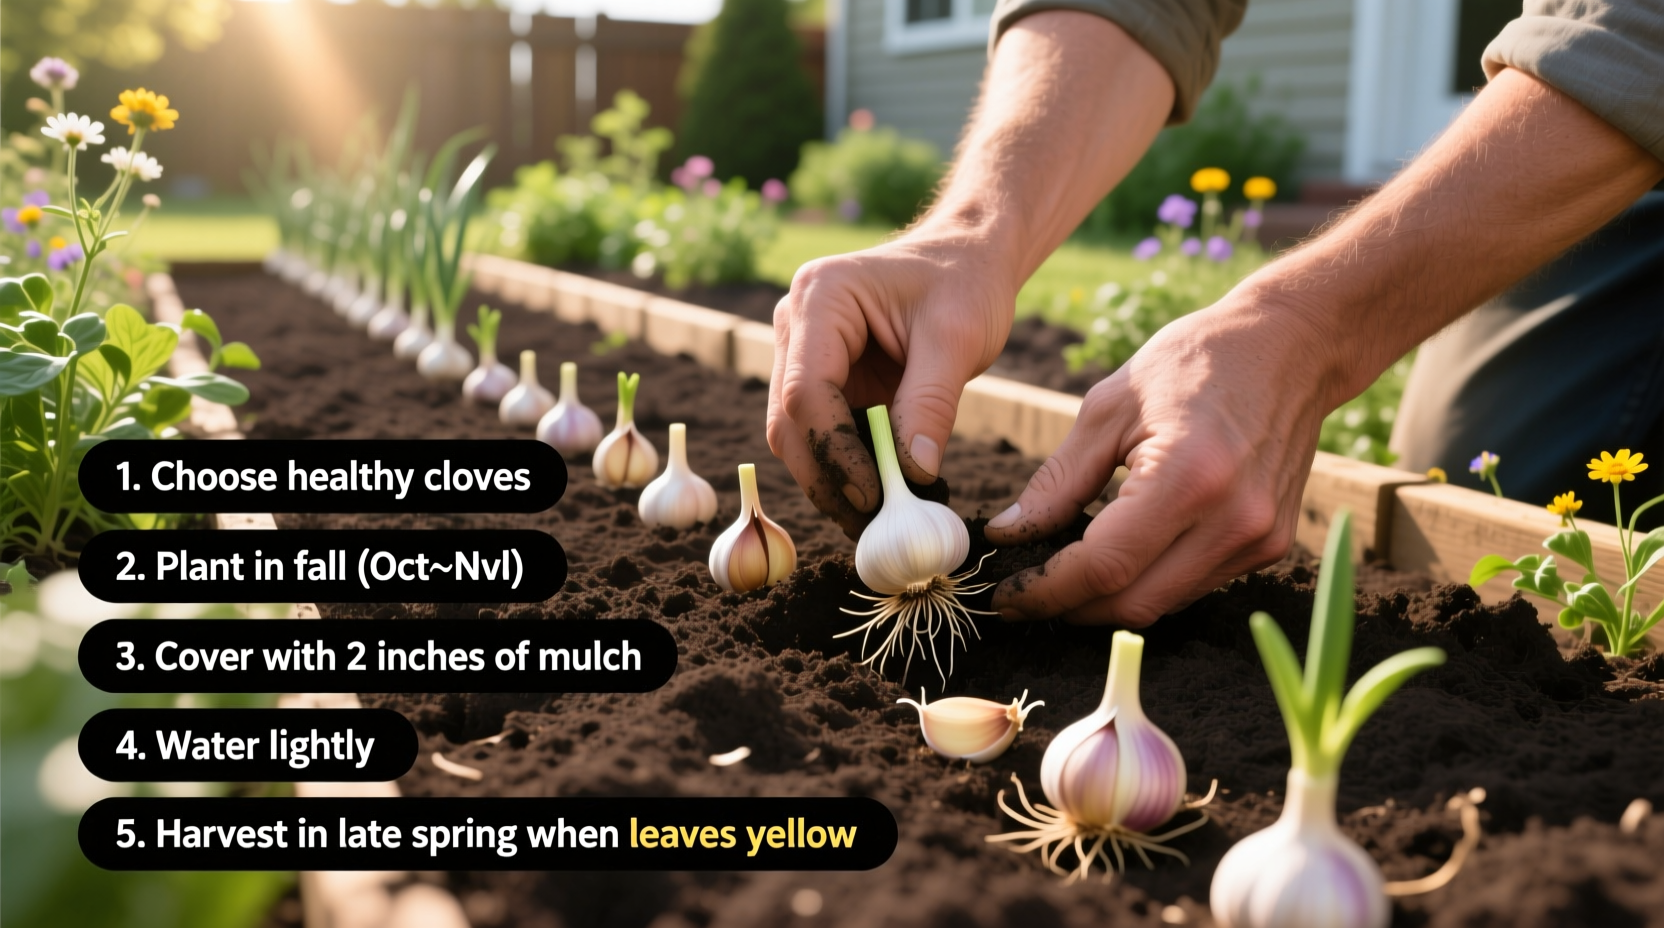
Step-by-Step Planting Guide
Follow these detailed steps for successful garlic planting:
- Select quality cloves: Use large, firm cloves from seed garlic (not supermarket garlic, which may be treated to prevent sprouting)
- Separate cloves carefully: Break bulbs into individual cloves 1-2 days before planting, keeping papery husk intact
- Plant with proper orientation: Place cloves with pointed end up and flat root end down
- Plant at correct depth: 4 inches deep in cold climates; 2-3 inches deep in milder climates
- Space properly: Position cloves 4-6 inches apart in rows spaced 12-18 inches apart
- Cover and mulch: After planting, cover with soil and apply 3-6 inches of straw or leaf mulch

Caring for Growing Garlic
Proper care throughout the growing season ensures healthy plants and large bulbs:
- Watering schedule: Water 1 inch per week during active growth (spring), reducing 2-3 weeks before harvest
- Weed management: Keep beds weed-free with shallow cultivation to avoid damaging shallow roots
- Fertilizing: Apply nitrogen-rich fertilizer when growth resumes in spring, then again 3-4 weeks later
- Scaping (hardneck only): Remove flower stalks when they curl to direct energy to bulb development
Harvesting and Curing Your Garlic
Timing your harvest correctly is crucial for storage quality:
- When to harvest: When lower 1/3 of leaves turn brown but 2/3 remain green (typically late spring to mid-summer)
- How to harvest: Carefully loosen soil with garden fork and lift bulbs without pulling stems
- Curing process: Hang in warm (75-85°F), dry, well-ventilated area for 2-3 weeks until necks are dry
Properly cured garlic develops full flavor and stores much longer. Don't wash garlic before curing—any moisture can lead to mold. The curing process allows outer layers to dry, protecting inner cloves during storage.
Storing Your Harvest for Maximum Shelf Life
After curing, prepare your garlic for long-term storage:
- Trim roots to 1/4 inch and remove excess dirt (don't peel)
- Cut stems to 1-2 inches for softneck varieties, or braid them
- Store in mesh bags, baskets, or paper bags in cool (55-65°F), dark, dry place
- Check regularly for any bulbs showing signs of spoilage
Hardneck varieties typically store for 5-8 months, while softneck varieties can last 9-12 months under proper conditions. Never store garlic in the refrigerator, as humidity promotes sprouting.
Troubleshooting Common Garlic Growing Issues
Even with proper care, you might encounter these problems:
- No bulb formation: Usually from planting supermarket garlic (treated to prevent sprouting) or insufficient cold exposure for hardneck varieties
- Splitting bulbs: Results from inconsistent watering late in season or harvesting too late
- Poor root development: Caused by planting too deep or in cold, wet soil
- Yellowing leaves: May indicate nutrient deficiency, overwatering, or disease
Frequently Asked Questions
Can I grow garlic from supermarket cloves?
While possible, it's not recommended. Most supermarket garlic is treated with sprout inhibitors and may carry diseases. For best results, use garlic cloves from a reputable garden supplier specifically grown for planting.
How deep should I plant garlic cloves?
Plant garlic cloves 2-4 inches deep, with the pointed end up. In colder climates, plant deeper (4 inches) for winter protection. In milder climates, 2-3 inches is sufficient. Always cover with soil and apply mulch after planting.
Why are my garlic bulbs small?
Small bulbs can result from planting cloves that were too small, insufficient nutrients, overcrowding, planting too late in the season, or not removing scapes from hardneck varieties. Using larger cloves for planting typically produces larger bulbs.
When should I stop watering before harvest?
Reduce watering 2-3 weeks before harvest when the lower leaves begin to yellow. This allows the bulbs to mature properly and initiates the curing process, which is essential for long-term storage.


 浙公网安备
33010002000092号
浙公网安备
33010002000092号 浙B2-20120091-4