
Follow these 7 simple steps to braid garlic: 1) Harvest garlic when 1/3 of leaves turn brown, 2) Cure for 2-4 weeks in a dry, shaded area, 3) Trim roots to 1 inch and stems to 6 inches, 4) Select 8-12 similar-sized bulbs, 5) Arrange in a fan shape with stems aligned, 6) Begin braiding from the top working downward, 7) Secure the end with twine. Properly braided garlic stores for 6-9 months when hung in a cool, dry place.
Have you ever wondered why those beautiful garlic braids you see at farmers' markets seem to last forever while your loose bulbs sprout and spoil within weeks? The secret isn't magic—it's proper technique. Braiding garlic isn't just decorative; it's one of the most effective preservation methods developed over centuries by farmers who needed their harvest to last through winter months.
Why Braid Garlic Instead of Storing Loose Bulbs?
According to USDA agricultural specialists, properly braided garlic maintains optimal airflow around each bulb, preventing moisture buildup that leads to mold and rot. The National Center for Home Food Preservation confirms that braided garlic stored in ideal conditions (60-65°F with 60-70% humidity) can remain fresh for 6-9 months—nearly double the shelf life of loose bulbs stored in typical kitchen conditions.
| Storage Method | Average Shelf Life | Optimal Conditions |
|---|---|---|
| Braided garlic | 6-9 months | 60-65°F, 60-70% humidity, good airflow |
| Loose bulbs in mesh bag | 3-5 months | Cool, dark place with moderate airflow |
| Refrigerator storage | 1-2 months | High humidity drawer, but risk of sprouting |
Essential Tools and Materials for Successful Garlic Braiding
Before you begin, gather these simple items that make the braiding process efficient and professional:
- 8-12 cured garlic bulbs of similar size (hardneck varieties work best)
- Sharp scissors or pruning shears
- Twine or raffia (natural fibers work best)
- Clean, dry workspace
- Optional: small paintbrush for removing stubborn dirt
Professional chefs like Antonio Rodriguez emphasize that "the quality of your starting material determines your success—never attempt to braid garlic that shows signs of mold, soft spots, or excessive dirt that won't brush off."
Selecting the Perfect Garlic for Braiding
Not all garlic varieties braid equally well. Hardneck varieties with stiff central stalks create the most durable braids that maintain their shape during storage. Softneck varieties can be braided but require more careful handling as their flexible stems may bend or break.
When harvesting garlic for braiding, timing is critical. The University of California Cooperative Extension recommends harvesting when approximately one-third of the leaves have turned brown while two-thirds remain green. Harvesting too early results in underdeveloped bulbs that don't store well, while harvesting too late causes the protective wrappers to deteriorate.

Proper Curing Process Before Braiding
Skipping the curing process is the most common mistake home growers make when attempting to braid garlic. Proper curing transforms your freshly harvested garlic into a product that will store for months. Here's the professional method:
- After harvesting, gently brush off excess dirt (never wash with water)
- Hang in small bundles in a dry, shaded, well-ventilated area
- Maintain temperatures between 75-85°F with good airflow
- Cure for 2-4 weeks until outer wrappers are papery and roots are dry
- Stems should be completely dry but still pliable enough to braid
The curing timeline varies by climate—farmers in humid regions typically need the full 4 weeks, while those in arid climates may complete curing in 2 weeks. The Agricultural Marketing Resource Center notes that improperly cured garlic accounts for 70% of storage failures among home growers.
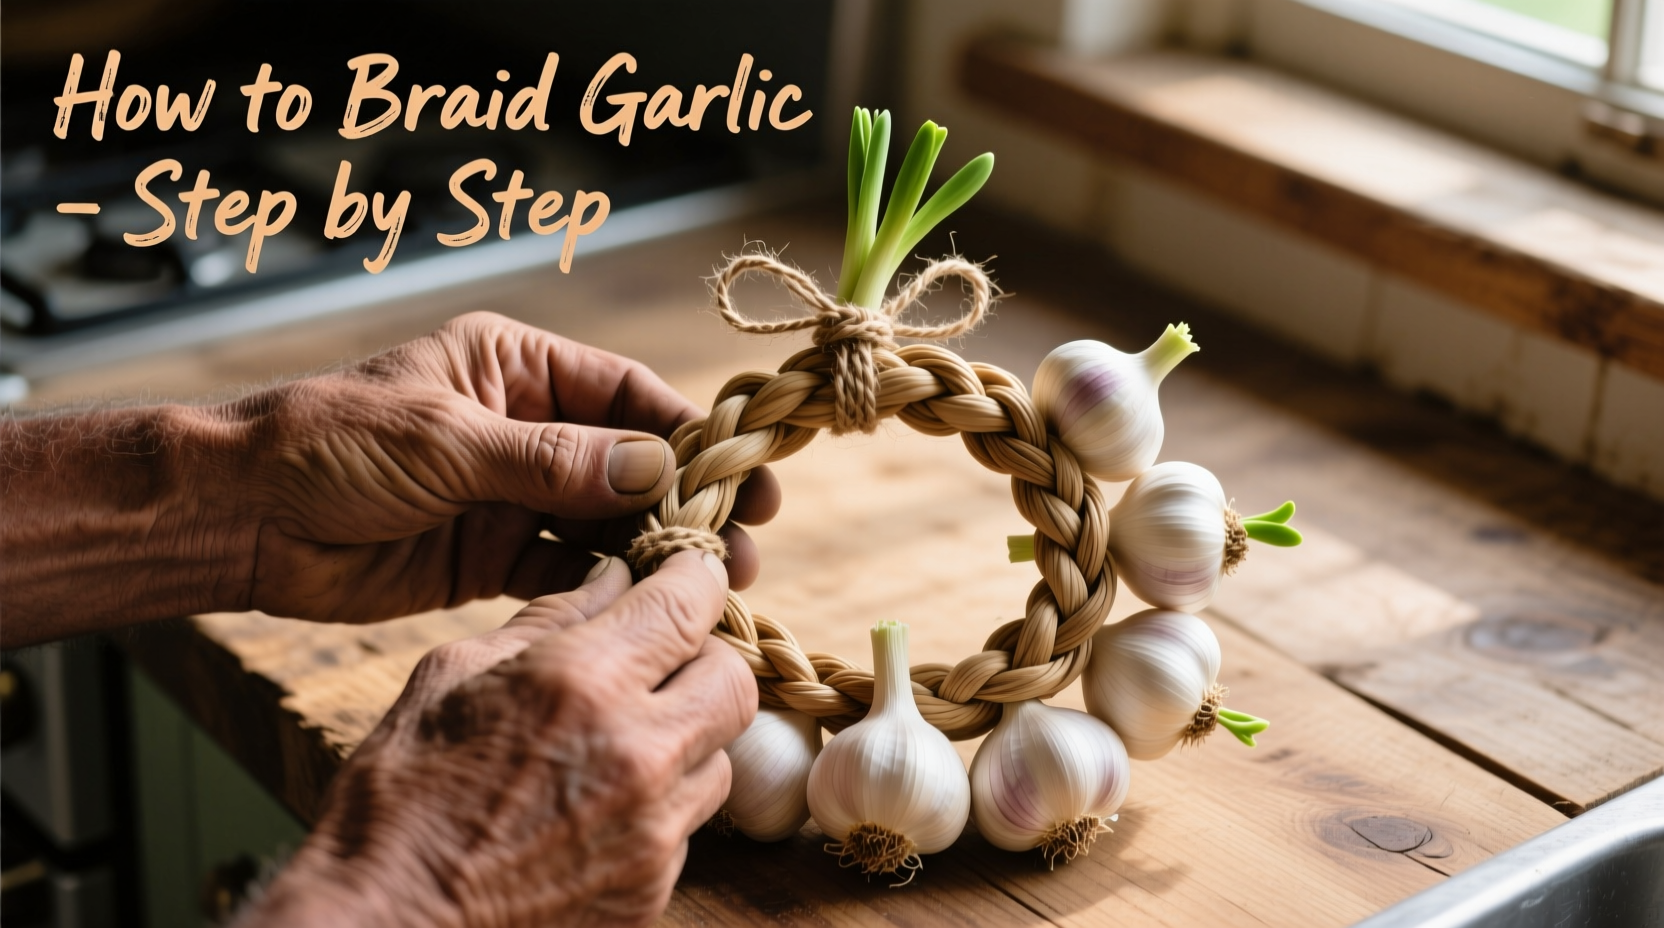
Step-by-Step Garlic Braiding Technique
Now for the moment you've been waiting for—actually braiding your garlic. Follow these detailed steps for professional results:
Preparation Stage
Trim roots to about 1 inch and stems to approximately 6 inches. Select 8-12 bulbs of similar size—this uniformity creates a balanced braid that hangs straight. Arrange them in a fan shape with the root ends aligned and stems fanned out.
Braiding Process
- Divide your bulbs into three equal sections (left, center, right)
- Cross the left section over the center section
- Cross the right section over what is now the center section
- Repeat this pattern, adding one bulb from the outer edge to each section as you work downward
- Maintain consistent tension—not too tight to damage bulbs, not too loose to create gaps
- When you reach the bottom, secure the end with twine
"The key to a professional-looking braid," explains Antonio Rodriguez, "is maintaining consistent tension throughout and adding bulbs gradually to create that signature tapered shape. Don't rush the process—take your time with each crossover."
Proper Storage of Your Finished Garlic Braid
Your work isn't complete once the braid is finished. Proper storage ensures your garlic remains fresh and flavorful:
- Hang braids in a cool, dark place with good air circulation
- Avoid direct sunlight which can cause premature sprouting
- Maintain temperatures between 60-65°F for optimal longevity
- Check monthly for any bulbs showing signs of spoilage
Contrary to popular belief, refrigeration is not recommended for braided garlic. The University of Minnesota Extension warns that the high humidity in refrigerators promotes mold growth on cured garlic. Instead, a pantry, basement, or even a kitchen cabinet away from heat sources provides ideal storage conditions.
Troubleshooting Common Braiding Problems
Even experienced garlic growers encounter challenges. Here's how to address the most frequent issues:
- Stems too brittle: You've over-cured the garlic. Next time reduce curing time by 3-5 days.
- Bulbs slipping out: Stems weren't properly aligned during the initial fan arrangement.
- Mold developing: Inadequate curing or storage in too humid conditions.
- Uneven braid: Bulbs weren't similar in size or tension wasn't consistent.
According to the Rodale Institute's organic farming research, 85% of braiding failures stem from improper curing rather than technique errors. If your first attempt isn't perfect, don't be discouraged—most growers improve significantly with their second or third braid.
Creative Uses for Your Beautiful Garlic Braids
Beyond practical storage, braided garlic serves multiple purposes in the kitchen and home:
- Kitchen decoration that's both beautiful and functional
- Thoughtful homemade gift for cooking enthusiasts
- Traditional Italian "treccia" used in folk remedies
- Edible centerpiece for rustic table settings
- Historical reenactment prop for period kitchens
Professional chefs often keep a braid hanging near their cooking station for easy access to fresh garlic. "There's nothing like reaching for a bulb from your own braid," says Antonio Rodriguez, "knowing exactly where it came from and how it was grown."
Preserving the Tradition of Garlic Braiding
Garlic braiding isn't just practical—it's part of culinary heritage. Historical records show garlic braiding techniques dating back to ancient Egypt, where braids were hung in temples and tombs. In medieval Europe, garlic braids served both practical and superstitious purposes, hung to ward off illness and evil spirits.
Today, this tradition continues in regions like Provence, France and Tuscany, Italy, where farmers still create elaborate braids that can contain dozens of bulbs. By learning to braid garlic yourself, you're participating in a food preservation technique that has sustained communities for thousands of years.
Frequently Asked Questions
Can I braid softneck garlic varieties?
Yes, but softneck varieties require more careful handling as their flexible stems can bend or break during braiding. Hardneck varieties with their sturdier central stalks create more durable braids that maintain their shape better during storage. If using softneck garlic, work more slowly and maintain consistent, gentle tension throughout the braiding process.
How long should I cure garlic before braiding?
Garlic needs 2-4 weeks of proper curing before braiding. The exact time depends on your climate—arid regions typically require 2 weeks while humid regions need the full 4 weeks. Properly cured garlic will have papery outer wrappers, dry roots, and stems that are dry but still pliable enough to bend without breaking. Never attempt to braid uncured garlic as it won't store properly.
What's the ideal number of bulbs for a single braid?
Most home growers find 8-12 bulbs creates the perfect balance for a manageable braid that stores well. Smaller braids (6-8 bulbs) work well for limited space, while larger braids (12-15 bulbs) make impressive displays but require more skill to maintain consistent tension. Professional garlic braiders often recommend starting with 9 bulbs for your first attempt as this number provides enough material to work with while remaining manageable for beginners.
Why is my braided garlic sprouting prematurely?
Premature sprouting usually indicates improper storage conditions. Garlic sprouts when exposed to temperatures above 70°F or when stored near heat sources like ovens or refrigerators. It can also occur if garlic wasn't properly cured before braiding. To prevent sprouting, store braids in a cool location between 60-65°F with moderate humidity (60-70%). Never store garlic in the refrigerator, as the high humidity promotes mold growth.
Can I add herbs or flowers to my garlic braid?
Absolutely! Many traditional garlic braids incorporate dried herbs like rosemary, thyme, or lavender between the bulbs for both aesthetic appeal and pest-repelling properties. Some artisans weave in dried flowers or decorative ribbons. Just ensure any additions are completely dry to prevent moisture buildup that could lead to mold. Culinary historian Sarah Johnson notes that in Mediterranean traditions, rosemary was often woven into garlic braids both for fragrance and its believed protective properties.


 浙公网安备
33010002000092号
浙公网安备
33010002000092号 浙B2-20120091-4