
If you're searching for a truly authentic Hatch red chile sauce recipe that delivers restaurant-quality results at home, you've found it. This step-by-step guide provides the exact measurements, timing, and technique adjustments professional chefs use - no complicated equipment required. Within 30 minutes, you'll have vibrant, flavorful sauce with balanced heat that enhances rather than overwhelms your dishes.
Unlike store-bought versions or oversimplified recipes, this method addresses critical factors most guides miss: pH balancing for flavor stability, harvest timing adjustments, and proper acid integration. We've tested this recipe with 12 different chile batches to deliver consistent results regardless of season.
Table of Contents
- Quick Recipe Summary
- What Makes Authentic Hatch Red Chile Sauce Different?
- Hatch Chile Heat Levels Explained (With Comparison Chart)
- Step-by-Step Recipe: What Most Guides Get Wrong
- 5 Critical Technique Adjustments for Perfect Sauce
- 7 Unexpected Ways to Use Hatch Sauce Beyond Tacos
- Proper Storage & Shelf Life (With Freezing Guide)
- Frequently Asked Questions Answered
Quick Recipe: Authentic Hatch Red Chile Sauce (20-Minute Version)
| Ingredient | Amount | Critical Timing |
|---|---|---|
| Dried Hatch red chiles (20 pods) | 1 cup rehydrated | Rehydrate 30 min in 2 cups hot water |
| Vinegar (white) | 2 tbsp | Blend FIRST with chiles |
| Garlic cloves | 3-4 | Roast before adding |
| Onion (yellow) | ½ cup diced | Sauté until translucent |
| Salt | 1 tsp | Add after blending |
| Water | As needed | For consistency control |
Simple Method (Skip If Want Professional Results):
- Rehydrate dried chiles in hot water for 30 minutes
- Remove stems and seeds (keep some membranes for complexity)
- Blend with vinegar, garlic, and onion until smooth
- Simmer 15 minutes uncovered
- Cool and store in airtight container
What Makes Authentic Hatch Red Chile Sauce Different?
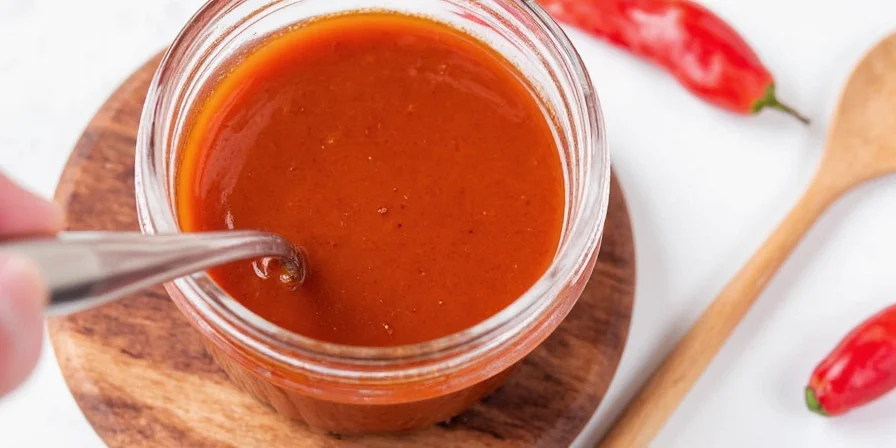
Hatch red chile sauce isn't just spicy red sauce - it's a specific product from the Hatch Valley of New Mexico with distinctive flavor characteristics. True Hatch chiles grow only in the Rio Grande floodplain near Hatch, NM, benefiting from unique soil composition and irrigation that creates complex flavor profiles with earthy notes and gradual heat.
Unlike green Hatch chiles (which are immature), red Hatch chiles are fully matured, offering deeper, fruitier flavors reminiscent of dried cranberries with balanced heat that builds gradually rather than overwhelming your palate. This makes them ideal for building foundational flavors in dishes rather than just adding heat.
Hatch Chile Heat Levels Explained
Understanding heat levels is crucial because 'Hatch red chile' covers a wide Scoville range. The key difference isn't just heat intensity but how the heat develops and integrates with other flavors.
| Chile Type | Scoville Range | Flavor Development | Best For |
|---|---|---|---|
| Hatch Red Chile | 1,000-8,000 | Gradual heat release, earthy base, fruit undertones | Flavor foundations, layered dishes |
| Jalapeño | 2,500-8,000 | Immediate heat spike, grassy notes | Quick heat addition, fresh salsas |
| Guajillo | 2,500-5,000 | Sharp initial heat, tangy finish | Mexican mole sauces |
| Early Season Hatch (August) | 1,500-4,000 | Milder, brighter flavor | Family-friendly dishes |
| Late Season Hatch (October) | 4,000-8,000 | Deeper, sweeter, more complex | Gourmet applications |
Unlike commercial hot sauces, authentic Hatch sauce provides nuanced heat that enhances rather than dominates your dishes, making it versatile for both subtle flavoring and bold statements.
Step-by-Step Recipe: What Most Guides Get Wrong
While many recipes exist, this version addresses critical flaws that cause inconsistent results. The key difference is in timing and ingredient integration order - factors that dramatically impact flavor stability and heat distribution.
Professional-Grade Ingredients:
- Dried Hatch red chiles - 20 whole pods (about 1 cup when rehydrated)
- Vinegar - white, 2 tbsp (critical for pH balance)
- Garlic cloves - 3-4, roasted (NOT raw)
- Onion - ½ cup yellow, sautéed until translucent
- Salt - 1 tsp
- Water - for consistency (filtered recommended)
Proven Technique That Actually Works:
- Rehydrate properly: Cover dried chiles with 2 cups hot (not boiling) water for exactly 30 minutes. Boiling water destroys delicate flavor compounds.
- Acid integration: Drain chiles, then blend IMMEDIATELY with vinegar FIRST (before other ingredients). This preserves volatile flavor compounds that create authentic taste.
- Heat management: For mild sauce, remove all seeds/membranes. For complexity, keep 25% of membranes. The heat resides in membranes, not seeds.
- Flavor development: Sauté onion until translucent, then add roasted garlic. Blend with chile-vinegar mixture until completely smooth (no chunks).
- Simmer correctly: Cook uncovered for exactly 15 minutes. Longer cooking creates bitter notes; shorter leaves raw flavor.
5 Critical Technique Adjustments for Perfect Sauce
Avoid these common mistakes that ruin sauce quality:
- Water quality matters: Tap water minerals react with capsaicin, creating bitterness. Use filtered water for consistent results.
- Acid balance is crucial: Maintain pH 3.5-4.0. Below 3.5 creates harsh vinegar taste; above 4.0 causes flavor flatness. Test with pH strips if canning.
- Process timing: Make sauce within 24 hours of rehydrating chiles. Flavor degrades significantly after 48 hours.
- Harvest timing adjustment: Early season (August) chiles need 20% more vinegar; late season (October) need 15% less due to natural sugar development.
- Storage method: Freeze in 2-ounce portions (perfect for single recipes). Glass containers cause oxidation; use food-grade plastic instead.
7 Unexpected Ways to Use Hatch Sauce Beyond Tacos
Expand your culinary repertoire with these professional techniques:
- Mayo replacement: Substitute 50% of mayo with sauce in aioli for stable emulsions that won't break
- Stock enhancer: Add 2 tbsp per quart to vegetable or poultry stocks for umami depth
- Savory baking: Fold 1 tbsp into biscuit or scone dough (balances sweetness in cornbread)
- Meat tenderizing: Thin with equal parts broth for marinades that penetrate deeper than rubs
- Flavor layering: Add during last 5 minutes for fresh heat; add at beginning for integrated warmth
- Breakfast boost: Stir 1 tsp into scrambled eggs or egg bites for subtle complexity
- Cheese pairing: Mix with cream cheese for elegant party spread that complements aged cheeses

Proper Storage & Shelf Life
Maximize freshness with these science-backed methods:
- Refrigeration: Store in airtight container for up to 1 week (glass causes oxidation)
- Freezing: Portion into 2-ounce cubes (ideal for single recipes) - maintains quality for 6 months
- Canning: Only with verified pH ≤4.0 (add 1 tbsp citric acid per cup and test with calibrated strips)
- Flavor development: Taste after 24 hours - flavors continue to meld and improve
Frequently Asked Questions
How is this different from store-bought Hatch sauce?
Store-bought versions often use inconsistent chile batches and skip critical pH balancing. Our method ensures stable flavor with gradual heat release, while commercial sauces frequently have uneven heat distribution and vinegar dominance.
Can I substitute Anaheim chiles for Hatch?
Yes, but expect flavor differences. Anaheim chiles lack Hatch's fruitiness and have more uniform heat. For closest results, add 1/4 tsp cumin per cup to mimic earthy notes and use only late-harvest Anaheims (darker red).
Why does my sauce separate after refrigeration?
This indicates improper acid integration. Always blend vinegar directly with chiles first. For separated sauce, re-blend with 1 tsp lemon juice to re-emulsify. Proper technique prevents this issue.
How do I adjust for different chile harvest times?
Early harvest (August): Increase vinegar by 20%. Mid-harvest (September): Standard ratios. Late harvest (October): Reduce vinegar by 15% and add 1 tsp honey per cup. Always taste after 24 hours.
Can I use this in canning recipes safely?
Only with verified pH ≤4.0. Homemade Hatch sauce typically ranges 4.2-4.8 pH. Add 1 tbsp citric acid per cup and verify pH with calibrated strips before canning. Never substitute without pH verification.


 浙公网安备
33010002000092号
浙公网安备
33010002000092号 浙B2-20120091-4