
When gardeners search for information about hatch chili seeds, they're typically seeking practical guidance for cultivating these distinctive New Mexico chiles. Unlike generic chili varieties, Hatch peppers develop their characteristic flavor profile from the unique terroir of the Hatch Valley in southern New Mexico. Understanding the specific requirements for growing hatch green chilies from seed separates successful harvests from disappointing results.
Understanding Hatch Chili Varieties
Hatch chilies aren't a single cultivar but rather a regional designation for New Mexico chile peppers grown in the Hatch Valley. The seeds produce plants yielding peppers that range from mild (500-1,000 SHU) to hot (5,000-10,000 SHU) varieties. Common types include 'Sandia', 'Big Jim', and 'NuMex Joe E. Parker' – each with distinct maturation timelines and heat levels. When selecting hatch green chili seed packets, check for regional adaptation information to ensure suitability for your climate zone.
Optimal Planting Timeline for Hatch Chili Seeds
The best time to sow hatch chili seeds depends on your geographic location. Gardeners in USDA zones 3-6 should start seeds indoors 8-10 weeks before the last expected frost date, while those in warmer zones (7-11) can begin 6-8 weeks prior. This extended indoor period accommodates Hatch chilies' longer growing season requirements compared to standard bell peppers.
| Climate Zone | Indoor Start Time | Transplant Outdoors | Days to Maturity |
|---|---|---|---|
| Zones 3-6 (Cold) | 10-12 weeks pre-frost | 2-3 weeks post-last frost | 75-90 days |
| Zones 7-9 (Moderate) | 8-10 weeks pre-frost | 1-2 weeks post-last frost | 70-85 days |
| Zones 10-11 (Warm) | 6-8 weeks pre-frost | After soil reaches 65°F | 65-80 days |
Step-by-Step Germination Process
Successful hatch green chili seed germination requires attention to specific conditions that differ slightly from other pepper varieties. Follow this verified process for optimal results:
- Seed selection: Choose fresh seeds (less than 2 years old) for highest viability. Older hatch chili seeds show significantly reduced germination rates
- Soil preparation: Use seed-starting mix with pH 6.0-6.8. Avoid standard potting soil which may contain pathogens
- Planting depth: Sow seeds 1/4 inch deep – deeper planting inhibits hatch green chili seed germination
- Temperature control: Maintain consistent 75-85°F using a heat mat. Temperatures below 70°F dramatically slow sprouting
- Moisture management: Keep soil consistently moist but not waterlogged. Use spray bottle to avoid disturbing seeds
- Light requirements: Provide 12-16 hours of direct light immediately after sprouting using LED grow lights positioned 2-4 inches above seedlings
Common Germination Challenges and Solutions
Gardeners often encounter specific issues when starting hatch chili seeds that don't affect other pepper varieties as severely. Understanding these challenges improves success rates:
- Damping-off disease: A fungal issue causing seedlings to collapse at soil line. Prevent with sterile seed mix and bottom watering technique
- Slow germination: Hatch varieties typically take 14-21 days (vs 7-14 for jalapeños). Maintain patience and consistent warmth
- Leggy seedlings: Caused by insufficient light. Position grow lights closer and consider gentle air circulation to strengthen stems
- Bolting: Early flowering from temperature stress. Maintain consistent 70-85°F range during seedling stage
Transplanting and Outdoor Care
When transitioning your growing hatch chilies from seed indoors to outdoor conditions, follow these specialized guidelines:
Begin hardening off seedlings 7-10 days before transplanting by gradually increasing outdoor exposure. Hatch chilies particularly benefit from black plastic mulch which warms the soil and conserves moisture – critical for developing their signature flavor compounds. Space plants 18-24 inches apart in rows 30-36 inches apart to ensure adequate airflow, which prevents common fungal issues in hatch green chili cultivation.
Water deeply but infrequently, aiming for 1-2 inches per week. During fruit set, reduce watering slightly to concentrate flavors – a technique specific to growing authentic-tasting Hatch chilies. Avoid overhead watering to prevent blossom end rot, which affects Hatch varieties more severely than other chilies due to their thinner walls.
Harvesting and Post-Harvest Handling
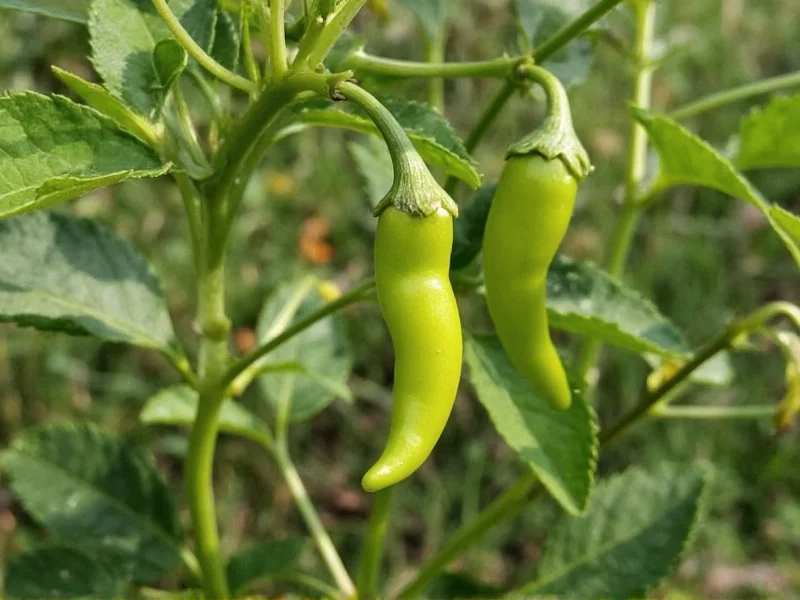
Hatch chilies reach maturity in stages, offering different flavor profiles at various development points. For traditional Hatch green chili flavor, harvest when peppers reach full size but remain green (approximately 6-8 inches long). The shoulders should feel firm but yield slightly to pressure. Use clean scissors to cut peppers from plants, leaving a small stem attached.
For red Hatch chilies (fully mature), allow peppers to ripen completely on the plant until deep red color develops. This extended maturation increases sweetness and complexity but reduces the characteristic Hatch smokiness. Immediately after harvest, store fresh Hatch chilies in perforated plastic bags in the refrigerator crisper drawer for up to 3 weeks.
Frequently Asked Questions
How long does it take hatch chili seeds to germinate?
Hatch chili seeds typically germinate in 14-21 days under optimal conditions (75-85°F soil temperature). This is slower than many other pepper varieties, which often sprout in 7-14 days. Maintaining consistent warmth using a seedling heat mat significantly improves germination rates for these New Mexico chile seeds.
Can I grow hatch chilies outside the Hatch Valley?
Yes, you can successfully grow Hatch chilies outside New Mexico's Hatch Valley, though they won't carry the official 'Hatch' designation. The key is replicating the valley's growing conditions: full sun, well-draining soil, and warm days with cool nights. Gardeners from Maine to California have successfully cultivated these peppers by selecting regionally adapted varieties and following proper growing hatch chilies from seed techniques.
What's the ideal soil pH for growing hatch chili seeds?
Hatch chili seeds perform best in slightly acidic to neutral soil with a pH between 6.0 and 6.8. Soil testing before planting is recommended, as values outside this range can cause nutrient deficiencies even with proper fertilization. Amend alkaline soils with elemental sulfur and acidic soils with garden lime to achieve the optimal pH range for hatch green chili seed cultivation.
How do I prevent blossom drop in hatch chili plants?
Blossom drop in Hatch chili plants typically occurs due to temperature stress (above 90°F or below 60°F), inconsistent watering, or poor pollination. To prevent this common issue when growing hatch chilies from seed, maintain consistent soil moisture, provide afternoon shade during extreme heat, and gently shake plants during flowering to improve pollination. Avoid high-nitrogen fertilizers which promote leaf growth at the expense of fruit set.
Should I soak hatch chili seeds before planting?
Soaking hatch chili seeds for 8-12 hours in room-temperature water can improve germination rates by softening the seed coat. However, avoid extended soaking (beyond 24 hours) which may cause seed rot. For best results with hatch green chili seed germination, combine brief soaking with consistent warmth and proper planting depth (1/4 inch) in well-draining seed starting mix.


 浙公网安备
33010002000092号
浙公网安备
33010002000092号 浙B2-20120091-4