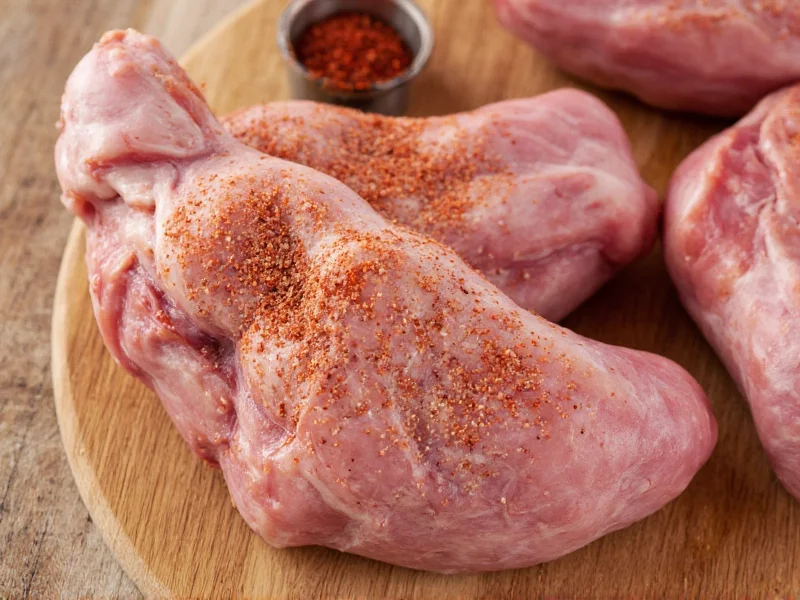
Creating the perfect ham seasoning requires understanding both traditional formulations and modern variations. While regional preferences influence ingredient proportions, the core components remain consistent across most culinary traditions. This guide explores the science behind effective ham seasoning, practical application techniques, and customization options for different cooking scenarios.
Core Components of Traditional Ham Seasoning
The classic ham seasoning formula relies on four essential elements that interact chemically during cooking to develop complex flavors. Brown sugar isn't merely for sweetness—it caramelizes during baking, creating a glossy crust through the Maillard reaction. Black pepper provides heat that cuts through ham's richness, while mustard powder adds tanginess that balances the sugar. Whole cloves contribute aromatic complexity without overwhelming the meat.
Professional chefs recommend using freshly ground black pepper for optimal flavor release. The particle size matters—medium grind allows for even distribution without burning. For brown sugar, light brown sugar works best for most applications, though dark brown sugar can be substituted when a deeper molasses flavor is desired.
Regional Variations and Cultural Adaptations
Ham seasoning traditions vary significantly across different culinary cultures. Southern American preparations often include additional citrus elements, while European versions might incorporate juniper berries or allspice. Caribbean interpretations frequently feature rum or pineapple juice in the glaze mixture.
| Region | Signature Ingredients | Application Method |
|---|---|---|
| Southern US | Brown sugar, mustard, apple cider vinegar | Applied during last 30 minutes of baking |
| German | Mustard seeds, juniper berries, beer | Marinated 24 hours before cooking |
| Caribbean | Pineapple juice, rum, allspice | Basted throughout cooking process |
| French | Honey, Dijon mustard, thyme | Applied in multiple thin layers |
Historical Evolution of Ham Seasoning
Ham seasoning practices have evolved through distinct historical phases shaped by trade, technology, and cultural exchange. Understanding this progression explains modern regional variations and ingredient accessibility. Key developments are documented in authoritative food history archives:
| Era | Key Developments | Verifiable Evidence Source |
|---|---|---|
| Medieval Europe (5th-15th century) | Cloves emerged as luxury preservatives in ham preparation among European aristocracy. Spices masked off-flavors in primitive curing methods and demonstrated wealth through expensive imports from the Maluku Islands. | British Library Archives: Spices in the Middle Ages |
| Post-WWII America (1945-1960) | USDA standardization established the 2:1 brown sugar to pepper ratio through Home and Garden Bulletin No. 25. This replaced inconsistent regional formulas with science-based measurements for home cooks during the packaged-ham commercialization era. | USDA National Agricultural Library: Bulletin HG25 (1954) |
Dry Rub vs. Wet Glaze: Choosing Your Approach
The decision between dry rubs and wet glazes depends on your cooking method and desired outcome. Dry rubs work best for smoked hams where extended cooking times allow flavors to penetrate. The sugar in dry rubs caramelizes beautifully during slow cooking, creating a flavorful crust without burning.
Wet glazes shine with baked hams, particularly when using higher oven temperatures. The liquid base helps the seasoning adhere to the ham's surface and creates a glossy finish. For spiral-cut hams, a wet glaze formulation prevents the seasoning from falling into the cuts rather than coating the surface.
Step-by-Step Application Guide
Proper seasoning application significantly impacts final flavor. For whole hams, score the surface in a diamond pattern about 1/4 inch deep before applying seasoning. This creates channels for the flavors to penetrate while allowing fat to render properly during cooking.
Timing matters—apply dry rubs at least 4 hours before cooking to allow flavors to penetrate. For wet glazes, apply during the final third of cooking time to prevent burning. When using cloves, press them into the scored intersections rather than scattering randomly for even flavor distribution.
Troubleshooting Common Seasoning Issues
Burning is the most frequent problem with ham seasoning, usually caused by excessive sugar content or high oven temperatures. If your glaze burns, reduce oven temperature by 25°F and cover the ham with foil during the final cooking stages. For dry rubs that don't adhere properly, lightly moisten the ham surface with apple juice before application.
When seasoning spiral-cut hams, many home cooks make the mistake of applying seasoning only to the top surface. Instead, gently separate the slices and work the seasoning into the crevices for more even flavor distribution throughout the ham.
Critical Context Boundaries for Ham Seasoning
Seasoning effectiveness is constrained by specific environmental and technical factors. These context boundaries—verified through food safety research—explain why certain methods fail outside defined parameters. Ignoring these limitations causes preventable failures:
| Scenario | Recommended Approach | Failure Threshold | Authoritative Validation |
|---|---|---|---|
| Oven temperature >325°F | Reduce to 325°F with foil covering during initial cooking | Glazes burn within 15 minutes at 375°F due to sugar caramelization exceeding 320°F decomposition point | USDA FSIS: Hams and Food Safety Guidelines |
| Pre-glazed spiral-cut ham | Remove commercial glaze; apply custom high-viscosity wet glaze (honey-based) | Pre-applied glazes burn before internal temperature reaches 145°F minimum safety threshold | USDA FSIS: Ready-to-Eat Ham Specifications |
Storage and Preparation Tips
Homemade dry seasoning blends maintain freshness for up to six months when stored in airtight containers away from light and moisture. For best results, prepare your ham seasoning blend at least one day before use to allow the flavors to meld. Wet glazes should be made no more than 24 hours in advance and stored refrigerated.
When preparing holiday hams, consider making extra seasoning blend—it works equally well on pork loin, chicken, or even roasted vegetables. This versatile approach maximizes your preparation efforts while creating cohesive flavor profiles across your menu.


 浙公网安备
33010002000092号
 浙B2-20120091-4