
Knowing exactly when garlic starts forming bulbs and how many leaves indicate harvest readiness separates successful growers from disappointed gardeners. This comprehensive guide details each growth phase with actionable care tips, visual indicators, and climate-specific considerations to maximize your garlic yield.
Garlic Growth Timeline: What to Expect Month by Month
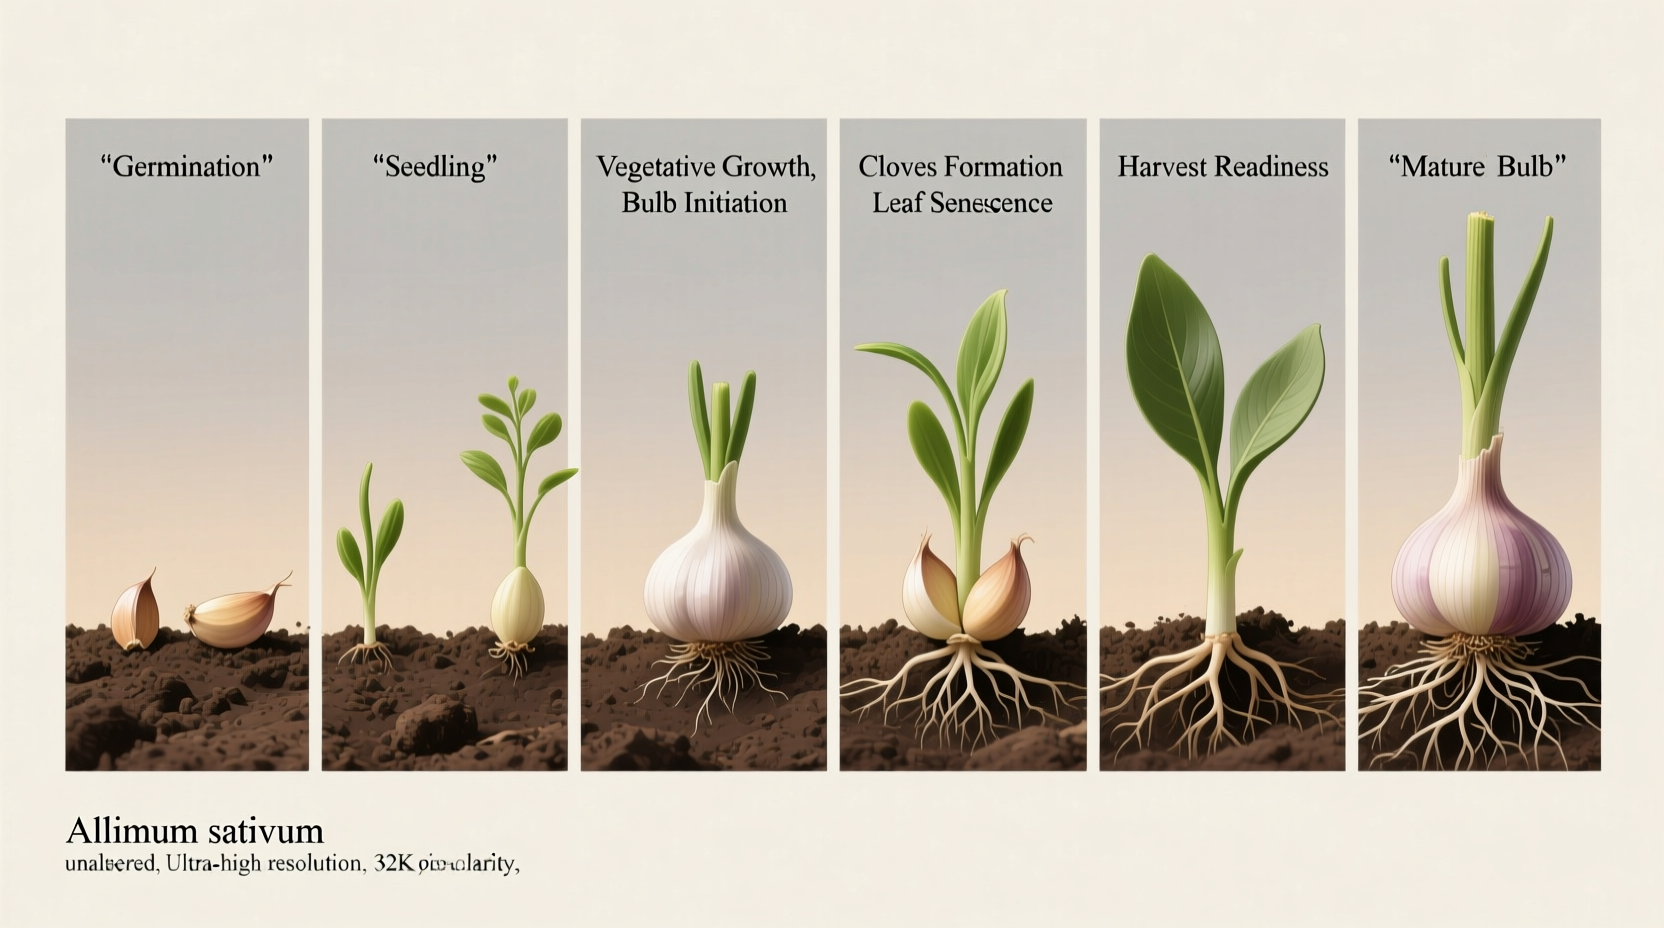
Garlic follows a predictable seasonal pattern when planted in fall (September-November in most climates). The complete growth cycle spans 8-9 months from planting to harvest, with critical transitions occurring at specific temperature thresholds. University agricultural extensions consistently document this timeline across diverse growing regions.
| Month | Growth Stage | Key Development | Gardener Actions |
|---|---|---|---|
| October | Planting & Rooting | Root development begins | Plant cloves 2" deep, mulch after planting |
| November-January | Winter Dormancy | Minimal visible growth | Maintain mulch layer, monitor soil moisture |
| February-March | Spring Growth | Leaf emergence accelerates | Remove mulch, apply nitrogen fertilizer |
| April | Bulb Initiation | 6-8 leaves trigger bulb formation | Increase watering, monitor leaf count |
| May-June | Bulb Swelling | Rapid bulb enlargement | Reduce watering, watch for harvest signs |
| July | Harvest Readiness | Lower leaves yellow/brown | Stop watering, prepare for harvest |
Stage 1: Planting and Root Development (Fall)
When you plant garlic cloves in fall (typically 4-6 weeks before first frost), the first critical phase begins underground. While little happens above ground, root development establishes the foundation for next season's bulb size. Research from Cornell University's agricultural extension confirms that cloves planted at proper depth (2 inches in cold climates, 1 inch in mild climates) develop stronger root systems than shallow plantings.
During this stage (October-November):
- Roots grow downward while the basal plate anchors the clove
- Shoots begin forming but remain dormant below soil
- Ideal soil temperature: 40-50°F (4-10°C)
Care tip: Apply 3-4 inches of straw mulch after planting to maintain consistent soil temperature and moisture. This prevents heaving during freeze-thaw cycles that can damage developing roots.
Stage 2: Winter Dormancy (December-February)
As temperatures drop below 40°F (4°C), garlic enters dormancy. This cold period (vernalization) is crucial for proper bulb formation later. According to Oregon State University's horticulture department, garlic requires 4-8 weeks below 45°F (7°C) to initiate bulb development.
During dormancy:
- Visible growth pauses completely
- Root system continues slow development
- Internal physiological changes prepare for spring growth
Climate consideration: In zones 7+, where winters stay above freezing, garlic may show some green growth but still requires cold exposure for proper bulb formation. Gardeners in mild climates sometimes refrigerate cloves for 4-6 weeks before planting to simulate winter conditions.
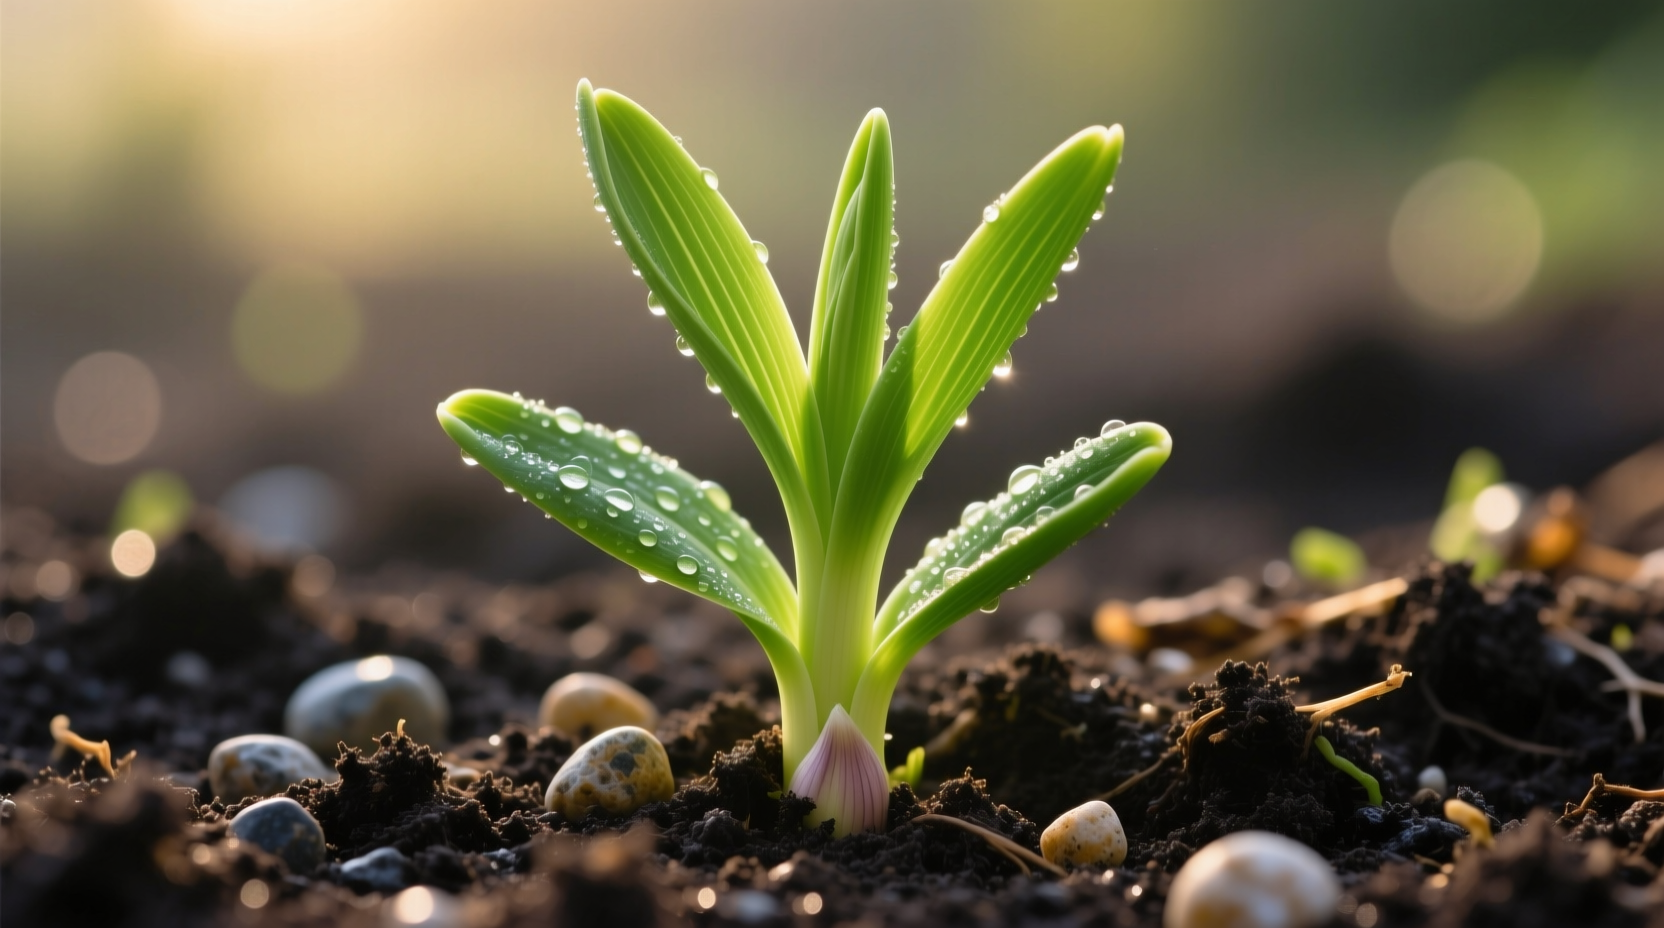
Stage 3: Spring Growth and Leaf Development (March-April)
As soil temperatures rise above 40°F (4°C), garlic resumes active growth. The number of leaves directly determines final bulb size - each leaf corresponds to a layer of the bulb. Research shows that garlic needs 6-8 healthy leaves before bulb initiation begins.
Key indicators during this phase:
- New leaves emerge weekly as temperatures warm
- Leaf tips may show frost damage in early spring
- Soil moisture becomes critical for leaf development
Pro tip: Remove mulch when 2-3 inches of green growth appears to allow soil warming. Apply nitrogen-rich fertilizer (like fish emulsion) when leaves reach 6 inches tall to support rapid growth.
Stage 4: Bulb Initiation (April-May)
This invisible but critical transition occurs when garlic has developed 6-8 leaves and experiences 14+ hour daylight periods. The plant shifts energy from leaf production to bulb formation. University of California agricultural researchers note that bulb initiation happens when soil temperatures reach 65°F (18°C).
What's happening underground:
- Stem plate begins dividing into individual cloves
- Outer wrapper leaves form around developing cloves
- Root system reaches maximum development
Watering strategy: Maintain consistent moisture during this phase - drought stress now creates smaller bulbs. Aim for 1 inch of water weekly through both rainfall and irrigation.
Stage 5: Bulb Swelling (May-June)
As summer approaches, garlic enters its most visible growth phase. The bulb rapidly expands as the plant transfers energy from leaves to cloves. This stage determines your final harvest size, making proper care essential.
Key developments:
- Bulb diameter increases significantly each week
- Lower leaves begin yellowing from tips downward
- Wrapper leaves become more papery and protective
Harvest timing clue: When half the leaves remain green and half turn brown, bulbs are nearing maturity. The USDA National Agricultural Library confirms that stopping irrigation 2-3 weeks before harvest improves storage quality by allowing wrapper leaves to dry properly.
Stage 6: Harvest Readiness (June-July)
Knowing exactly when to harvest garlic makes the difference between perfect bulbs and disappointing results. The most reliable indicator is leaf color - when 40% of leaves have turned brown while 60% remain green, bulbs have reached full size but wrappers are still intact.
| Variety Type | Leaf Count at Harvest | scape Removal Impact | Storage Potential |
|---|---|---|---|
| Hardneck Garlic | 5-6 green leaves remaining | Increases bulb size by 15-25% | 5-8 months |
| Softneck Garlic | 7-8 green leaves remaining | No scapes produced | 9-12 months |
Harvest mistake to avoid: Waiting until all leaves brown results in split wrappers and smaller cloves. Dig test bulbs weekly starting when lower leaves yellow to determine perfect timing for your specific conditions.
Climate-Specific Growth Variations
Garlic growth timing varies significantly by climate zone. The University of Minnesota Extension notes that garlic planted in zone 4 requires 25% more days to maturity than the same variety in zone 6 due to cooler spring temperatures.
Regional considerations:
- Cold climates (zones 3-5): Plant earlier in fall, use heavier mulch, expect later harvest
- Moderate climates (zones 6-7): Standard planting/harvest windows apply
- Warm climates (zones 8-10): Plant later in fall, select softneck varieties, expect earlier harvest
Proven technique for warm climates: Refrigerate cloves for 40 days before planting to simulate winter chill requirements, as recommended by Texas A&M AgriLife Extension.
Common Growth Problems and Solutions
Understanding growth stages helps diagnose issues early:
- Yellowing leaves in spring: Could indicate nitrogen deficiency or waterlogged soil
- Stunted bulb development: Often caused by premature scape removal or insufficient cold period
- Mold on bulbs: Results from harvesting too late or improper curing conditions
Preventative measure: Rotate garlic planting locations annually - the USDA recommends waiting 3-4 years before replanting alliums in the same soil to prevent disease buildup.


 浙公网安备
33010002000092号
浙公网安备
33010002000092号 浙B2-20120091-4