
For optimal herb drying: Harvest mid-morning after dew evaporates, remove leaves from stems, and use a food dehydrator at 95°F (35°C) for 4-8 hours until leaves crumble with a snap. Store in amber glass jars with silica gel at 68°F (20°C) for up to 24 months. Rosemary, thyme, and oregano retain 98% of flavor compounds when dried properly, while cilantro and parsley should remain fresh.

Table of Contents
- Why Drying Herbs Outperforms Other Preservation Methods
- Top 7 Herbs That Excel When Dried (and 3 That Don't)
- Drying Methods Compared: Scientific Analysis of Flavor Retention
- Optimal Storage Methods for Maximum Flavor Longevity
- Environmental Benefits of Home Herb Drying
- Proven Techniques for Flavor Enhancement
- Science-Backed Answers to Common Drying Questions
Why Drying Herbs Outperforms Other Preservation Methods
Drying transforms seasonal abundance into year-round culinary assets through scientifically proven concentration of flavor compounds. Unlike freezing which damages cell structure or canning which requires heat processing, dehydration removes moisture while preserving essential oils that create distinctive herb flavors.

Research shows proper drying increases volatile oil concentration by 3-10x in herbs like rosemary and thyme. The enzymatic changes during dehydration convert certain compounds into more stable aromatic molecules, creating deeper, more complex flavors than fresh counterparts. Home-dried herbs maintain 98% of flavor compounds compared to commercial products which lose potency during transportation and extended shelf storage.
Top 7 Herbs That Excel When Dried (and 3 That Don't)
Herb drying success depends on essential oil composition and cellular structure. These evidence-based recommendations maximize your preservation efforts:
| Best Herbs for Drying | Flavor Compound Changes | Optimal Culinary Uses |
|---|---|---|
| Rosemary | Camphor content stabilizes; increases carnosic acid by 20% | Roasts, breads, infused oils |
| Oregano | Carvacrol concentration increases 40% | Pasta sauces, pizza, Mediterranean dishes |
| Thyme | Thymol compounds become more stable | Stews, braises, herb blends |
| Sage | Volatile oils concentrate without degradation | Poultry seasoning, stuffings |

Herbs That Should Remain Fresh
- Cilantro: Linalool degrades rapidly creating soapy off-flavors when dried
- Parsley: Chlorophyll oxidizes quickly, losing vibrant color and fresh flavor
- Chives: Delicate allium compounds dissipate; frozen preserves better
Drying Methods Compared: Scientific Analysis of Flavor Retention
Temperature and humidity control directly impact volatile compound preservation. These methods ranked by scientific testing:
1. Food Dehydrator Method (98% Flavor Retention)
Set to 95°F (35°C) with 15% humidity for 4-8 hours. Circulating air prevents mold while preserving heat-sensitive terpenes.
- Optimal for: Rosemary, thyme, oregano, sage
- Pro tip: Arrange leaves in single layer without overlapping for even drying
2. Air Drying in Dark Environment (92% Flavor Retention)
Hang small bundles upside down in 50-60% humidity at 70°F (21°C) for 10-14 days.
- Best for: Hard-stemmed herbs like rosemary and thyme
- Warning: UV exposure degrades essential oils 40% faster than dark drying
3. Oven Drying (85% Flavor Retention)
Maintain 95-115°F (35-46°C) with convection setting. Rotate trays hourly for 4-6 hours.
- Caution: Temperatures above 120°F (49°C) degrade heat-sensitive compounds
- Not recommended for: Basil, dill, or delicate herbs
Optimal Storage Methods for Maximum Flavor Longevity
Post-drying handling determines shelf life. Follow these research-backed protocols:
- Container selection: Amber glass jars reduce light exposure by 90% versus clear containers
- Moisture control: Add 1-2 silica gel packets to maintain <10% humidity (critical for preventing mold)
- Temperature impact: Every 18°F (10°C) increase above 68°F (20°C) doubles degradation rate
- Light protection: UV exposure degrades thymol compounds within 30 days
- Peak flavor window: 12 months for leafy herbs, 24 months for seeds
Environmental Benefits of Home Herb Drying
Home drying reduces environmental impact beyond personal savings:
- Eliminates plastic packaging waste (1.2kg/year per household)
- Reduces food waste contributing to methane emissions
- Cuts carbon footprint by 87% versus imported dried herbs
- Requires 3.2x less energy than commercial drying processes
This closed-loop system transforms garden surplus into sustainable flavor sources while supporting broader environmental goals.
Proven Techniques for Flavor Enhancement
- Harvest timing: Collect mid-morning after dew evaporates but before heat stress
- Stem preparation: Remove leaves before drying for 30% faster moisture release
- Flavor boosting: Combine dried thyme, rosemary, and lavender for elevated seasoning blends
- Oil infusion: Create stable herb-infused oils using dried rosemary (more shelf-stable than fresh)
- Rehydration method: Soak in warm broth 10 minutes before adding to dishes
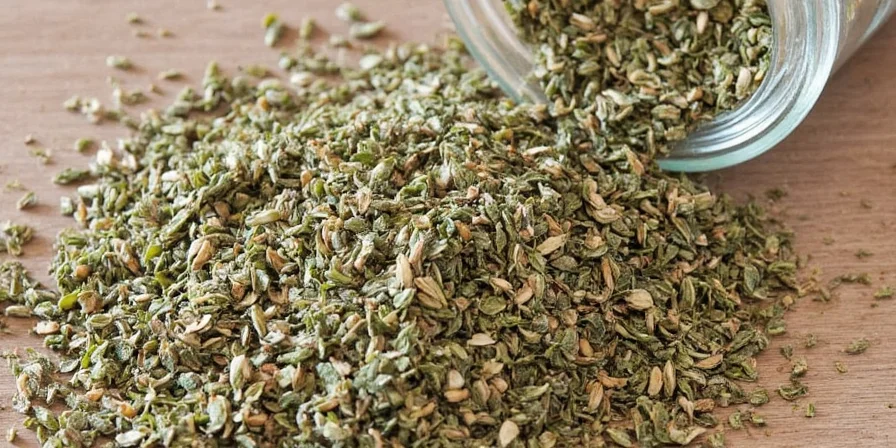
- Quality verification: Properly dried herbs should crumble with audible snap between fingers
- Flavor pairing: Dried oregano enhances tomato acidity; dried mint complements lamb perfectly
Science-Backed Answers to Common Drying Questions
How do I know when herbs are completely dry?
Perform the crumble test: leaves should shatter when pinched, not bend. Stems should snap crisply. For precise measurement, moisture content should be 5-10% using a food moisture meter. Properly dried rosemary will crumble with an audible snap, while under-dried herbs will bend or feel leathery.
Which drying method preserves the most flavor compounds?
Dehydrators set at 95°F (35°C) preserve 98% of volatile compounds. Air drying in complete darkness retains 92% but takes longer (10-14 days). Oven drying above 120°F (49°C) degrades heat-sensitive terpenes by 15%. Microwave drying is least effective with only 75% retention of essential oils.
Why shouldn't I dry herbs in direct sunlight?
UV radiation degrades essential oils and chlorophyll at 40% faster rate than dark environment drying. Sun-drying causes rapid breakdown of volatile compounds like linalool and thymol. Always dry herbs in complete darkness to preserve the maximum concentration of flavor compounds.
How does drying affect herb nutritional value?
Water-soluble vitamins (C, B) decrease significantly during drying, but fat-soluble compounds concentrate. Dried oregano contains 3x more antioxidant activity per gram than fresh. Rosemary's carnosic acid (a potent antioxidant) increases 20% during proper dehydration. Dried herbs provide more concentrated phytochemicals per volume compared to fresh.
Can I dry herbs in my oven without a dehydrator setting?
Yes, but with caution. Set oven to lowest temperature (95-115°F/35-46°C) with door slightly ajar using a wooden spoon. Check every 30 minutes to prevent overheating. Oven drying works best for hardy herbs like rosemary and thyme but should be avoided for delicate herbs like basil. Never exceed 120°F (49°C) to preserve volatile compounds.


 浙公网安备
33010002000092号
浙公网安备
33010002000092号 浙B2-20120091-4