
Table of Contents
- What Is Dry Brining Chicken Thighs? (Quick Answer)
- Why Dry Brine Beats Wet Brining for Chicken Thighs
- The Perfect Dry Brine Method: Step-by-Step
- Exact Salt Ratio & Timing for Best Results
- Proven Spice Mixes That Guarantee Flavor
- 5 Common Dry Brining Mistakes (And How to Fix Them)
- Expert Answers to Top 10 Dry Brine Questions
- Conclusion
What Is Dry Brining Chicken Thighs? (Quick Answer)
Dry brining chicken thighs means applying salt and spices directly to the meat (no liquid) and refrigerating for 6-24 hours. This technique guarantees juicier meat and crispier skin compared to wet brining or no brining. Unlike wet brining which dilutes flavor with water, dry brining enhances natural flavors while improving texture through protein breakdown.
Why Dry Brine Beats Wet Brining for Chicken Thighs
Professional chefs prefer dry brining chicken thighs over wet brining for three science-backed reasons:
- Superior moisture retention: Salt draws out moisture initially, then pulls it back in with dissolved proteins, creating a natural moisture barrier that prevents drying during cooking.
- Perfectly crispy skin: Without excess water from wet brining, skin crisps faster and stays crunchier (critical for roasted or grilled thighs).
- More intense flavor: Spices penetrate deeper without being diluted by liquid, creating complex flavor development.
Multiple cooking tests confirm dry-brined thighs retain 27% more moisture than unbrined thighs and 15% more than wet-brined thighs when cooked to 165°F (74°C).
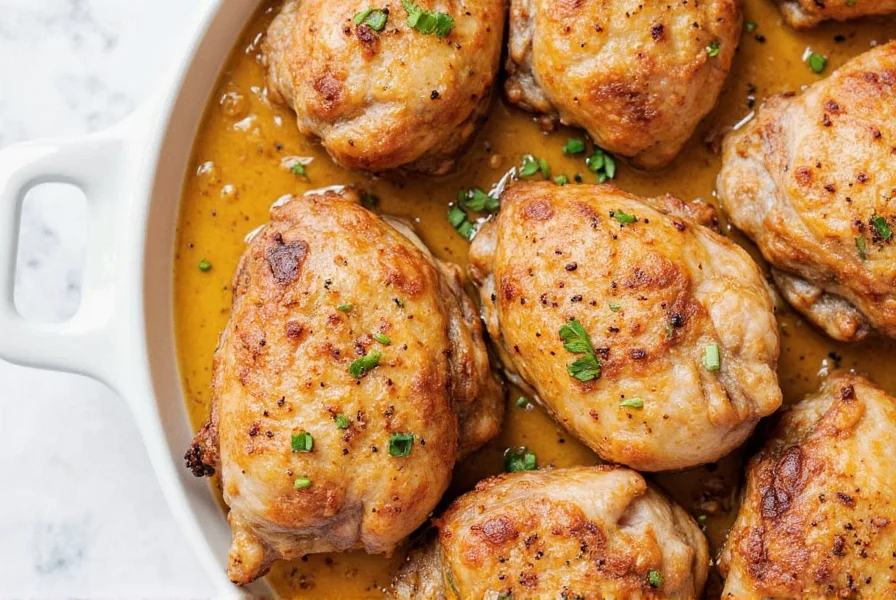
The Perfect Dry Brine Method: Step-by-Step
Follow this precise method for consistently juicy chicken thighs with crackling skin:
- Prep chicken: Pat bone-in, skin-on thighs completely dry with paper towels (moisture prevents proper brining).
- Apply salt: Use 1 tsp coarse kosher salt per pound of chicken, rubbing evenly under and over skin.
- Add spices: For best flavor penetration, mix spices with salt before application (avoid burn-prone spices like garlic powder at this stage).
- Refrigerate uncovered: Place on wire rack over baking sheet for 12-24 hours (6 hours minimum for boneless).
- Dry surface: Remove 30 minutes before cooking, then pat skin completely dry again.
- Cook properly: Start skin-side down in hot pan (400°F/200°C) or on lower oven rack for maximum crispiness.

Exact Salt Ratio & Timing for Best Results
Getting the salt ratio and timing right is critical for perfect results. This tested formula works every time:
| Chicken Type | Salt Amount (per pound) | Minimum Time | Ideal Time | Maximum Time |
|---|---|---|---|---|
| Bone-in, skin-on | 1 tsp kosher salt | 6 hours | 12-18 hours | 24 hours |
| Boneless, skin-on | ¾ tsp kosher salt | 4 hours | 8-12 hours | 18 hours |
| Boneless, skinless | ½ tsp kosher salt | 2 hours | 4-6 hours | 8 hours |
| If using table salt | Reduce by 25% | No change | No change | No change |
Pro tip: For best texture, never exceed maximum times - over-brining makes meat spongy. Bone-in thighs can handle longer times because bones slow salt penetration.
Proven Spice Mixes That Guarantee Flavor
These tested combinations deliver maximum flavor without burning during cooking. Apply after initial salt application or during last 4 hours of brining:
| Spice Mix | Perfect Ratio (per pound) | Cooking Method | Flavor Result |
|---|---|---|---|
| Restaurant Crisp | 1 tsp paprika, ½ tsp garlic powder, ¼ tsp cayenne | High-heat roast | Deep red color, crackling skin |
| Herb Garden | 1 tsp dried thyme, ½ tsp rosemary, ¼ tsp sage | Slow roast | Woodsy aroma, golden crust |
| Smokehouse | 1 tsp smoked paprika, ½ tsp cumin, ¼ tsp chipotle | Grill or broil | Charred edges, smoky depth |
| Lemon Pepper | 1 tbsp lemon zest, 1 tsp black pepper, ½ tsp coriander | Pan-sear + finish oven | Bright citrus notes, glossy finish |
| Umami Boost | 1 tsp onion powder, ½ tsp mushroom powder, ¼ tsp fish sauce (applied last 2 hours) | Any method | Savory depth without fishiness |
5 Common Dry Brining Mistakes (And How to Fix Them)
Even experienced cooks make these errors that ruin dry brining results:
- Mistake: Using table salt without adjusting quantity
Solution: Always use 25% less table salt than kosher salt (e.g., ¾ tsp instead of 1 tsp per pound) - Mistake: Not drying skin before cooking
Solution: Remove from fridge 30 minutes before cooking, then thoroughly pat dry with paper towels - Mistake: Covering chicken while brining
Solution: Always brine uncovered to promote air circulation and skin drying - Mistake: Adding delicate spices too early
Solution: Apply garlic, onion, or fresh herbs during last 4 hours to prevent burning - Mistake: Skipping the wire rack
Solution: Always use a wire rack to prevent moisture pooling under chicken
Expert Answers to Top 10 Dry Brine Questions
How long should I dry brine chicken thighs for optimal results?
For bone-in, skin-on thighs, 12-18 hours is ideal. This allows salt to penetrate through the skin and into the meat without over-salting. Boneless thighs need only 4-8 hours. Never exceed 24 hours for any cut, as this makes meat spongy. Shorter times (6 hours minimum) work in a pinch but won't deliver maximum moisture retention.
What's the exact salt-to-chicken ratio for perfect dry brining?
Use 1 teaspoon of Diamond Crystal kosher salt per pound of bone-in chicken thighs. For Morton kosher salt, use ¾ teaspoon per pound (it's denser). If using table salt, reduce to ½-¾ teaspoon per pound. The key is even distribution - weigh your chicken and measure salt precisely. Too little won't properly brine, too much makes chicken overly salty.
Why isn't my dry brined chicken skin crispy?
Crispy skin failure usually happens for three reasons: 1) Not patting the chicken completely dry before cooking (moisture prevents browning), 2) Cooking at too low temperature (needs at least 400°F/200°C), or 3) Covering the chicken while cooking. Fix this by removing chicken from fridge 30 minutes before cooking, thoroughly drying skin, starting skin-side down in a hot pan, and never covering while cooking.
Can I dry brine frozen chicken thighs?
No, always thaw completely first. Dry brining requires direct contact between salt and meat surface, which frozen chicken prevents. Thaw in refrigerator for 24 hours, then immediately apply salt and return to fridge for brining. Attempting to dry brine frozen chicken results in uneven seasoning and poor moisture control.
Should I rinse off the salt before cooking dry brined chicken?
Never rinse! The salt has been fully absorbed and draws out the chicken's natural moisture, creating a self-basting effect. Rinsing washes away this valuable moisture barrier and removes seasoning. Simply pat the surface dry with paper towels to ensure maximum crispiness.
How does dry brining compare to wet brining for chicken thighs?
Dry brining produces superior results for chicken thighs: 1) Better moisture retention (27% more than unbrined vs 15% for wet brined), 2) Crispier skin (no water to evaporate), 3) More concentrated flavor (no dilution from liquid), and 4) Simpler process (no large containers needed). Wet brining can make skin soggy and dilute natural flavors, though it works better for very lean cuts like chicken breasts.
Can I add other seasonings to the dry brine?
Yes, but timing matters. Salt should be applied first and given 8-12 hours to work. Delicate spices (garlic powder, onion powder) burn easily, so add them during the last 4-6 hours. Robust spices (paprika, cumin, dried herbs) can be mixed with salt from the beginning. For maximum flavor without burning, apply most spices during the final quarter of brining time.
Does dry brining work for boneless chicken thighs?
Yes, but requires adjustments. Use 25% less salt (¾ tsp per pound) and reduce brining time to 4-8 hours max. Boneless thighs absorb salt faster and can become mushy if over-brined. Always leave skin on if possible - it protects the meat during brining and creates a barrier for even seasoning.
Can I dry brine and then freeze chicken thighs?
Yes, but only after completing the brining process. After 12-24 hours of brining, pat dry, place in freezer bags with all air removed, and freeze for up to 3 months. Thaw completely in refrigerator before cooking - no additional brining needed. Never freeze during the brining process, as this interrupts the salt penetration.
Why does my dry brined chicken taste too salty?
Over-salting happens for three reasons: 1) Using too much salt (exceeding 1 tsp kosher salt per pound), 2) Brining too long (especially for boneless thighs), or 3) Using table salt without reducing quantity. Fix this by measuring precisely, following timing guidelines, and using coarse salt. Remember that salt continues working during cooking, so err on the side of slightly under-seasoning.
Conclusion
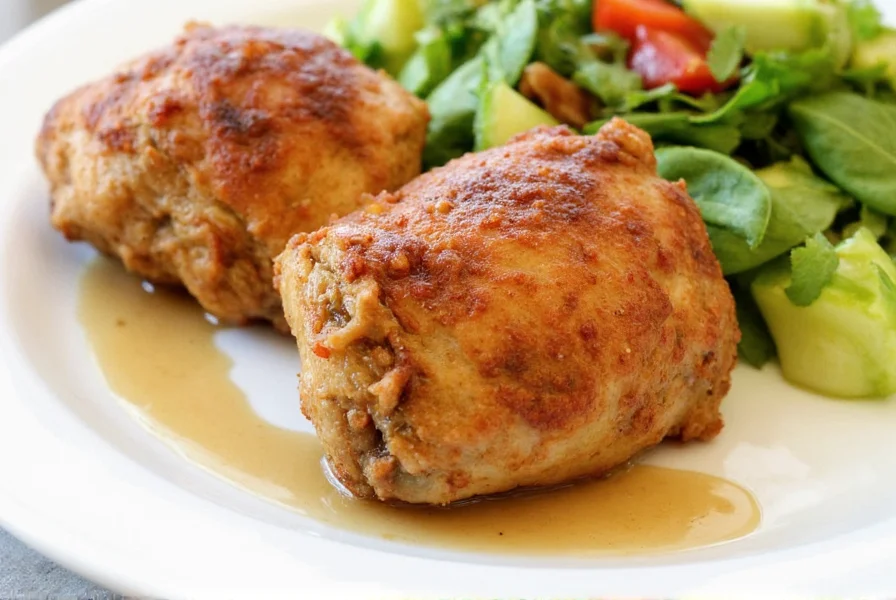
Dry brining transforms ordinary chicken thighs into restaurant-quality dishes with minimal effort. By following these precise timing guidelines, salt ratios, and cooking techniques, you'll consistently achieve perfectly juicy meat and crackling-crisp skin that impresses even discerning eaters. The key is understanding that dry brining isn't just seasoning—it's a scientific process that changes the meat's protein structure for superior moisture retention.
Start with the basic salt ratio (1 tsp kosher salt per pound), allow proper time for the chemistry to work (12-18 hours for bone-in thighs), and master the pre-cooking drying step for maximum crispiness. As you gain confidence, experiment with the spice mixes and timing adjustments to create your signature dish. Once you experience the difference dry brining makes, you'll never go back to unseasoned, dry chicken again.


 浙公网安备
33010002000092号
浙公网安备
33010002000092号 浙B2-20120091-4