
The Art of Authentic Homemade Chili
Creating exceptional chili from scratch separates casual cooks from true kitchen artisans. Unlike store-bought mixes that often contain fillers and excessive sodium, a from-scratch approach lets you control every element of flavor development. This method connects you with chili's rich culinary heritage while producing a deeply satisfying meal that store versions simply cannot match.
Essential Ingredients for Homemade Chili
The foundation of any great homemade chili recipe from scratch begins with quality ingredients. Don't compromise here—your chili will only be as good as what you put into it.
Meat Selection
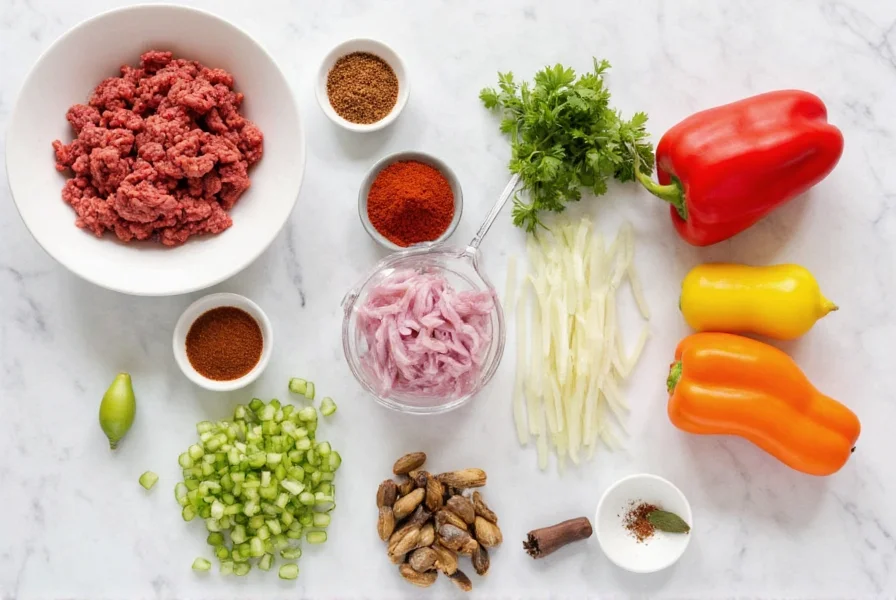
For authentic chili con carne, use 2 pounds of:
- 80/20 ground beef (the fat content is crucial for flavor)
- Alternatively, cubed chuck roast for Texas-style chili
- For a leaner option, ground turkey with added bacon fat
Fresh Vegetable Base
The "holy trinity" of chili vegetables provides essential flavor complexity:
- 1 large yellow onion, finely diced
- 1 bell pepper (red or green), finely diced
- 4 cloves garlic, minced
Spice Blend Components
The secret to authentic chili preparation method lies in your spice mix. Combine:
- 3 tablespoons chili powder (use ancho for depth)
- 1.5 tablespoons ground cumin
- 1 tablespoon smoked paprika
- 1 teaspoon dried oregano
- 1/2 teaspoon cayenne pepper (adjust to heat preference)
- 1 teaspoon cocoa powder (secret ingredient for richness)
Liquid Ingredients
For proper texture and flavor development:
- 28-ounce can fire-roasted diced tomatoes
- 15-ounce can tomato sauce
- 1 cup beef or vegetable broth
- 1 tablespoon apple cider vinegar (added at the end)
Equipment You'll Need
While you can make chili in any heavy pot, these tools elevate your chili from scratch experience:
- 6-8 quart Dutch oven (cast iron preferred)
- Wooden spoon for stirring
- Sharp chef's knife and cutting board
- Measuring spoons and cups
- Ladle for serving
Step-by-Step Preparation Guide
Follow this detailed process for the best chili recipe without mix that develops maximum flavor.
Browning the Meat
Heat 1 tablespoon of oil in your Dutch oven over medium-high heat. Add the meat in batches, breaking it into small pieces. Resist the urge to stir too soon—let it develop a proper sear (about 5 minutes). This Maillard reaction creates complex flavors that define exceptional chili. Drain excess fat, leaving about 2 tablespoons for cooking vegetables.
Sautéing the Aromatics
Add onions and bell peppers to the pot with the meat drippings. Cook until softened (about 8 minutes). Add garlic during the last 2 minutes to prevent burning. This builds the flavor foundation for your traditional chili ingredients.
Building Flavor Layers
Stir in your spice blend and cook for 1-2 minutes until fragrant. This "blooms" the spices, releasing their essential oils and creating deeper flavor. Add tomato products and broth, scraping the bottom of the pot to incorporate all the flavorful browned bits.
| Chili Component | Preparation Time | Cooking Time | Key Purpose |
|---|---|---|---|
| Meat Browning | 15 minutes | 5-7 minutes | Creates complex flavor through Maillard reaction |
| Vegetable Sauté | 10 minutes | 8-10 minutes | Builds aromatic foundation |
| Simmering Phase | - | 90-120 minutes | Develops depth and melds flavors |
| Resting Period | - | 30+ minutes | Allows flavors to fully integrate |
The Critical Simmering Phase
Reduce heat to low and maintain a gentle simmer—never a rolling boil. Skim off any foam that rises to the surface during the first 30 minutes. For the slow cooked chili recipe approach, cover partially and cook for 1.5-2 hours, stirring occasionally. The longer it simmers (up to 3 hours), the more the flavors will meld. Add beans during the last 30 minutes if using.
Final Flavor Adjustments
Before serving, taste and adjust:
- Add 1 tablespoon apple cider vinegar to brighten flavors
- Stir in 1-2 teaspoons of masa harina for thickening and authentic corn flavor
- Adjust salt and heat level as needed
Common Mistakes to Avoid
Even experienced cooks make these errors when attempting chili con carne from scratch:
Overlooking the Searing Process
Rushing the meat browning step results in boiled, gray meat rather than properly seared chunks with complex flavor. Take time to develop that crucial crust.
Using Pre-Mixed Chili Seasoning
While convenient, these blends often contain excessive salt, fillers, and inconsistent spice ratios. Creating your spice blend for homemade chili ensures balanced, authentic flavor.
Simmering at Too High Temperature
A vigorous boil breaks down the tomatoes too much and can make meat tough. Maintain that gentle simmer for optimal texture development.
Serving Immediately
Chili always tastes better the next day as flavors continue to meld. If possible, make it a day ahead. At minimum, let it rest for 30 minutes before serving for the perfect chili texture.
Regional Variations Worth Trying
Once you've mastered the basic how to make chili from beginning technique, explore these authentic regional styles:
Texas Red (No-Bean Chili)
The Lone Star State's official dish features only meat, spices, and liquid. Use cubed chuck roast instead of ground beef and simmer for 3+ hours until the meat shreds easily.
Cincinnati-Style Chili
Served over spaghetti with oyster crackers, this unique version includes chocolate, cinnamon, and allspice for a distinctive sweet-spicy profile.
Vegetarian Adaptation
Replace meat with 2 cups each of black beans and kidney beans plus 1 cup of textured vegetable protein. Use vegetable broth and add 1 cup of chopped mushrooms for umami depth.
Serving and Storage Recommendations
Proper presentation and storage maximize your homemade chili recipe from scratch investment:
Serving Suggestions
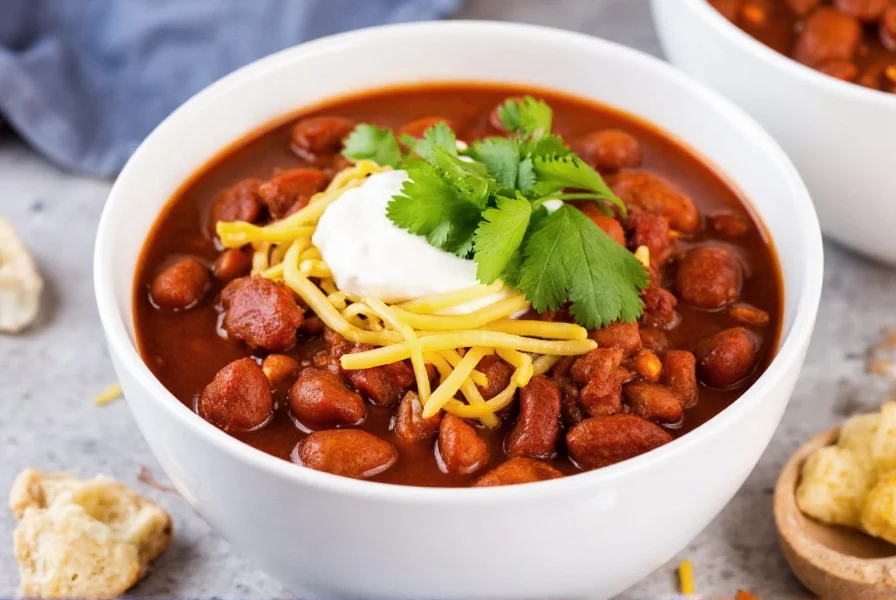
Offer these traditional toppings:
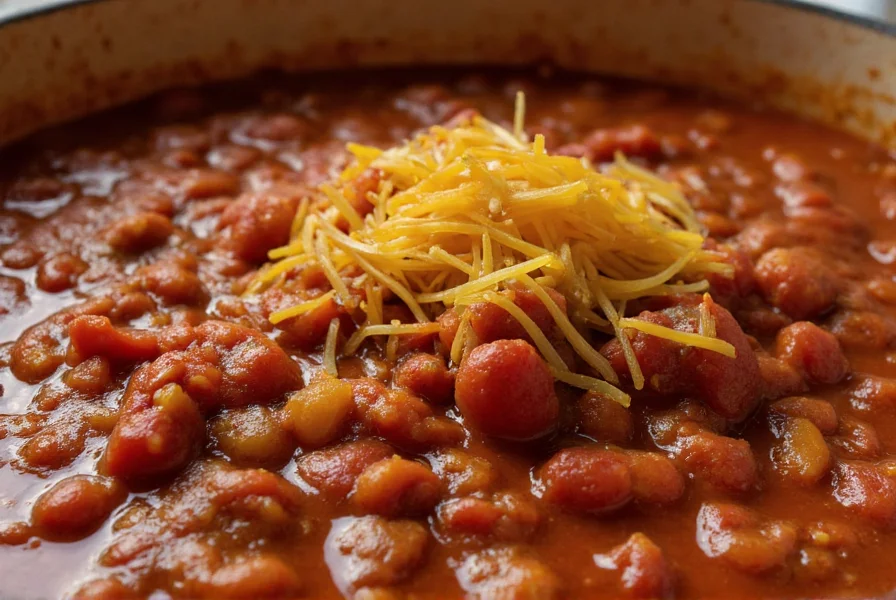
- Shredded cheddar or Monterey Jack cheese
- Sour cream or Greek yogurt
- Freshly chopped cilantro
- Lime wedges for brightness
- Sliced jalapeños for extra heat
- Oyster crackers or cornbread on the side
Storage Guidelines
Chili freezes exceptionally well. Store in airtight containers:
- Refrigerator: Up to 5 days
- Freezer: Up to 6 months (portion into meal-sized containers)
- Reheating: Thaw overnight in refrigerator, then reheat gently on stove with a splash of broth
Frequently Asked Questions
How can I thicken my chili without using flour or cornstarch?
The best method for thickening chili naturally is to remove about 1 cup of the chili, blend it until smooth, then return it to the pot. Alternatively, stir in 1-2 tablespoons of masa harina (corn dough) which adds authentic flavor while thickening. Simmer uncovered for 15-20 minutes to reduce excess liquid.
What's the difference between chili powder and chili seasoning?
Chili powder is a single spice made from ground dried chilies, while chili seasoning is a pre-mixed blend containing chili powder plus other spices like cumin, garlic powder, and oregano, often with added salt and fillers. For authentic from-scratch chili, use pure chili powder and create your own custom spice blend.
Can I make authentic chili from scratch in an Instant Pot?
Yes, you can make excellent chili from scratch in an Instant Pot. Use the sauté function to brown meat and vegetables, then pressure cook on high for 25 minutes followed by a natural 15-minute release. However, the slow development of flavors in traditional simmering creates a more complex taste profile that pressure cooking cannot fully replicate.
Why does my homemade chili taste bitter?
Bitterness in chili usually comes from overcooked tomatoes or too much cumin. To fix it, add 1 tablespoon of sugar or honey to balance acidity, or stir in 1 tablespoon of apple cider vinegar to brighten flavors. Adding a small amount of unsweetened chocolate (1-2 squares) can also counteract bitterness while adding depth.
How do I achieve the perfect chili texture?
For ideal chili texture, brown meat properly without over-stirring, maintain a gentle simmer rather than a boil, and allow adequate resting time before serving. If too thin, simmer uncovered to reduce; if too thick, add small amounts of broth. The meat should be tender but still have texture, not completely dissolved into the sauce.


 浙公网安备
33010002000092号
浙公网安备
33010002000092号 浙B2-20120091-4