

Here's a straightforward homemade chili crunch recipe: Combine 1 cup dried chilies, 1 cup neutral oil, 1/2 cup garlic, 1/4 cup ginger, 2 tbsp sesame seeds, and 1 tbsp sugar. Toast chilies until fragrant, then blend into flakes. Heat oil, fry garlic and ginger until golden, add chili flakes, and simmer 15 minutes. Cool, then stir in sesame seeds and sugar. Store in airtight jars for up to 3 months. This authentic chili crunch recipe yields a versatile condiment perfect for noodles, rice, eggs, and more.
The Art of Crafting Perfect Homemade Chili Crunch
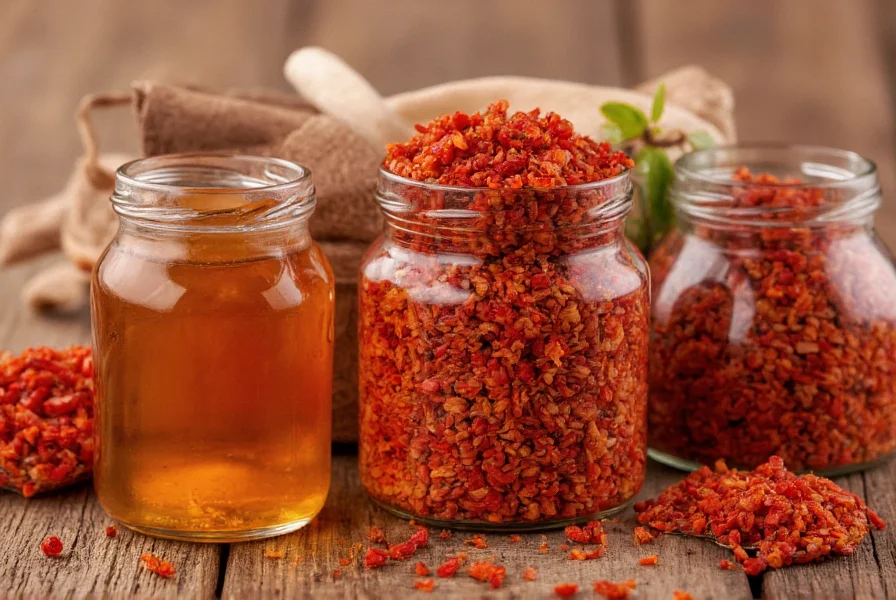
Chili crunch has exploded from regional Chinese condiment to global pantry staple, but nothing compares to the vibrant flavor of homemade versions. Commercial options often contain preservatives and lack the nuanced heat profile achievable through careful preparation. Creating your own chili crunch allows complete control over ingredients, spice level, and texture—resulting in a fresher, more complex condiment that elevates everything from simple rice bowls to gourmet dishes.
Why Homemade Chili Crunch Outshines Store-Bought Versions
While convenient, most store-bought chili crunch products compromise on quality with additives like MSG, artificial colors, and excessive preservatives. The authentic chili crunch ingredients in homemade versions deliver superior freshness and customizable heat levels. You'll notice immediate differences in aroma and complexity—freshly toasted chilies release volatile compounds that degrade during commercial processing. Plus, making your own supports dietary preferences; this vegan chili crunch recipe requires no animal products while remaining deeply umami-rich.
Essential Ingredients for Authentic Flavor
The magic of exceptional chili crunch lies in ingredient quality and proper preparation. Don't settle for generic "red pepper flakes"—seek out specific varieties:
| Ingredient | Recommended Type | Substitution Options |
|---|---|---|
| Dried Chilies | Guajillo + Arbol blend | Chiles de árbol or Korean gochugaru |
| Cooking Oil | Grapeseed or avocado oil | Vegetable or canola oil |
| Aromatics | Fresh garlic and ginger | Shallots for milder flavor |
| Texture Elements | Toasted sesame seeds | Crushed peanuts or fried onions |
Professional chefs emphasize toasting dried chilies before processing—this crucial step develops deeper flavors through the Maillard reaction. Avoid pre-ground chili powders which often contain fillers and lose volatile oils during extended storage.
Equipment Checklist for Success
While basic kitchen tools suffice, these specialized items ensure optimal results:
- Cast iron or carbon steel wok (superior heat retention)
- Mesh strainer (2mm gauge for optimal particle separation)
- Thermometer (maintain oil between 275-300°F/135-150°C)
- Wide-mouth glass jars with airtight seals
Step-by-Step Preparation Guide
Follow this easy chili crunch from scratch method for restaurant-quality results:
- Toasting chilies: Heat dry skillet over medium-low. Add 1 cup mixed dried chilies (stemmed, seeds retained for heat) and toast 3-4 minutes until fragrant but not smoking. Cool completely.
- Processing: Pulse toasted chilies in food processor to coarse flakes (not powder). Proper texture ensures balanced heat distribution.
- Oil preparation: Heat 1 cup neutral oil in wok to 275°F. Add 1/2 cup thinly sliced garlic and 1/4 cup minced ginger.
- Frying aromatics: Cook 5-7 minutes until golden brown, stirring constantly. Remove 1/3 of solids for topping.
- Infusing heat: Reduce heat to medium-low. Add chili flakes gradually while stirring. Simmer 15 minutes—do not boil.
- Finishing: Remove from heat. Stir in 2 tbsp toasted sesame seeds and 1 tbsp sugar. Cool 10 minutes before transferring to jars.
Troubleshooting Common Issues
Even experienced cooks encounter challenges with how to make chili crunch sauce. Here's how to fix frequent problems:
- Bitter flavor: Caused by overheating oil or burning aromatics. Solution: Maintain oil below 300°F and remove garlic/ginger when light golden.
- Separation issues: Oil and solids separating indicates improper emulsification. Fix: Add 1 tsp rice vinegar during cooling phase.
- Insufficient heat: Mild chili crunch often results from old chilies. Remedy: Use chilies toasted within past month or add 1/4 tsp cayenne pepper.
- Mold development: Caused by moisture contamination. Prevention: Sterilize jars and ensure all ingredients are completely dry.
Optimal Storage Techniques
Proper chili crunch storage tips extend freshness and safety:
- Store in refrigerator for up to 3 months (room temperature storage risks botulism)
- Always use clean, dry utensils when scooping
- Ensure oil completely covers solids in jar
- Freeze in ice cube trays for 6-month storage
Discard if you notice mold, off odors, or bubbling—these indicate bacterial growth. Properly stored chili crunch recipe without preservatives develops more complex flavors over 2-3 weeks as flavors meld.
Creative Culinary Applications
Move beyond basic condiment use with these innovative applications for your best chili crunch recipe:
- Marinade base: Mix with soy sauce and honey for meats
- Soup enhancer: Stir into ramen or pho during final minute of cooking
- Baking ingredient: Add to cornbread or biscuit dough
- Cocktail mixer: Blend with simple syrup for spicy margaritas
- Dessert accent: Pair with chocolate for mole-inspired treats
Customizable Variations for Every Palate
Personalize your chili crunch recipe with these professional variations:
- Smoky version: Add 1 tsp chipotle powder and use smoked sea salt
- Sweet & spicy: Incorporate 2 tbsp palm sugar and star anise
- Seafood-forward: Include 1 tbsp dried shrimp powder for umami boost
- Herb-infused: Steep with fresh cilantro stems during oil heating
Frequently Asked Questions
How long does homemade chili crunch last?
Properly stored in sterilized jars with oil completely covering solids, homemade chili crunch lasts 3 months refrigerated. For extended storage, freeze in ice cube trays (6 months). Discard immediately if mold appears, bubbling occurs, or off odors develop.
Can I make chili crunch without sesame seeds?
Yes, sesame seeds can be substituted with crushed peanuts, fried onions, or omit entirely. For nut-free versions, try toasted sunflower seeds. The sesame primarily adds texture—flavor remains excellent without it, though traditional recipes include this element for authentic mouthfeel.
Why did my chili crunch turn out bitter?
Bitterness typically results from overheating oil (above 300°F/150°C) or burning garlic/ginger. To prevent this, maintain oil temperature between 275-300°F using a thermometer, and remove aromatics when they turn light golden—not dark brown. If already bitter, adding 1 tsp rice vinegar and 1 tbsp sugar during cooling can help balance flavors.
Is homemade chili crunch vegan?
Yes, this basic chili crunch recipe is naturally vegan when using plant-based oil and omitting any animal-derived additives. Traditional versions contain only chilies, oil, aromatics, and seasonings. Always verify ingredient labels if using pre-made components, as some commercial chili oils contain shrimp or fish derivatives.
How can I adjust the heat level in chili crunch?
Control heat by adjusting chili varieties and seed content. For milder versions, remove seeds from dried chilies or use more guajillo (mild) than arbol (hot) peppers. For extra heat, add cayenne pepper or include some ghost pepper flakes. Remember that heat intensifies slightly during storage as flavors meld—adjust accordingly when first making your batch.


 浙公网安备
33010002000092号
浙公网安备
33010002000092号 浙B2-20120091-4