
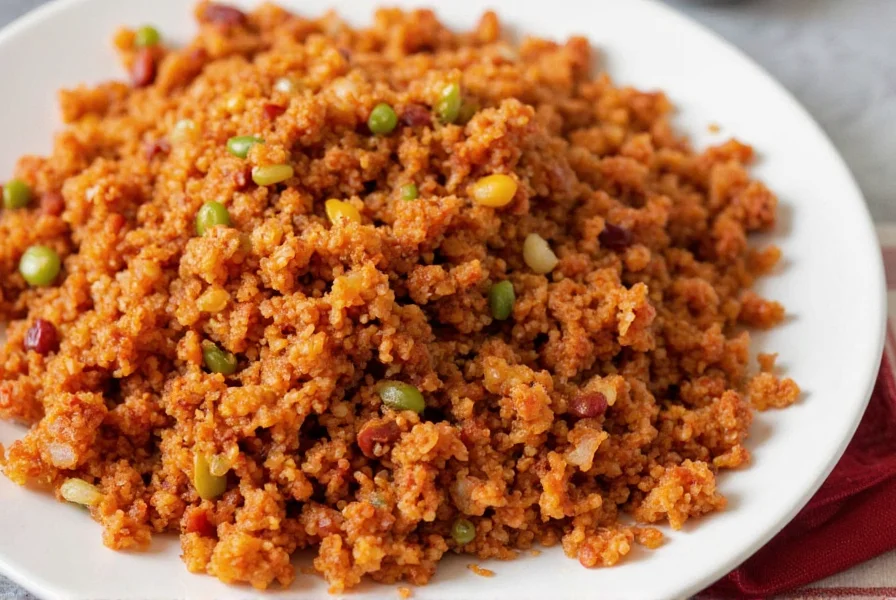
Chili crisp has evolved from regional Chinese condiment to global pantry staple, prized for its complex layers of heat, fragrance, and umami. Unlike store-bought versions that often contain preservatives and artificial flavors, crafting your own homemade chili crisp recipe allows complete control over ingredients and heat levels while capturing the authentic texture and depth that defines this beloved sauce.
Originating in Sichuan province, traditional chili crisp (lazi you) features a careful balance of toasted dried chilies, Sichuan peppercorns, and aromatics suspended in flavorful oil. The magic happens through precise oil temperature control—hot enough to extract flavors without burning ingredients. Our tested method ensures perfect crispiness while developing rich, rounded flavors without bitterness.
Essential Ingredients for Authentic Chili Crisp
Quality ingredients make the difference between ordinary and exceptional chili crisp. Focus on these key components:
| Ingredient | Recommended Type | Critical Function |
|---|---|---|
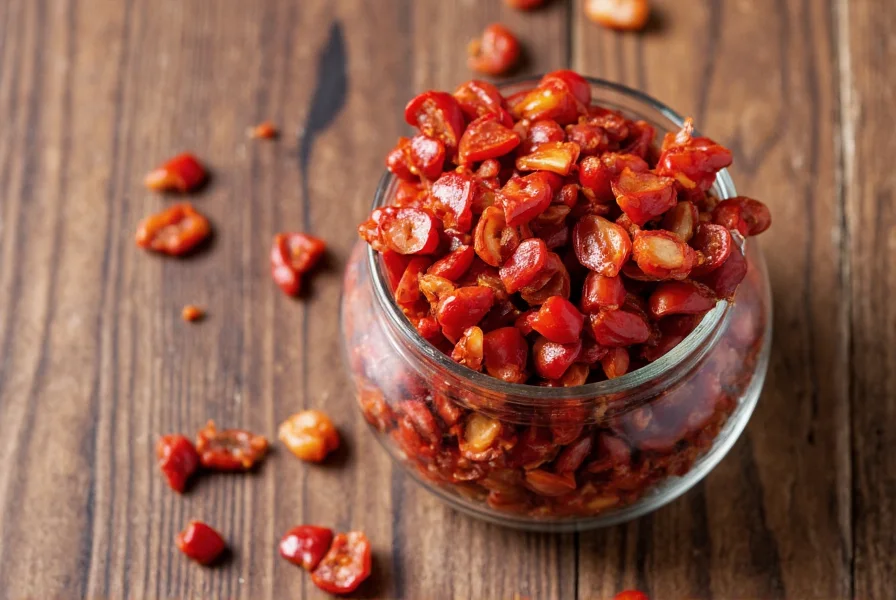
| Dried chilies | Guajillo + Arbol blend | Provides layered heat and rich red color |
| Sichuan peppercorns | Red variety, freshly toasted | Creates signature mouth-numbing sensation |
| Neutral oil | Peanut or avocado oil | High smoke point carrier for flavors |
| Aromatics | Fresh garlic, ginger, shallot | Builds foundational fragrance profile |
For the most authentic Sichuan chili crisp, source whole dried chilies rather than pre-ground versions. The Guajillo-Arbol blend delivers moderate heat with complex fruitiness, while single-origin chilies often lack dimension. Toast Sichuan peppercorns in a dry pan until fragrant but not burnt—this activates hydroxy-alpha-sanshool compounds responsible for the characteristic tingling sensation.
Step-by-Step Preparation Guide
Follow these precise steps for foolproof chili crisp every time. Temperature control is the most critical factor in this easy chili crisp recipe.
- Prepare ingredients: Stem and roughly chop 30g dried chilies. Slice 4 garlic cloves, 1-inch ginger, and 1 small shallot. Measure 15g Sichuan peppercorns.
- Toast aromatics: Heat 2 cups oil to 250°F (121°C). Fry garlic until golden (1-2 minutes), then remove. Repeat with ginger and shallot.
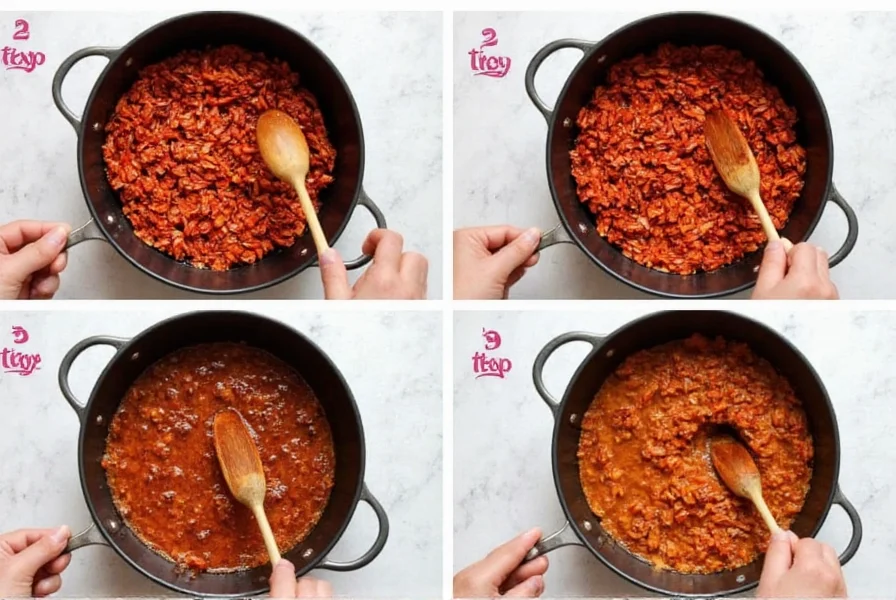
- Infuse oil: Reduce heat to 200°F (93°C). Add chilies and peppercorns, stirring constantly for 8-10 minutes until chilies darken slightly.
- Combine elements: Return all fried aromatics to oil. Add 1 tsp sugar and 2 tbsp soy sauce. Simmer 5 minutes.
- Cool and store: Remove from heat. Cool completely before transferring to sterilized jars.
Never exceed 275°F (135°C) during infusion—this prevents bitter, burnt flavors. The gradual temperature approach extracts maximum flavor while preserving delicate compounds. For chili crisp storage tips, ensure all equipment is completely dry to prevent bacterial growth in the oil-based condiment.
Pro Techniques for Perfect Texture and Flavor
Master these professional techniques to elevate your best chili crisp recipe:
- Double-infusion method: Strain oil after initial infusion, reheat to 300°F (149°C), then pour over reserved chilies for intensified flavor extraction
- Acid balance: Add 1 tsp black vinegar during final simmer to brighten rich flavors without making it taste vinegary
- Texture control: Pulse half the chilies in food processor for chunkier texture while leaving others whole for visual appeal
- Umami boost: Include 1 tsp fermented black beans (douchi) during final simmer for deeper savory notes
Safety note: Always cool chili crisp completely before sealing containers. The residual heat continues cooking ingredients, and trapping steam creates condensation that could promote spoilage. Properly made homemade chili crisp maintains quality for 3 months at room temperature when stored in airtight containers away from light.
Creative Variations to Explore
Once you've mastered the authentic Sichuan chili crisp, experiment with these regional adaptations:
- Yunnan mushroom version: Add dried morels or porcini during oil infusion for earthy complexity
- Sweet chili adaptation: Incorporate 2 tbsp rock sugar during final simmer for balanced sweet-heat profile
- Seafood chili oil: Include dried shrimp or scallops for umami-rich coastal variation
- Vegan fish sauce alternative: Substitute mushroom-soy blend for traditional fish sauce in final seasoning
Dietary modifications work well with this versatile chili crisp recipe. For gluten-free versions, verify soy sauce is GF-certified. To reduce sodium, use reduced-sodium soy sauce and compensate with additional umami elements like dried shiitake mushrooms.
How to Use Your Homemade Chili Crisp
Move beyond basic applications with these creative serving suggestions for your homemade chili crisp:
- Stir 1-2 tablespoons into ramen broth during final minute of cooking
- Marinate tofu or tempeh by mixing equal parts chili crisp and soy sauce
- Create instant dipping sauce by combining with equal parts honey and rice vinegar
- Top avocado toast with fried egg and generous chili crisp drizzle
- Infuse mayonnaise with 1 tablespoon chili crisp for spicy sandwich spread
The beauty of authentic chili crisp recipe preparation lies in its adaptability. Unlike commercial versions with fixed heat levels, homemade batches allow precise customization to match your palate. Start with moderate chili quantities, then adjust in subsequent batches based on your preference.
Troubleshooting Common Issues
Resolve these frequent chili crisp recipe challenges with professional solutions:
- Oil separation: Normal occurrence—simply stir before use. If excessive, reduce oil quantity by 10% in next batch
- Bitter flavor: Indicates overheating. Discard batch and strictly monitor temperatures below 275°F (135°C) next time
- Mold development: Caused by moisture contamination. Always use completely dry utensils and containers
- Weak heat level: Increase chili quantity by 25% or include hotter varieties like Bird's Eye chilies
For optimal results in your how to make chili crisp at home attempts, maintain meticulous temperature control throughout the process. Invest in a reliable candy thermometer for precise monitoring—this small tool makes the difference between exceptional and mediocre results.
Perfecting Your Chili Crisp Craft
Mastering this authentic Sichuan chili crisp requires attention to detail but rewards with a condiment that elevates countless dishes. The key differentiators between adequate and exceptional chili crisp lie in ingredient quality, temperature precision, and patience during the infusion process.
Document your batches with notes on chili varieties, oil temperatures, and infusion times. This practice helps refine your personal best chili crisp recipe over time. Remember that authentic chili crisp develops deeper flavors after 3-5 days of resting as flavors fully meld—a patience worth practicing for superior results.
Frequently Asked Questions
Can I make chili crisp without Sichuan peppercorns?
Yes, though you'll miss the signature numbing sensation. Substitute with 1 tsp black pepper plus 1/4 tsp allspice for partial approximation of the complex flavor profile. For authentic experience, seek out Sichuan peppercorns at Asian markets or reputable online spice retailers.
Why did my chili crisp turn out bitter?
Bitterness typically indicates oil temperature exceeded 275°F (135°C) during infusion. Chilies and aromatics burn easily at higher temperatures. Always use a thermometer and maintain oil between 200-250°F (93-121°C) throughout the process for optimal flavor extraction without burning.
How long does homemade chili crisp last?
Properly prepared and stored in airtight containers away from light, homemade chili crisp maintains quality for 3 months at room temperature. Refrigeration extends shelf life to 6 months. Always use clean, dry utensils to prevent moisture contamination that could cause spoilage.
Can I adjust the heat level in chili crisp?
Absolutely—this is the advantage of homemade versions. Control heat by varying chili types and quantities. For milder version, use more Guajillo and fewer Arbol chilies. For extra heat, add Bird's Eye chilies. Always toast chilies first to mellow raw heat while developing complex flavors.


 浙公网安备
33010002000092号
浙公网安备
33010002000092号 浙B2-20120091-4