

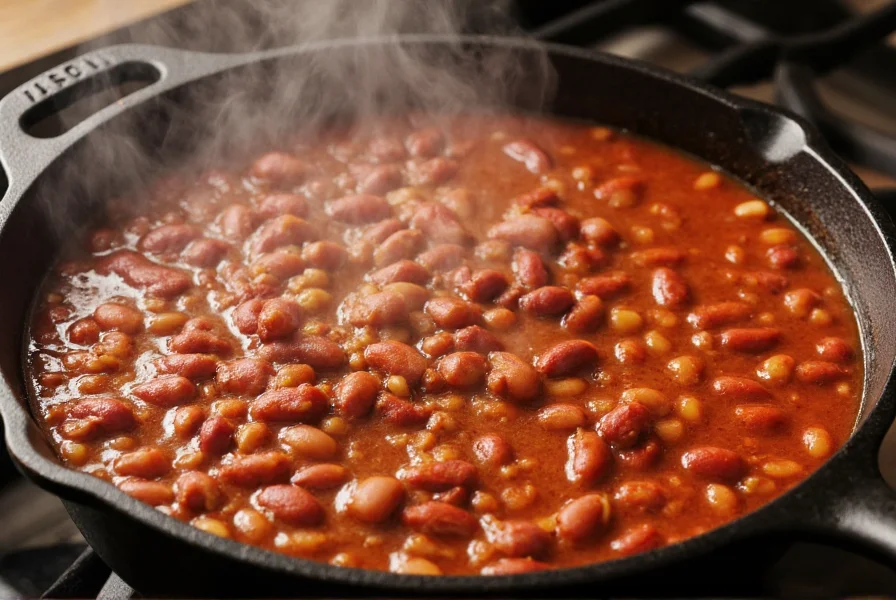
This classic chili and beans recipe combines hearty kidney beans, ground beef, and a rich tomato base with the perfect blend of spices for a satisfying meal ready in under 90 minutes. With simple ingredients like onions, garlic, chili powder, and cumin, this authentic chili recipe serves 6-8 people and can be customized for mild or spicy preferences. The secret to the best chili and beans lies in the slow simmering process that allows flavors to fully develop.
The Ultimate Guide to Perfect Chili and Beans
Chili with beans has been a beloved American comfort food since the late 19th century, evolving from Texas-style meat stews to the bean-inclusive versions popular nationwide. While purists may debate the inclusion of beans, most home cooks appreciate how kidney beans add heartiness, fiber, and texture to this classic dish. This comprehensive guide provides everything you need to create restaurant-quality chili at home, whether you're using a stovetop, slow cooker, or Instant Pot.
Essential Ingredients for Authentic Chili
The foundation of any successful chili and beans recipe lies in quality ingredients. Here's what you'll need for the perfect balance of flavor and texture:
| Ingredient | Quantity | Why It Matters |
|---|---|---|
| Ground beef (80/20) | 2 lbs | Provides rich meaty base; higher fat content enhances flavor |
| Kidney beans (canned) | 3 cans (15 oz each) | Classic bean choice that holds shape during cooking |
| Fire-roasted tomatoes | 2 cans (28 oz each) | Adds depth and subtle smokiness |
| Yellow onion | 1 large, diced | Sweetness that balances acidity |
| Chili powder | 3 tbsp | Essential spice blend for authentic flavor |
Step-by-Step Cooking Instructions
Follow these detailed steps for foolproof chili every time:
- Brown the meat: In a large pot or Dutch oven over medium-high heat, cook ground beef with diced onions until no pink remains (about 8 minutes). Drain excess fat but retain some for flavor.
- Add aromatics: Stir in minced garlic, bell peppers, and chili powder. Cook for 2 minutes until fragrant.
- Build the base: Add fire-roasted tomatoes, tomato paste, beef broth, and Worcestershire sauce. Stir well to combine.
- Incorporate beans: Drain and rinse kidney beans, then add to the pot along with black beans if desired.
- Simmer to perfection: Reduce heat to low, cover partially, and simmer for 60-90 minutes, stirring occasionally. The longer it simmers, the better the flavor.
- Final seasoning: Taste and adjust salt, pepper, and spices. For deeper flavor, add a teaspoon of cocoa powder or coffee.
Pro Tips for the Best Chili and Beans Recipe
Professional chefs and experienced home cooks agree these techniques elevate basic chili to exceptional:
- Layer your spices: Add some chili powder when browning meat and the rest during simmering for complex flavor development
- Acidity balance: A splash of apple cider vinegar or lime juice at the end brightens flavors
- Texture control: Mash some beans against the pot side to naturally thicken the chili
- Resting time: Let chili sit for 15-20 minutes before serving to allow flavors to meld
Customizing Your Chili and Beans
This versatile recipe adapts beautifully to different preferences and dietary needs:
Variations for Different Diets
- Vegetarian chili and beans: Substitute beef with textured vegetable protein or extra beans, and use vegetable broth
- Slow cooker chili and beans: After browning meat and sautéing vegetables, transfer everything to slow cooker and cook on low for 6-8 hours
- White bean chili recipe: Use cannellini beans, chicken breast, and green chilies for a lighter alternative
Adjusting Heat Levels
Control spice intensity by:
- Mild: Omit cayenne and use only 2 tbsp chili powder
- Medium: Include 1 diced jalapeño with seeds removed
- Hot: Add 1-2 chipotle peppers in adobo sauce and extra cayenne
Serving and Storage Recommendations
Chili and beans tastes even better the next day as flavors continue to develop. For best results:
- Serving suggestions: Top with shredded cheddar, sour cream, diced onions, and fresh cilantro. Serve with cornbread or saltine crackers.
- Refrigeration: Store in airtight container for up to 5 days
- Freezing: Portion into freezer bags (lay flat for space efficiency) for up to 6 months. Thaw overnight in refrigerator before reheating.
- Reheating: Warm gently on stove over medium-low heat, adding a splash of broth if needed to restore consistency.
Frequently Asked Questions
What are the best beans for chili recipe?
Kidney beans are the traditional choice for chili due to their hearty texture and ability to hold shape during long cooking. Pinto beans also work well, adding creaminess. For variety, many cooks combine kidney beans with black beans or cannellini beans. Always drain and rinse canned beans before adding to remove excess sodium and the starchy liquid that can make chili too thick.
How can I thicken chili and beans without altering flavor?
The best way to thicken chili without changing flavor is to remove about 1 cup of beans and liquid, mash them thoroughly, then return to the pot. Alternatively, simmer uncovered for an additional 15-20 minutes to reduce liquid naturally. Avoid flour or cornstarch as they can create an artificial texture and mute flavors.
Can I make this chili and beans recipe in an Instant Pot?
Yes! For Instant Pot chili and beans, use the sauté function to brown meat and vegetables first. Add remaining ingredients except beans, seal, and cook on manual high pressure for 15 minutes. Quick release, then add drained beans and cook on sauté mode for 5-7 minutes to heat through. The pressure cooking method develops deep flavors in less time while keeping beans intact.
Why does my chili and beans taste bland?
Bland chili usually needs proper layering of flavors. Make sure to: 1) Brown meat well for fond development 2) Bloom spices in fat before adding liquids 3) Balance acidity with tomatoes or a splash of vinegar 4) Add salt in stages throughout cooking 5) Finish with fresh garnishes. Taste and adjust seasoning at the end - chili often needs more salt and spices than expected.


 浙公网安备
33010002000092号
浙公网安备
33010002000092号 浙B2-20120091-4