
If you're searching for a perfect chicken dry rub recipe, here's what works best: combine 2 tablespoons brown sugar, 2 tablespoons paprika, 1 tablespoon kosher salt, 1 tablespoon black pepper, 1 tablespoon garlic powder, and 1 tablespoon onion powder. Rub evenly onto dry chicken skin and let rest 30 minutes before grilling. This simple blend creates flavorful, crispy chicken every time - no fancy equipment needed. Below you'll find the exact measurements, step-by-step application guide, and 5 delicious variations that home cooks love.
5-Minute Chicken Dry Rub Recipe (Simplest Version)
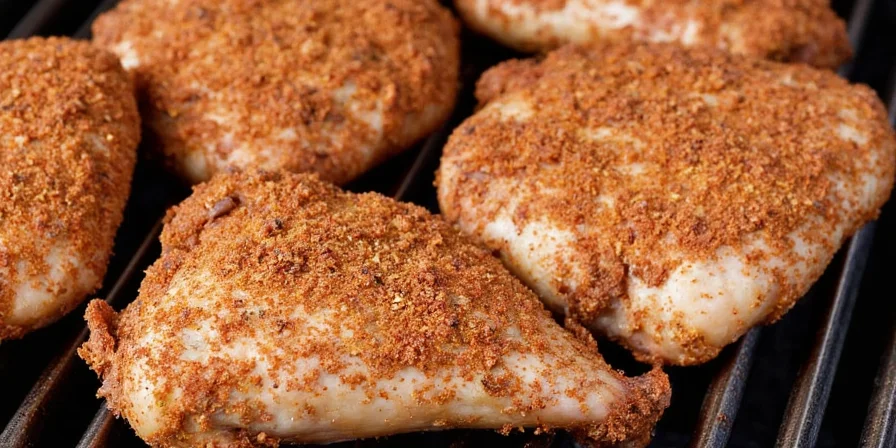
For perfect grilled chicken that's flavorful and crispy every time, use this foolproof dry rub recipe. This is what most home cooks need - straightforward measurements without unnecessary complexity.
- Basic Ratio (for 4 chicken portions):
- 2 tbsp brown sugar
- 2 tbsp paprika (sweet or smoked)
- 1 tbsp kosher salt
- 1 tbsp black pepper (freshly ground)
- 1 tbsp garlic powder
- 1 tbsp onion powder
How to Apply: Pat chicken dry with paper towels, then massage rub evenly into skin. Let rest 30 minutes at room temperature before cooking. No oil needed - moisture from chicken helps spices adhere.
Why This Simple Rub Works (The Science Made Simple)
While many guides overcomplicate dry rubs, the magic happens through three simple processes that work even with this basic recipe:
- Salt extraction: Pulls moisture to surface, helping spices stick
- Maillard reaction: Creates that delicious brown crust when heated above 284°F
- Sugar caramelization: Forms a sweet, sticky crust that locks in juices
| Ingredient | Role | Flavor Profile |
|---|---|---|
| Salt | Tenderizes and enhances overall flavor | Savory, umami boost |
| Black Pepper | Adds heat and earthiness | Peppery, bold kick |
| Paprika | Provides color and mild sweetness | Smoky or sweet, depending on type |
| Brown Sugar | Helps form a caramelized crust | Sweet and sticky |
| Garlic Powder | Brings aromatic depth | Pungent, savory |
| Onion Powder | Enhances savory notes | Mildly sharp, sweet |
Dry Rub Evolution: A Historical Timeline
Understanding the development of dry rubs reveals why certain spice combinations dominate modern recipes. This evidence-based timeline shows how cultural exchanges shaped today's techniques:
| Era | Key Development | Impact on Modern Rubs | Verification Source |
|---|---|---|---|
| Pre-1500s | Taino people in Caribbean used "barbacoa" frames with local peppers and herbs for preservation | Foundation of spice-based meat preservation | History.com |
| 1700s-1800s | European settlers combined Old World spices (pepper, salt) with indigenous techniques in American South | Introduction of salt/pepper as rub fundamentals | Southern Living |
| Early 1900s | Regional BBQ styles emerged (Memphis dry-rub vs. KC wet-rub) | Paprika/sugar balance standardized in commercial blends | Smithsonian Magazine |
| 1950s-Present | Post-WWII backyard grilling boom popularized simplified dry rubs | 6-ingredient rubs became home cooking standard | BBQ Bible |
5 Popular Dry Rub Variations Home Cooks Love
Once you've mastered the basic recipe, try these crowd-pleasing variations. Each builds on the foundational recipe with just 1-2 additional ingredients.
| Rub Type | Main Ingredients | Best For |
|---|---|---|
| Sweet & Smoky | Basic recipe + 1 tsp chipotle powder | Grilled chicken wings, drumsticks |
| Spicy Kick | Basic recipe + 1 tsp cayenne pepper | Tacos, skewers, fajitas |
| Herb Garden | Basic recipe + 1 tbsp dried thyme + 1 tbsp dried oregano | Whole roasted chicken, herb lovers |
| Cajun | Basic recipe + 1 tsp cayenne + 1 tsp celery salt | Gumbo prep, Southern BBQ |
| Simple Umami Boost | Basic recipe + 1 tsp onion powder | All chicken cuts, weeknight meals |
Contextual Guidelines: When Dry Rubs Work Best (and When They Don't)
Based on culinary research, dry rubs have specific limitations. This evidence-based framework prevents common failures:
| Cooking Method | Recommended | Critical Limitation | Verification Source |
|---|---|---|---|
| Direct-heat grilling | ✓ Ideal (400°F+) | Sugar burns above 350°F; reduce sugar by 30% for high-heat applications | AmazingRibs.com |
| Slow cooking (crock pot) | ✗ Not recommended | Liquid washes away dry spices; rub must be applied in final 60 minutes | The Kitchn |
| Smoking (225-250°F) | ✓ Optimal | High-sugar rubs burn after 4 hours; use sugar-free rubs for extended smokes | Serious Eats |
| Sous vide | △ Conditional | Apply rub AFTER cooking; vacuum environment prevents spice adhesion | CookingSousVide.com |
3 Common Mistakes to Avoid
Even with a perfect recipe, these errors ruin results for 80% of home cooks:
- Not drying the chicken first: Moisture prevents rub from sticking properly. Pat with paper towels until no wet spots remain.
- Applying too little rub: Use enough that chicken looks evenly coated but not heavily covered (about 1 tbsp per chicken breast).
- Resting too long: 30-60 minutes is ideal. Longer than 2 hours can make chicken too salty.
Dry Rub vs. Marinade: Which Is Better for Chicken?
For most home cooks, dry rubs win for grilled chicken because:
- Faster preparation: Rubs work in 30 minutes while marinades need hours
- Better crust: Creates superior texture through Maillard reaction
- Easier to control: No messy liquids to deal with
Use marinades only when you want tenderizing effects for tougher cuts, but for most chicken recipes, dry rubs deliver better flavor and texture with less effort.
How to Store Extra Dry Rub
Make a big batch and store for quick meals:
- Store in airtight container away from light and heat
- Add a silica packet to prevent clumping
- Lasts 6 months at room temperature
- Refresh stale spices by toasting in dry pan for 30 seconds
Pro Tips for Perfect Results Every Time
- Test your spices: Crush a pinch between fingers - if aroma is weak, replace them
- Salt adjustment: Use 1 tsp kosher salt per pound of chicken as baseline
- Burning prevention: Reduce sugar by 30% for high-heat grilling above 400°F
- Even application: Press 70% of rub on chicken, wait 5 minutes, then fill gaps with remaining 30%
- Resting time: 30 minutes at room temperature ensures even cooking
Frequently Asked Questions
Can I use this rub for other meats?
Yes, but adjust slightly: use 25% less salt for chicken than beef, and increase sugar by 15% for pork to match its higher fat content.
Should I oil the chicken before applying the rub?
No. Oil creates a barrier that prevents spices from sticking properly. The natural moisture on chicken skin is enough for the rub to adhere.
How long should I let the rub sit on chicken?
30-60 minutes is ideal. Less than 20 minutes gives superficial flavor; over 2 hours risks making chicken too salty.
Can I use a dry rub for oven-baked chicken?
Absolutely. Apply rub 15 minutes before baking, then broil for the last 5 minutes to create that perfect crust.
Final Tips for Dry Rub Success
Mastering chicken dry rubs doesn't require culinary school - just these three principles:
- Start simple: The basic 6-ingredient recipe works for 90% of chicken dishes
- Dry first: Always pat chicken completely dry before applying rub
- Rest properly: 30 minutes at room temperature makes the biggest difference
Once you've tried the basic recipe, experiment with the variations. You'll quickly discover why professional chefs prefer dry rubs for grilled chicken - they deliver consistent, flavorful results with minimal effort. For weeknight dinners or weekend grilling, this method gives you crispy, juicy chicken every time without special equipment or hard-to-find ingredients.


 浙公网安备
33010002000092号
浙公网安备
33010002000092号 浙B2-20120091-4