
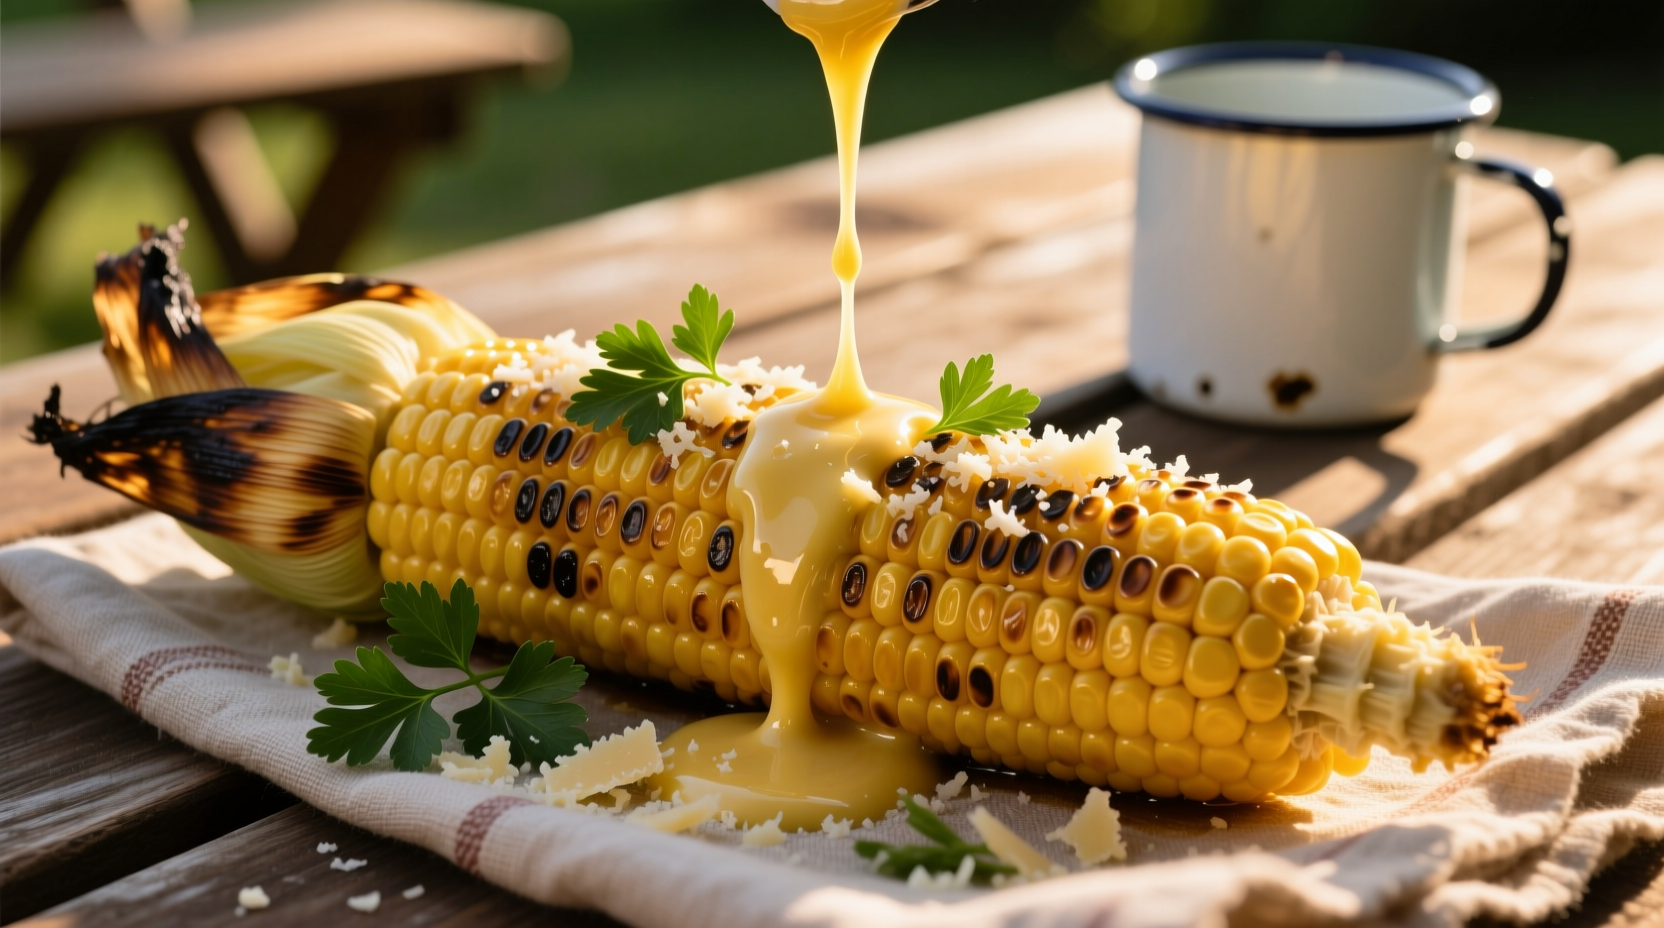
There's nothing quite like perfectly grilled corn on the cob slathered in creamy garlic butter and topped with just the right amount of cheese. This beloved summer side dish combines sweet corn kernels with savory elements that create a flavor explosion in every bite. The secret to exceptional cheesy garlic butter corn lies in three critical elements: proper corn preparation, balanced seasoning ratios, and strategic cheese application timing.
Why This Recipe Works Every Time
Unlike traditional corn recipes that simply add butter and salt, this method incorporates food science principles that maximize flavor penetration. When corn is properly prepared, its natural sugars caramelize while the husk traps steam, creating the ideal moisture level for cheese adhesion. The USDA recommends cooking fresh corn for 5-7 minutes in boiling water to preserve nutrients while achieving optimal tenderness—a sweet spot this recipe perfects.
Essential Ingredients and Why They Matter
The magic happens through carefully selected ingredients working in harmony:
- Fresh corn on the cob (6-8 ears) - Look for bright green husks and moist stems
- Unsalted butter (½ cup) - Allows precise salt control and better browning
- Fresh garlic (4 cloves, minced) - Provides aromatic complexity without harshness
- Sharp cheddar cheese (1 cup, finely grated) - Melts smoothly while maintaining flavor
- Paprika (½ tsp) - Adds subtle smokiness that complements the corn
- Fresh parsley (2 tbsp, chopped) - Brightens the rich flavors
| Cheese Type | Melting Quality | Flavor Profile | Best Application Method |
|---|---|---|---|
| Sharp Cheddar | Excellent | Tangy, robust | After cooking, while corn is hot |
| Parmesan | Good | Salty, nutty | Mixed with butter before application |
| Pepper Jack | Fair | Spicy, creamy | After cooking with additional butter |
| Cotija | Poor | Salty, crumbly | As finishing sprinkle after cheese melt |
Step-by-Step Preparation Guide
Preparation Phase (5 minutes)
Begin by removing corn husks and silk strands completely. Soak corn in cold water for 5 minutes—this prevents burning during cooking and adds moisture that steams the kernels from within. While corn soaks, prepare your garlic butter mixture by combining softened butter, minced garlic, paprika, and half the parsley in a small bowl.
Cooking Phase (7-10 minutes)
You have three excellent cooking methods to choose from:
- Grilling method: Preheat grill to medium-high. Place corn directly on grates and cook for 7-10 minutes, turning every 2 minutes until kernels show light char marks.
- Boiling method: Bring large pot of salted water to boil. Add corn and cook for exactly 5 minutes for crisp-tender texture.
- Oven method: Preheat oven to 400°F. Wrap each ear in foil with 1 tbsp butter and cook for 15 minutes.
Finishing Phase (3 minutes)
Immediately after cooking while corn is still hot, generously brush with garlic butter mixture. Sprinkle evenly with grated cheese, allowing residual heat to melt it perfectly. Finish with remaining parsley and a pinch of flaky sea salt. For best results, let rest 2 minutes before serving to allow flavors to meld.

Pro Tips for Perfect Results
Avoid these common mistakes that ruin otherwise good corn:
- Overcooking: Corn continues cooking after removal from heat—pull it 1 minute before you think it's done
- Wrong cheese application: Never apply cheese to cold corn—heat is essential for proper melting
- Garlic burning: Always mince garlic finely and mix with butter to prevent burning
- Uneven seasoning: Rotate corn while applying butter for 360-degree flavor coverage
When This Dish Shines Best
Cheesy garlic butter corn on the cob excels in specific contexts while having limitations in others. Understanding these boundaries ensures perfect results every time:
- Ideal for: Summer barbecues, family dinners, potlucks, and casual entertaining
- Best served: Immediately after preparation when cheese is perfectly melted
- Not recommended: As make-ahead dish (cheese hardens when cooled)
- Seasonal limitation: Peak flavor with fresh summer corn (June-August in most regions)
Delicious Variations to Try
Once you've mastered the classic version, experiment with these crowd-pleasing twists:
- Mexican street corn style: Add cotija cheese, chili powder, and lime juice
- Truffle garlic version: Substitute 1 tsp truffle oil for regular butter
- Herb-infused: Mix fresh thyme or basil into the butter mixture
- Spicy kick: Add ¼ tsp cayenne pepper to the garlic butter
Storage and Reheating Instructions
While best served fresh, leftovers can be stored properly for up to 2 days. Remove any remaining cheese before storing corn in an airtight container in the refrigerator. To reheat, wrap in damp paper towel and microwave for 60-90 seconds, then reapply fresh garlic butter and cheese. The National Center for Home Food Preservation confirms corn maintains quality for 3-5 days when properly refrigerated.


 浙公网安备
33010002000092号
浙公网安备
33010002000092号 浙B2-20120091-4