
Why Potato Propagation Works: The Science Simplified
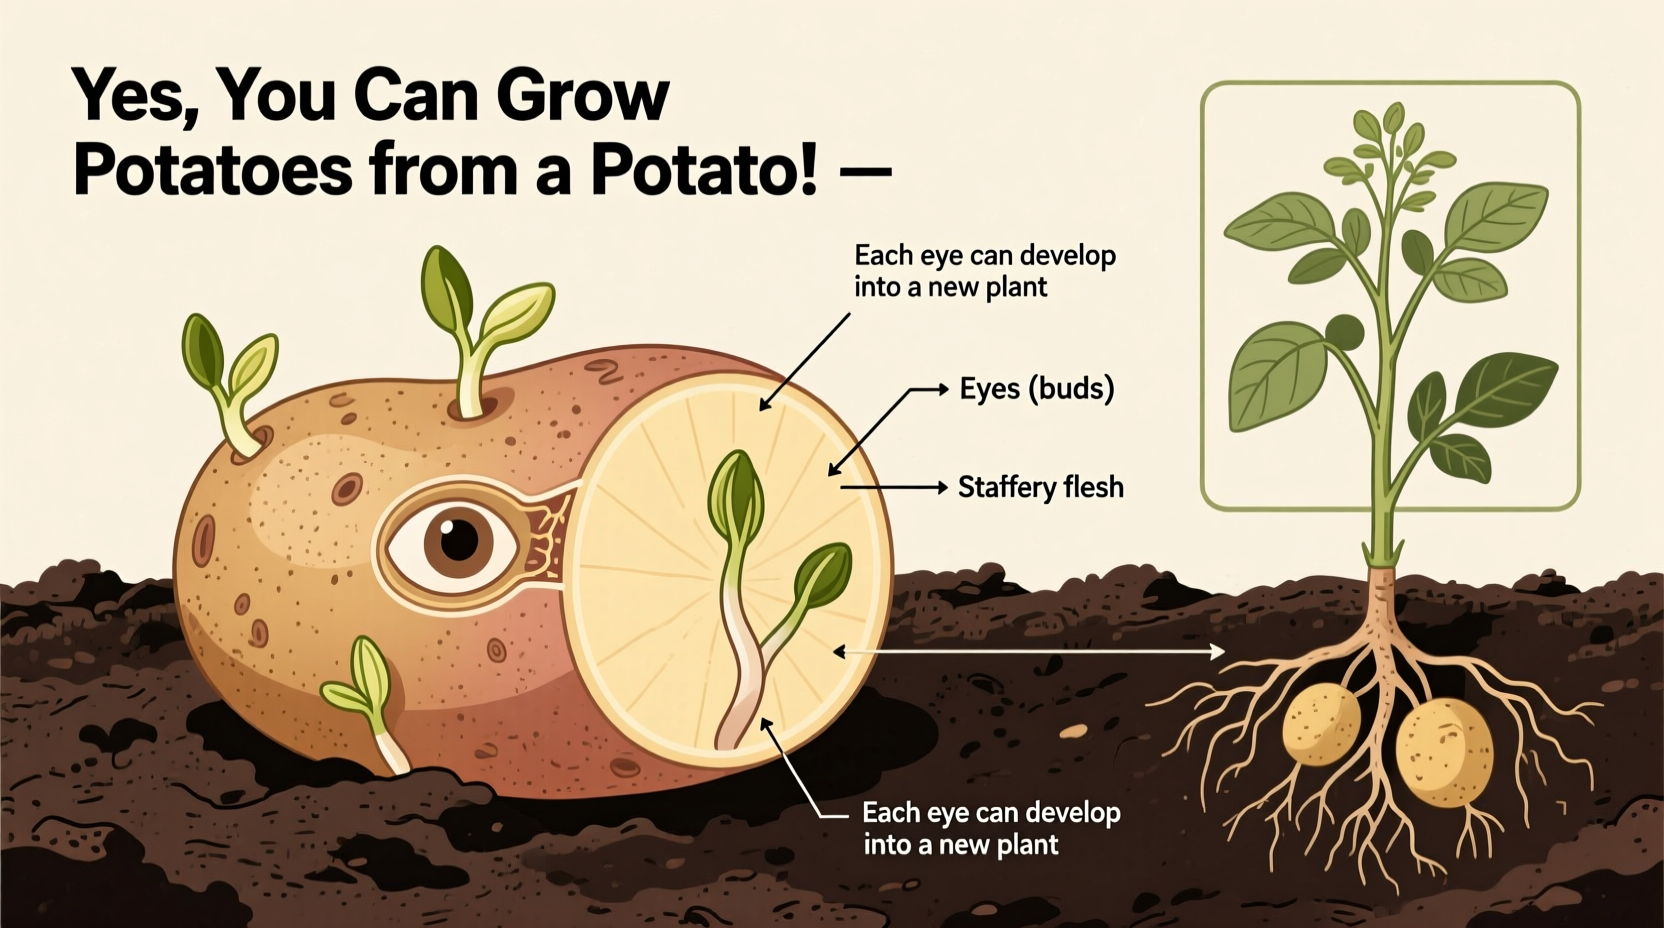
Contrary to what the name suggests, "seed potatoes" aren't actual seeds but rather whole or cut pieces of mature potatoes containing "eyes"—the small indentations where new sprouts emerge. These eyes contain meristematic tissue capable of developing into complete potato plants through vegetative propagation. This cloning process preserves all genetic characteristics of the parent potato.
According to research from the Oregon State University Extension Service, this method works because potatoes are modified underground stems (tubers) designed by nature to store energy and regenerate when conditions are right. The tuber provides immediate nutrients while roots develop, giving home gardeners a reliable way to grow potatoes without purchasing specialized seeds.
What You'll Need: Simple Supplies for Success
Starting your potato garden requires minimal equipment:
- Organic potatoes (store-bought often contain sprout inhibitors)
- Well-draining soil or potting mix
- Garden bed or container (at least 12" deep)
- Watering can or hose with gentle spray
- Optional: Compost or balanced fertilizer
| Supply | Critical Requirement | Why It Matters |
|---|---|---|
| Seed Potatoes | At least 1-2 eyes per piece | Each eye develops into a separate plant |
| Soil | pH 5.0-6.5, loose texture | Prevents tuber deformities and rot |
| Container | Minimum 12" depth | Allows proper tuber development |
Your Step-by-Step Potato Growing Journey
Phase 1: Preparing Your Seed Potatoes (1-3 Weeks Before Planting)
Chitting (pre-sprouting) significantly increases your harvest. Place potatoes in a single layer in an egg carton or tray with eyes facing up. Keep in a cool (45-60°F), bright location for 2-4 weeks until 1/2"-1" sprouts develop. This process, documented by University of Minnesota Extension, gives plants a head start and improves yield by up to 30%.
Phase 2: Planting Your Potatoes (Early Spring)
Plant when soil temperature reaches 45°F (typically 2-4 weeks before last frost). For each potato:
- Dig 3-4" deep trenches spaced 12" apart
- Place seed potatoes eyes-up, 12" apart
- Cover with 3" of soil
- Water thoroughly but avoid saturation
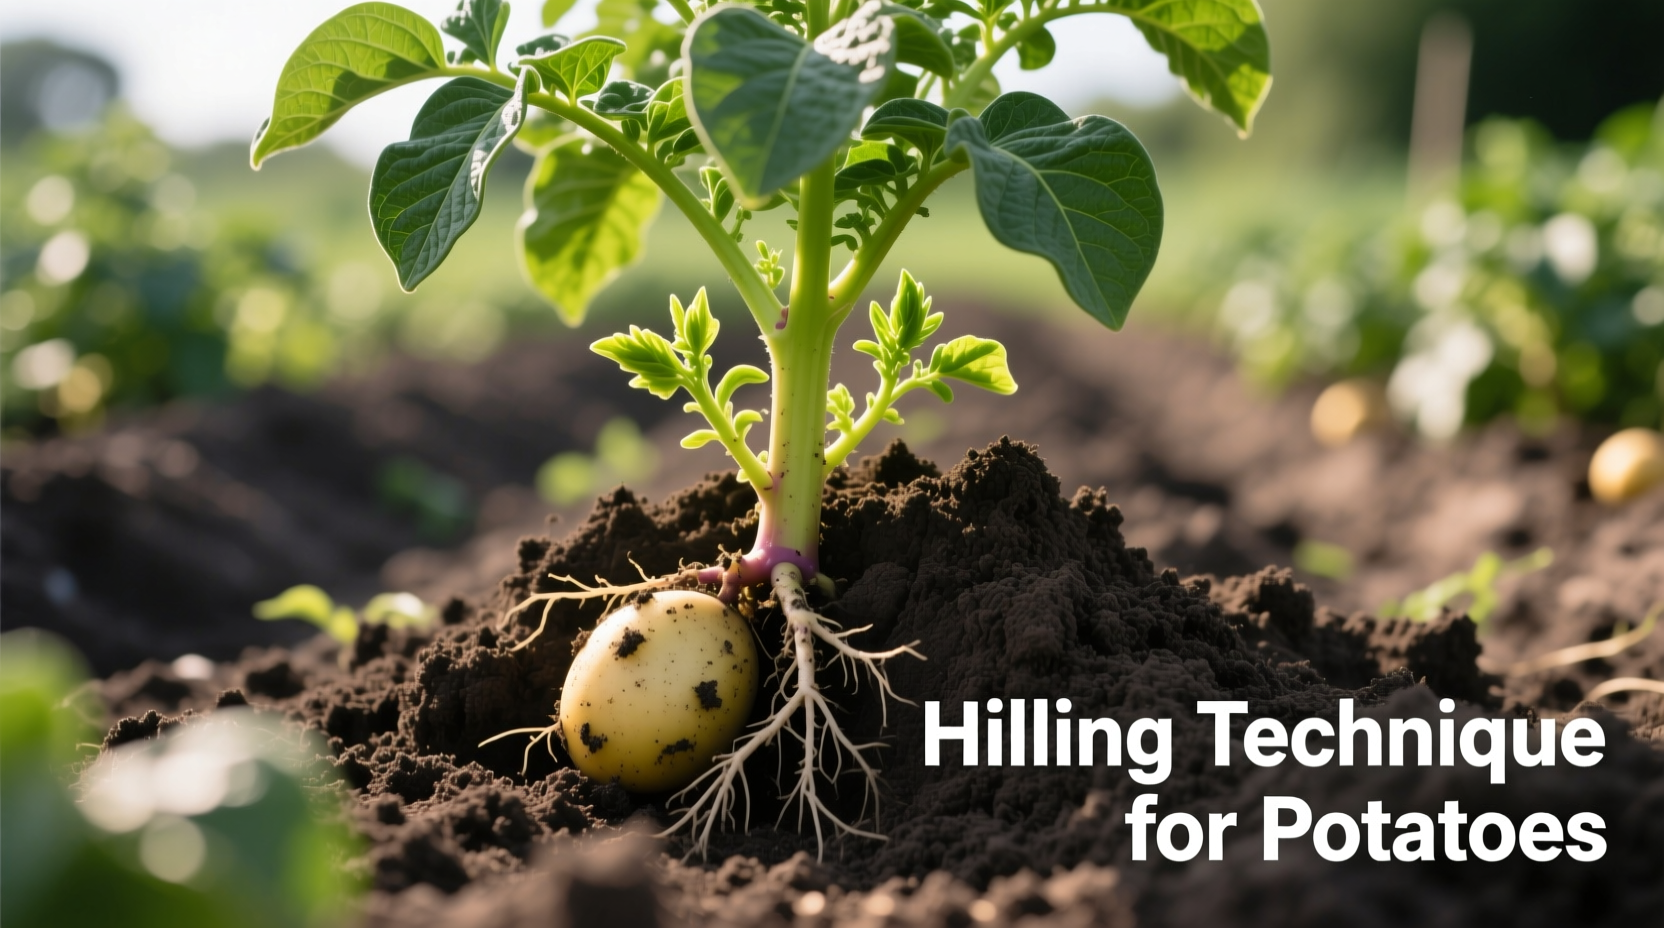
Phase 3: Hilling and Maintenance (3-8 Weeks After Planting)
When plants reach 6-8" tall, "hill" by mounding soil around stems, leaving only top leaves exposed. Repeat every 2-3 weeks as plants grow. This critical step:
- Prevents tubers from turning green (which produces toxic solanine)
- Creates more space for tuber development
- Improves drainage around developing potatoes
Phase 4: Harvesting Your Homegrown Potatoes
Harvest timing depends on your goal:
- New potatoes: 7-8 weeks after planting, when plants flower (small, tender potatoes)
- Main crop: 2-3 weeks after foliage dies back (fully mature, better for storage)
Gently dig with a fork, starting 6" from plant base. Cure harvested potatoes in a dark, humid location for 2 weeks before long-term storage to thicken skins and improve shelf life.
Avoiding Common Potato Growing Mistakes
Based on The Old Farmer's Almanac gardening data from 10,000+ home growers, these errors cause most failed potato crops:
- Using grocery store potatoes - Most contain sprout inhibitors; organic or certified seed potatoes work best
- Planting too early - Cold, wet soil causes rot; wait until soil reaches 45°F
- Insufficient hilling - Leads to green tubers and reduced yields
- Overwatering - Potatoes need 1-2" water weekly; excess moisture causes rot
Realistic Timeline: What to Expect Week by Week
Understanding this progression helps manage expectations:
- Weeks 1-3: Sprouts emerge (chitted potatoes show growth 7-10 days faster)
- Weeks 4-6: Plants establish, first hilling needed
- Weeks 7-8: Flowering begins, new potatoes ready
- Weeks 10-12: Foliage peaks, second hilling
- Weeks 14-16: Foliage yellows, main crop ready for harvest
Maximizing Your Potato Harvest: Pro Tips
For larger yields and healthier plants:
- Rotate crops annually to prevent disease buildup
- Add 2" compost to planting trenches for nutrients
- Use straw mulch to maintain consistent soil moisture
- Test soil pH; potatoes prefer slightly acidic conditions (5.0-6.5)
- Choose disease-resistant varieties like 'Yukon Gold' or 'Kennebec' for beginners
Frequently Asked Questions
Can I use any potato from the grocery store to grow potatoes?
While possible, most grocery store potatoes contain sprout inhibitors that reduce success rates. Organic potatoes work better, but certified disease-free seed potatoes from gardening suppliers provide the most reliable results with higher yields and fewer disease problems.
How long does it take to grow potatoes from a potato?
From planting to harvest, potatoes typically take 70-120 days depending on variety. Early varieties produce 'new potatoes' in 7-8 weeks after planting, while main crop varieties for storage take 14-16 weeks. The growing season ends when the foliage naturally dies back.
Why are my homegrown potatoes small?
Small potatoes usually result from overcrowding, insufficient hilling, inconsistent watering, or poor soil nutrition. Space seed potatoes at least 12" apart, hill regularly to create more growing space, maintain even soil moisture, and amend soil with compost before planting for larger tubers.
Can you grow potatoes in containers or pots?
Yes, containers work well for potato growing. Use a pot at least 15 gallons (12" deep) with drainage holes. Fill with potting mix, plant 2-3 seed potatoes, and as plants grow, add more soil or straw to cover stems while leaving top leaves exposed. Container-grown potatoes often yield slightly less but are easier to harvest.


 浙公网安备
33010002000092号
浙公网安备
33010002000092号 浙B2-20120091-4