
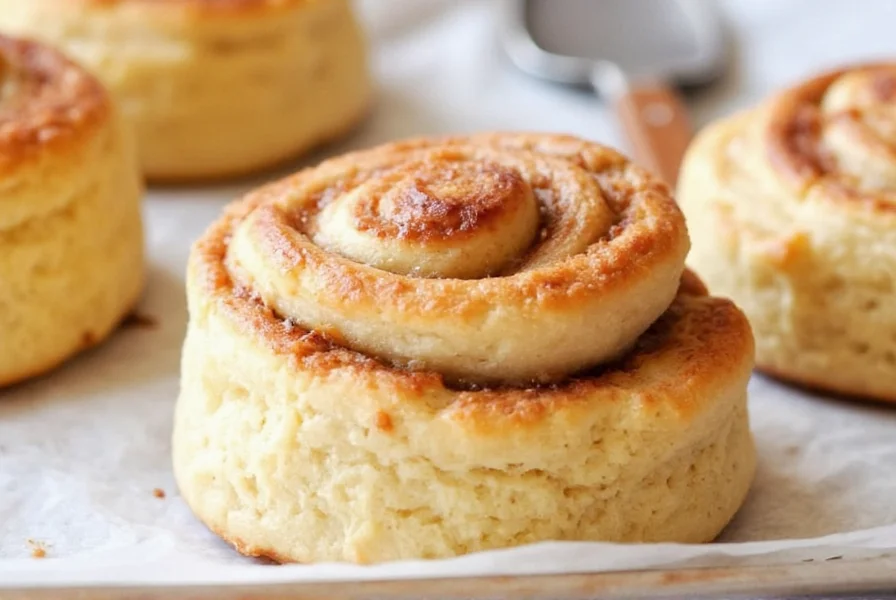
The Ultimate Guide to Perfect Biscuit Cinnamon Rolls
If you're craving cinnamon rolls but don't have hours to wait for dough to rise, biscuit cinnamon rolls offer the perfect solution. This simplified version uses pre-made biscuits as the base, cutting preparation time dramatically while still delivering that signature sweet, cinnamon flavor everyone loves. Unlike traditional recipes requiring yeast activation and multiple rising periods, biscuit cinnamon rolls can be ready in under 30 minutes—ideal for busy mornings or unexpected guests.
Why Choose Biscuit Cinnamon Rolls?
Biscuit-based cinnamon rolls have gained popularity for several practical reasons. They're accessible to beginner bakers who might struggle with yeast doughs, require minimal equipment, and use pantry staples. The canned biscuit method eliminates the most challenging aspect of traditional cinnamon rolls: achieving the perfect dough consistency and rise. This approach maintains the essential cinnamon roll experience while removing common pain points like dough overproofing or underproofing.
Essential Ingredients for Biscuit Cinnamon Rolls
The beauty of this recipe lies in its simplicity. You'll need just a handful of ingredients, most of which you likely already have in your kitchen:
| Ingredient | Quantity | Notes |
|---|---|---|
| Canned biscuits | 8-count can | Refrigerated crescent or buttermilk biscuits work best |
| Unsalted butter | ½ cup (1 stick) | Melted, for brushing and filling |
| Granulated sugar | ½ cup | For cinnamon-sugar mixture |
| Brown sugar | ¼ cup | Adds depth to the filling |
| Ground cinnamon | 2 tablespoons | Freshly ground provides best flavor |
| Vanilla extract | 1 teaspoon | Optional but recommended |
| Powdered sugar | 1 cup | For glaze |
| Milk | 2-3 tablespoons | For glaze consistency |
Step-by-Step Preparation Guide
Preparing the Biscuits
Start by preheating your oven to 375°F (190°C) and greasing a 9x13 inch baking pan. Remove the biscuits from their packaging and flatten each one into a 4-inch circle using a rolling pin. For best results with canned biscuits, work quickly before they begin to rise at room temperature.
Creating the Cinnamon Filling
In a small bowl, combine the granulated sugar, brown sugar, cinnamon, and a pinch of salt. Mix thoroughly to distribute the cinnamon evenly. In a separate container, melt the butter and stir in the vanilla extract. Brush a thin layer of melted butter over each flattened biscuit, then generously sprinkle with the cinnamon-sugar mixture, leaving a small border around the edges.
Rolling and Baking
Carefully roll each biscuit into a tight spiral, starting from one edge. Place the rolls seam-side down in your prepared baking pan, spacing them about ½ inch apart to allow for expansion during baking. Bake for 18-22 minutes, or until golden brown. The rolls are done when an instant-read thermometer inserted into the center registers 190°F (88°C).
Pro Tips for Perfect Results
Several factors can elevate your biscuit cinnamon rolls from good to exceptional. For the flakiest texture, work with cold biscuits straight from the refrigerator. If you prefer a gooier center, slightly underbake the rolls by 2-3 minutes. For added richness, incorporate 2 tablespoons of cream cheese into your melted butter mixture. When making biscuit cinnamon rolls with canned biscuits, avoid overhandling the dough as this can make the final product tough rather than tender.
Common Variations to Try
Once you've mastered the basic recipe, experiment with these popular variations:
- Cream cheese stuffed: Place ½ teaspoon of softened cream cheese in the center of each flattened biscuit before adding the cinnamon filling
- Nutty crunch: Mix ¼ cup finely chopped pecans or walnuts into your cinnamon-sugar mixture
- Apple cinnamon: Add 2 tablespoons of finely diced dried apples to the filling
- Maple glaze: Substitute maple syrup for half the milk in your powdered sugar glaze
- Whole wheat option: Use whole wheat biscuits or substitute ¼ cup of the flour in homemade biscuits with whole wheat flour
Troubleshooting Common Issues
Even simple recipes can encounter problems. If your biscuit cinnamon rolls are dry, you likely overbaked them or used too much flour when rolling. For soggy centers, ensure your oven is properly preheated and avoid overcrowding the baking pan. If the rolls stick to the pan, always grease thoroughly and allow them to cool for 5-7 minutes before removing. When making biscuit cinnamon rolls from scratch biscuits, remember that homemade biscuits require slightly different handling than canned varieties—roll them more gently to maintain flakiness.
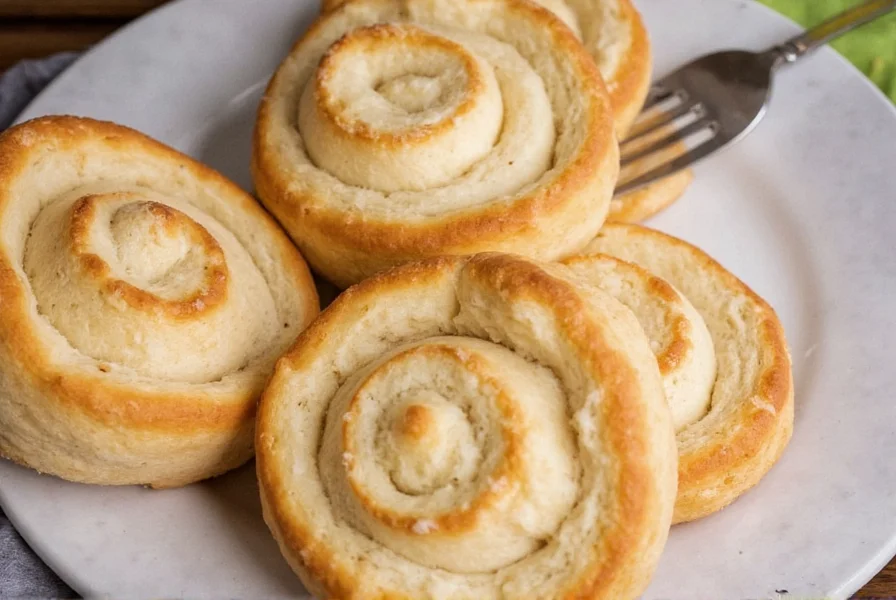
Serving and Storage Recommendations
Serve biscuit cinnamon rolls warm for the best texture and flavor experience. The ideal serving temperature is between 140-160°F (60-71°C), when the glaze is still slightly runny but not hot enough to burn. Leftovers can be stored in an airtight container at room temperature for up to 2 days or refrigerated for up to 5 days. To refresh, microwave individual rolls for 15-20 seconds or warm in a 300°F (150°C) oven for 8-10 minutes. For make-ahead convenience, prepare the rolled biscuits, place them in the baking pan, cover tightly, and refrigerate overnight before baking.
Can I use homemade biscuits instead of canned for cinnamon rolls?
Yes, you can absolutely use homemade biscuits. The key difference is that homemade biscuit dough requires more careful handling to maintain flakiness. Roll your homemade biscuits slightly thicker than you would for regular biscuits (about ½ inch), and work quickly to prevent the butter in the dough from melting. The baking time may need adjustment—homemade biscuit cinnamon rolls often require 2-4 minutes less baking time than those made with canned biscuits.
How do I prevent my biscuit cinnamon rolls from becoming dry?
To prevent dryness in biscuit cinnamon rolls, avoid overbaking them—remove from the oven when they're just golden brown. Using buttermilk biscuits instead of regular biscuits adds moisture. Incorporating brown sugar into your cinnamon filling also helps retain moisture. Don't skip the glaze, as it adds necessary moisture to the finished product. If making ahead, store with a slice of bread in the container to maintain moisture.
What's the best way to reheat biscuit cinnamon rolls?
The best method for reheating biscuit cinnamon rolls is in a low oven (300°F/150°C) for 8-10 minutes, which preserves texture better than microwaving. If using a microwave, heat for just 15-20 seconds on medium power. For frozen rolls, thaw overnight in the refrigerator before reheating. Always add fresh glaze after reheating for the best flavor and texture.
Can I make biscuit cinnamon rolls ahead of time?
Yes, you can prepare biscuit cinnamon rolls ahead of time. Assemble the rolls in the baking pan, cover tightly with plastic wrap, and refrigerate for up to 24 hours before baking. When ready to bake, remove from the refrigerator while the oven preheats—this allows them to come closer to room temperature for more even baking. Do not freeze assembled rolls before baking, as the biscuit texture will suffer.
Why do my biscuit cinnamon rolls fall apart when rolling?
Biscuit cinnamon rolls may fall apart when rolling if the biscuits are too cold or if you've floured the surface too heavily. Allow refrigerated biscuits to sit at room temperature for 5-7 minutes before flattening. Use minimal flour when rolling—just enough to prevent sticking. If using homemade biscuits, ensure your dough isn't too dry; it should be slightly tacky but not sticky. Brushing with melted butter before adding filling helps the layers adhere.


 浙公网安备
33010002000092号
浙公网安备
33010002000092号 浙B2-20120091-4