
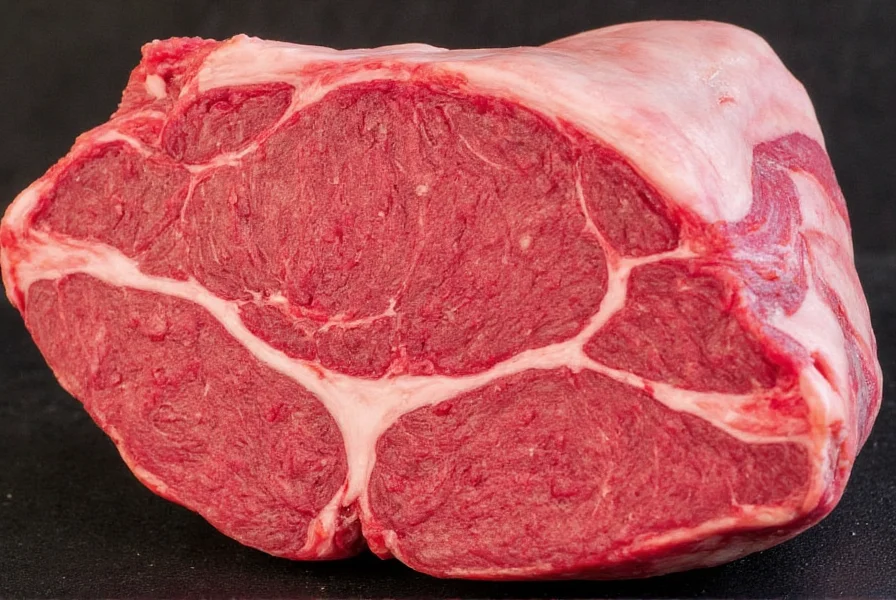
When crafting authentic, hearty chili, selecting the right beef cut makes all the difference. Among professional chefs and chili enthusiasts, beef chuck consistently emerges as the superior choice for slow-cooked chili recipes. Understanding why this particular cut excels requires examining its unique composition and how it responds to the specific demands of chili preparation.
Why Beef Chuck Outperforms Other Cuts for Chili
Beef chuck comes from the shoulder area of the cow, a well-exercised muscle group that develops distinctive characteristics perfect for chili:
- Optimal fat distribution - The 20-30% marbling melts slowly during cooking, basting the meat from within
- Abundant connective tissue - Collagen breaks down into gelatin during slow cooking, creating that signature chili mouthfeel
- Flavor concentration - More active muscles develop deeper beefy flavor compounds
- Texture retention - Maintains structure better than leaner cuts that become stringy
Unlike leaner cuts like sirloin or round that dry out during the 2-3 hour simmering process essential for proper chili development, chuck roast remains succulent. The fat content also helps carry and distribute spices throughout the dish, creating more complex flavor integration.
Selecting Premium Beef Chuck for Chili
Not all chuck roast performs equally in chili. Follow these selection guidelines for best results:
| Quality Indicator | What to Look For | Avoid |
|---|---|---|
| Marbling | Fine, evenly distributed fat streaks | Large solid fat deposits |
| Color | Bright cherry red | Dull, brownish hue |
| Texture | Firm with slight springback | Mushy or slimy surface |
| Grade | USDA Choice or higher | Select or lower grades |
For authentic Texas-style chili, select chuck with visible intramuscular fat running throughout the meat. The chuck eye or blade portions typically offer the best balance of meat-to-fat ratio for chili applications. Plan for approximately 1 pound of chuck per 4 servings to account for shrinkage during cooking.
Proper Preparation Techniques for Beef Chuck Chili
How you prepare the chuck before cooking significantly impacts your final chili:
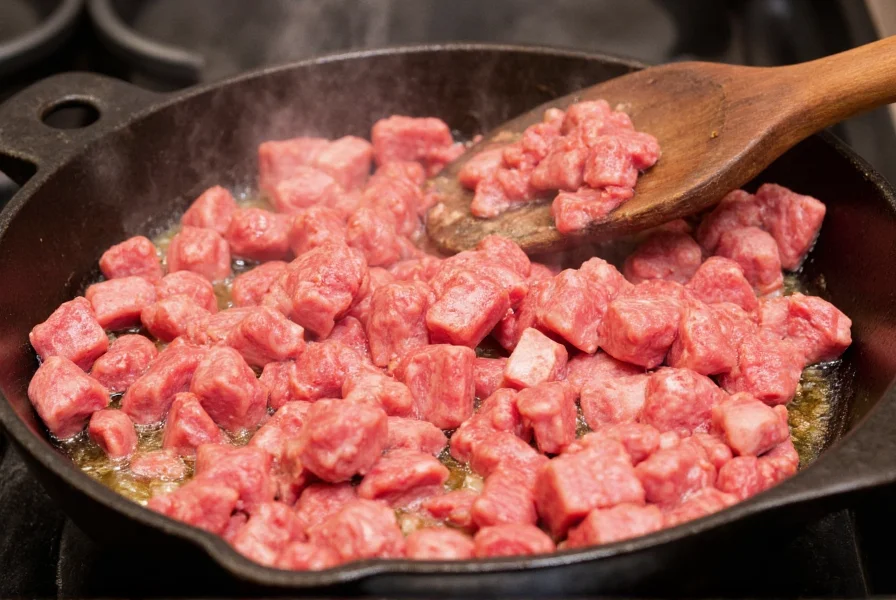
- Cubing correctly - Cut into 3/4-inch cubes (larger than stew meat) to prevent overcooking
- Temperature control - Bring meat to room temperature before browning
- Patience with browning - Sear in batches without crowding for proper Maillard reaction
- Partial cooking - Brown meat only 70% before adding to chili pot to finish cooking in liquid
Resist the temptation to trim all fat from chuck roast. The intramuscular fat provides essential moisture and flavor carriers. Instead, remove only large external fat deposits that won't render properly. For deeper flavor development, consider dry-brining chuck cubes with salt 1-2 hours before cooking to enhance moisture retention.
Classic Beef Chuck Chili Recipe Framework
This foundational recipe showcases chuck's advantages. Adjust spice levels to preference:
Ingredients
- 2 lbs beef chuck, cut into 3/4-inch cubes
- 3 tbsp chili powder (ancho preferred)
- 1 tbsp cumin
- 2 cloves garlic, minced
- 1 large onion, diced
- 1 (28 oz) can crushed tomatoes
- 1 cup beef stock
- 2 tbsp tomato paste
- Salt and black pepper to taste
Method
- Season chuck cubes with salt, pepper, and half the chili powder
- Heat oil in heavy pot over medium-high heat
- Brown meat in batches, removing when 70% cooked
- Sauté onions until translucent, add garlic and tomato paste
- Return meat to pot with remaining ingredients
- Simmer covered for 2-2.5 hours until meat is fork-tender
- Adjust seasoning and simmer uncovered 15 minutes to thicken
The extended cooking time allows collagen in the chuck to fully convert to gelatin, creating that luxurious mouthfeel characteristic of excellent chili. For best results, make chili one day ahead—flavors deepen significantly overnight as the chuck continues to absorb seasonings.
Troubleshooting Common Beef Chuck Chili Issues
Even with the best cut, problems can arise. Here's how to fix them:
- Meat too tough - Continue simmering 30-60 minutes; chuck requires sufficient time for connective tissue breakdown
- Excess fat - Chill finished chili and skim solidified fat from surface
- Flavor too mild - Add 1 tsp vinegar or citrus juice to brighten flavors
- Texture too dry - Stir in 1/4 cup reserved cooking liquid or beef stock
Remember that chuck's fat content means your chili will naturally separate as it sits. Stir well before serving to redistribute the flavorful fat throughout the dish. For thicker chili without compromising tenderness, try mashing some beans into the finished product rather than reducing further, which could overcook the chuck.
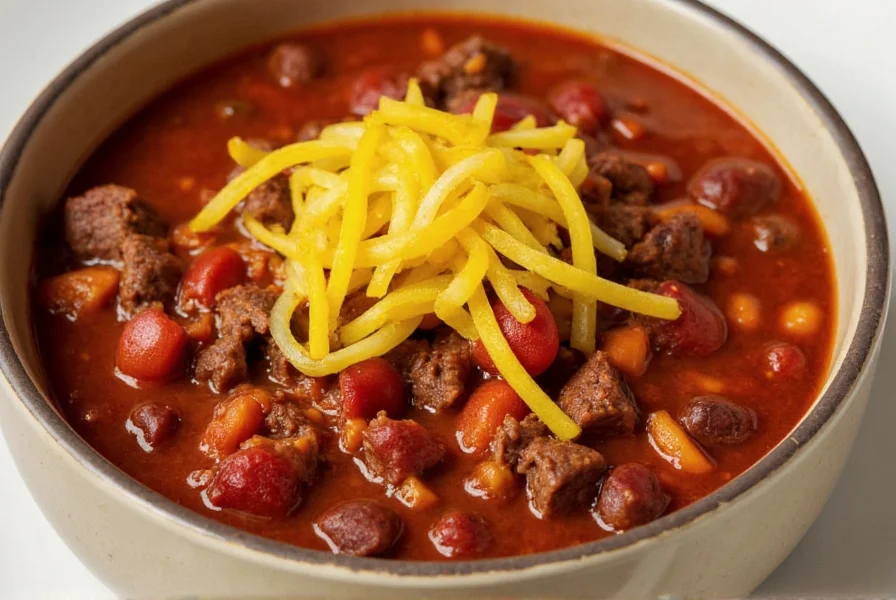
Serving Suggestions and Variations
Traditional toppings enhance chuck chili's rich profile:
- Shredded cheddar or queso fresco
- Freshly chopped onions
- Lime wedges for acidity
- Sliced jalapeños for heat
- Cilantro for freshness
For dietary adaptations, chuck's robust flavor stands up well to modifications. Try adding kidney beans for vegetarian protein contrast, or experiment with smoked paprika for depth without additional meat. Regional variations like Cincinnati-style (with chocolate and cinnamon) or New Mexico-style (with green chilies) work beautifully with chuck's flavor profile.
Can I use ground beef instead of chuck roast for chili?
While ground beef works in chili, it lacks the textural complexity of cubed chuck roast. Ground beef cooks quickly and can become dry during extended simmering, whereas chuck's connective tissue breaks down slowly, creating tender, flavorful chunks. For best results, use at least 70% of your meat as cubed chuck with 30% ground beef for added richness.
How long should I cook beef chuck for optimal chili texture?
Beef chuck requires 2-3 hours of gentle simmering to reach optimal tenderness for chili. The connective tissue needs this extended time to convert to gelatin. Check tenderness at 2 hours - the meat should pull apart easily with a fork but still maintain distinct chunks. Rushing the process results in tough, stringy meat that hasn't properly broken down.
What's the difference between chuck roast and chuck eye for chili?
Chuck roast refers to the entire shoulder cut, while chuck eye comes from the more tender portion near the ribeye. For chili, standard chuck roast provides better value and sufficient tenderness when cooked properly. Chuck eye contains slightly less connective tissue but costs more - the difference becomes negligible after slow cooking, making regular chuck roast the more economical choice for chili preparation.
Why does my beef chuck chili turn out greasy?
Excess grease typically occurs when chuck isn't properly browned before simmering. The initial sear renders some fat that should be discarded before adding liquids. Additionally, chuck naturally releases fat during cooking - chilling finished chili allows fat to solidify on the surface for easy removal. Using chuck with excessive external fat (rather than marbled meat) also contributes to greasiness.
Can I make beef chuck chili in a pressure cooker?
Yes, but with adjustments. Pressure cooking reduces chuck's required cooking time to 45-60 minutes, but you'll miss some flavor development from slow simmering. For best results, brown chuck thoroughly first, then cook at high pressure for 50 minutes followed by natural release. The texture will be tender but lack the deep flavor integration of traditionally simmered chili. Many chili enthusiasts prefer the traditional method for authentic results.


 浙公网安备
33010002000092号
浙公网安备
33010002000092号 浙B2-20120091-4