
The perfect cinnamon rolls require a soft, slightly sweet yeast dough rolled with a balanced cinnamon-sugar-butter filling, proofed until puffy, then baked at 350°F (175°C) for 20-25 minutes until golden. Key success factors include proper yeast activation, adequate proofing time, and a filling with the right butter-to-sugar ratio to prevent leakage.
There's nothing quite like the aroma of freshly baked cinnamon rolls filling your kitchen. These beloved pastries combine soft, pillowy dough with a warmly spiced filling and sweet icing. While many consider them intimidating, mastering homemade cinnamon roll baking is achievable with the right technique and understanding of the process. This guide provides professional insights for consistently perfect results, whether you're a beginner or refining your skills.
Understanding Cinnamon Roll Components
Crafting exceptional cinnamon rolls involves three critical elements: the dough, the filling, and the icing. Each component requires specific attention to detail for optimal results. Unlike store-bought versions, homemade cinnamon roll dough develops superior texture and flavor through proper fermentation and handling.
Essential Ingredients and Their Roles
Quality ingredients form the foundation of the best cinnamon roll recipe for beginners. Understanding why each ingredient matters helps with successful substitutions when needed.
| Ingredient | Function | Substitution Options |
|---|---|---|
| Active dry yeast | Leavening agent for rise | Instant yeast (use 25% less) |
| Bread flour | Higher protein for structure | All-purpose flour (slightly less chewy) |
| Unsalted butter | Flakiness and flavor carrier | Vegetable shortening (less flavorful) |
| Dark brown sugar | Moisture and deep caramel notes | Light brown sugar (less complex flavor) |
Step-by-Step Baking Process
Dough Preparation
Begin by activating your yeast in warm milk (105-110°F) with a pinch of sugar. The liquid temperature is critical—too hot kills yeast, too cold won't activate it. After 5-10 minutes, the mixture should appear foamy. Combine this with flour, sugar, salt, and melted butter, then knead until smooth and elastic (about 8-10 minutes by hand). Proper cinnamon roll dough kneading technique develops gluten structure without overworking.
Filling Application
The secret to cinnamon roll filling that doesn't leak during baking lies in the ratio and application. Mix 1 cup dark brown sugar with 2-3 tablespoons cinnamon and a pinch of salt. After rolling out your dough to a 16x12 inch rectangle, spread softened (not melted) butter evenly, leaving a ½ inch border. Sprinkle the sugar mixture evenly—too much filling creates excess liquid that leaks during baking.
Rolling and Cutting
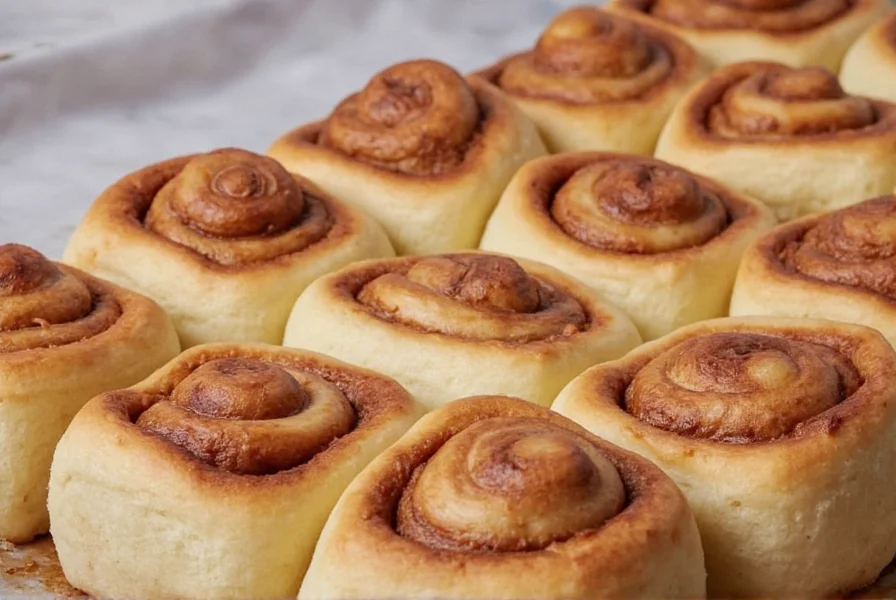
Tight but gentle rolling prevents air pockets. Use a sharp serrated knife or unflavored dental floss to cut rolls—this prevents squishing. For uniform perfectly shaped cinnamon rolls, aim for 1½ inch widths. Place cut rolls in a buttered baking dish with space between them for proper expansion.
Proofing Essentials
Proofing is where many bakers rush the process. Rolls need 1-1½ hours at room temperature until nearly doubled. The ideal cinnamon roll proofing conditions involve a draft-free area around 75-80°F. Under-proofed rolls won't expand properly; over-proofed rolls collapse during baking. Test by gently pressing—a good proof leaves a slight indentation that slowly rebounds.
Baking Temperature and Timing
Bake at 350°F (175°C) for 20-25 minutes. The cinnamon roll baking temperature and time is crucial—too hot causes uneven cooking and burnt edges; too low creates dense texture. Rolls are done when golden brown and internal temperature reaches 190°F. Remove immediately from the pan to prevent soggy bottoms.
Troubleshooting Common Issues
Even experienced bakers encounter challenges. Understanding these solutions improves your cinnamon roll baking success rate.
- Dense rolls: Usually from insufficient proofing, dead yeast, or over-flouring during kneading. Measure flour by spooning into cups, not scooping.
- Leaking filling: Caused by too much filling, melted butter, or insufficient dough tension. Reduce filling quantity and ensure butter is softened, not liquid.
- Burnt bottoms: Place baking dish on a preheated baking sheet or use light-colored pans. Dark pans require reducing oven temperature by 25°F.
- Dry texture: Overbaking or insufficient fat content. Check oven temperature with a separate thermometer.
Advanced Techniques for Perfect Results
For those seeking professional-quality cinnamon rolls at home, consider these pro tips:
An overnight cinnamon roll preparation method develops deeper flavor. After shaping rolls in the pan, cover and refrigerate for 8-12 hours. The cold fermentation enhances taste and makes morning baking effortless—just remove from fridge 30 minutes before baking. This technique also creates more consistent rise as the yeast activates gradually.
For soft and fluffy cinnamon rolls with extended freshness, replace some liquid with potato water (water used to boil potatoes) which contains starch that retains moisture. Alternatively, add 1-2 tablespoons of milk powder to the dry ingredients.
Variations to Explore
Once you've mastered the classic cinnamon roll baking technique, experiment with these popular variations:
- Cheesecake swirl: Add a layer of cream cheese mixture between filling and dough
- Apple cinnamon: Thinly sliced apples sprinkled over the filling
- Gluten-free option: Use a quality gluten-free flour blend with xanthan gum
- Vegan adaptation: Substitute plant-based butter and non-dairy milk
Storage and Reheating Instructions
Store cooled rolls in an airtight container at room temperature for up to 2 days. For longer storage, freeze before icing. To refresh stale cinnamon rolls, place in a 300°F oven for 5-7 minutes or microwave individual rolls for 10-15 seconds. Never store iced rolls in the refrigerator as it accelerates staling.
Frequently Asked Questions
Can I make cinnamon rolls without a stand mixer?
Yes, you can make excellent cinnamon rolls entirely by hand. Knead the dough on a lightly floured surface for 8-10 minutes until smooth and elastic. The key is developing sufficient gluten through proper hand-kneading technique—fold, push, and turn the dough repeatedly until it passes the windowpane test.
Why did my cinnamon rolls collapse after baking?
Collapse typically occurs from over-proofing, where the yeast exhausts its food supply before baking. The rolls rise too much during proofing, then lack energy to maintain structure in the oven. Another cause is opening the oven door too early during baking, causing temperature fluctuations. Proper proofing (rolls should be nearly doubled but still spring back slightly when touched) prevents this issue.
How can I prevent my cinnamon roll filling from leaking?
To prevent filling leakage, use softened (not melted) butter when assembling, maintain the correct sugar-to-butter ratio (1 cup sugar to ½ cup butter), and leave a ½ inch border without filling around the dough edges. Rolling the dough tightly but gently creates proper tension. Additionally, chilling cut rolls for 15 minutes before baking helps the filling set initially.
What's the ideal room temperature for proofing cinnamon rolls?
The ideal proofing temperature for cinnamon rolls is between 75-80°F (24-27°C). At this temperature, yeast activity is optimal without accelerating too quickly. If your kitchen is cooler, create a proofing environment by placing rolls in the oven with just the light on, or near a warm appliance. Avoid temperatures above 85°F which can cause uneven rising and off-flavors.
Can I prepare cinnamon rolls ahead of time for morning baking?
Yes, the overnight refrigerator method works exceptionally well. Assemble rolls in the baking dish, cover tightly, and refrigerate for 8-12 hours. The cold temperature slows yeast activity while allowing flavor development. Remove from refrigerator 30 minutes before baking to take the chill off, then bake as directed. This method often produces superior texture and flavor compared to same-day baking.


 浙公网安备
33010002000092号
浙公网安备
33010002000092号 浙B2-20120091-4