
From Mild to Wild: Crafting the Perfect Sweet Thai Chili Sauce at Home
Table of Contents
- Why You’ll Love This Sweet Thai Chili Sauce Recipe
- Sweet Thai Chili Sauce Ingredients Breakdown
- Step-by-Step Guide to Making the Sauce
- Pro Tips for Customizing Your Sweet Thai Chili Sauce
- Creative Ways to Use Sweet Thai Chili Sauce in Everyday Cooking
- Storage Secrets: How to Keep It Fresh Longer
- Chili Sauce Showdown: Homemade vs. Store-Bought
- A Taste of Tradition: The Story Behind Sweet Thai Chili Sauce
- Conclusion
Why You’ll Love This Sweet Thai Chili Sauce Recipe
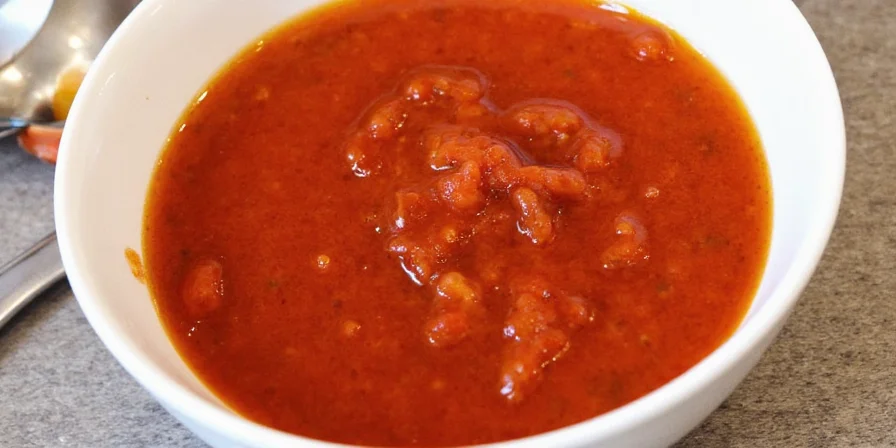
Sweet Thai chili sauce is the unsung hero of Asian pantries—a perfect balance between sugary sweetness and fiery heat. Whether you're dipping spring rolls or drizzling it on grilled chicken, this versatile condiment adds a punch of flavor that’s hard to resist.
In this article, we’ll walk you through an easy yet flavorful sweet Thai chili sauce recipe that you can make at home with basic ingredients. We’ll also share some insider tips, historical context, and even compare homemade vs. store-bought versions so you can impress your friends at your next dinner party!
Sweet Thai Chili Sauce Ingredients Breakdown
Making your own sweet Thai chili sauce gives you full control over the flavor, spice level, and quality of ingredients. Here's what you'll need:
- Red chili peppers (fresh or dried)
- Rice vinegar
- Garlic cloves
- Ginger (optional for extra kick)
- Fish sauce or soy sauce (for umami depth)
- Palm sugar or brown sugar
- Water or broth
- Lime juice (optional for brightness)
We’ve broken down the ingredients below based on their role in the final flavor profile:
| Ingredient | Role in Flavor | Substitution Option |
|---|---|---|
| Red chilies | Heat + natural sweetness | Cayenne pepper (spicier), bell peppers (milder) |
| Rice vinegar | Tanginess | White vinegar, apple cider vinegar |
| Garlic | Umami boost | Garlic powder (less aromatic) |
| Palm sugar | Balances heat | Brown sugar, honey |
| Fish sauce | Salty depth | Soy sauce, tamari (vegetarian option) |
Step-by-Step Guide to Making the Sauce
Ready to whip up your own batch? Follow these easy steps:
- Wash and chop red chilies. Remove seeds if you want less heat.
- In a saucepan, combine chopped chilies, garlic, rice vinegar, fish sauce, palm sugar, and water.
- Bring the mixture to a boil, then reduce to a simmer for about 15–20 minutes until the chilies soften.
- Let the mixture cool slightly, then blend using a blender or immersion blender until smooth.
- Strain through a fine-mesh sieve if desired (for smoother texture).
- Bottle the sauce and refrigerate.
And just like that—you have restaurant-quality sweet Thai chili sauce without the preservatives or mystery ingredients!

Pro Tips for Customizing Your Sweet Thai Chili Sauce
Want to make your version stand out from the rest? Try these tweaks:
- Add a splash of lime juice for tangy freshness
- Throw in a thumb-sized piece of fresh ginger for extra warmth
- Mix in a spoonful of peanut butter for a creamy twist
- Infuse with lemongrass or kaffir lime leaves for a Thai aroma
- Use tamarind paste instead of vinegar for a fruity tang
Remember, personalization is key—this sauce is your culinary canvas!
Creative Ways to Use Sweet Thai Chili Sauce in Everyday Cooking
Don’t limit yourself to just dipping! Here are some delicious ways to use your homemade sweet Thai chili sauce:
- Marinade for grilled shrimp or tofu
- Stir into fried rice or pad thai
- Glaze for roasted vegetables or chicken wings
- Spice up mayonnaise for sandwiches or burgers
- Mixed with yogurt or sour cream as a dipping sauce
- Dress up avocado toast or ramen bowls
The possibilities are endless once you have a killer base sauce in your fridge.
Storage Secrets: How to Keep It Fresh Longer
Proper storage ensures your homemade sweet Thai chili sauce stays fresh and flavorful for weeks—even months! Here’s how to do it right:
- Store in sterilized glass jars with tight-fitting lids
- Refrigerate for up to 3 months
- Freeze in ice cube trays for longer storage (up to 6 months)
- For extended shelf life, add a teaspoon of vinegar or lemon juice before sealing
If you notice mold or a foul smell, toss it immediately. Better safe than sorry when it comes to fermented sauces!
Chili Sauce Showdown: Homemade vs. Store-Bought
So what’s the real difference between whipping up your own sweet Thai chili sauce and grabbing a bottle off the shelf? Let’s take a look:
| Feature | Homemade | Store-Bought |
|---|---|---|
| Flavor Control | ✅ Fully customizable | ❌ Pre-set flavor profile |
| Ingredients | ✅ Natural, minimal additives | ❌ Often contains preservatives & thickeners |
| Cost | ✅ Cost-effective in bulk | ❌ More expensive per ounce |
| Shelf Life | ⚠️ Up to 3 months refrigerated | ✅ Lasts 6–12 months unopened |
| Time Investment | ⏰ 30–45 minutes | ⚡ Instant access |
A Taste of Tradition: The Story Behind Sweet Thai Chili Sauce
Sweet Thai chili sauce—often labeled as “Nam Jim Gai” or “Pad Thai sauce”—has deep roots in Thai street food culture. Originally used as a dipping sauce for grilled meats and seafood, its popularity soared in the 1980s and 1990s when Thai cuisine gained global recognition.
Unlike traditional hot sauces from other regions, Thai sweet chili sauce balances heat with natural sugars found in ripe chilies and palm sugar. Its unique profile reflects Thailand’s rich agricultural heritage and love for harmonious flavors.
Today, it’s one of the most exported condiments from Thailand and a staple in households around the world—from Bangkok to Berlin to Brooklyn.
Conclusion
With just a few ingredients and a bit of time, you can transform your kitchen into a mini Thai street stall. Our sweet Thai chili sauce recipe is not only easy to follow but also endlessly adaptable. Whether you’re cooking for yourself, your family, or guests, this sauce brings the heat—and the heart—to every bite.
So go ahead, spice things up with your own homemade version. Your taste buds—and your pantry—will thank you!


 浙公网安备
33010002000092号
浙公网安备
33010002000092号 浙B2-20120091-4